
The following FAQs (Frequently Asked Questions) provide answers to questions that staff and students may frequently encounter. You can browse the FAQ below, search the FAQ archive by keywords or submit your questions to us if you cannot find similar questions to your problems.
Computer Virus & Security
How do I report spam?
If you think a message is spam but goes into your mailbox without being filtered by the email security gateway service, you may report the spam to help improve the service. What you need to do is send the spam as an attachment in a new email message to response@greenradar.com.
If you are using MS Outlook, we suggest you compose a new message and attach the spam in the message (choose Insert -> Item from the menu and select the spam concerned).
How to apply open password on PDF file?
Procedures
For Acrobat Professional (Screen capture base on Acrobat Pro XI)
- Open the PDF file.
- Choose File -> Document properties from the menu bar.
- Click on the security tab. Choose Password Security from Security Method.
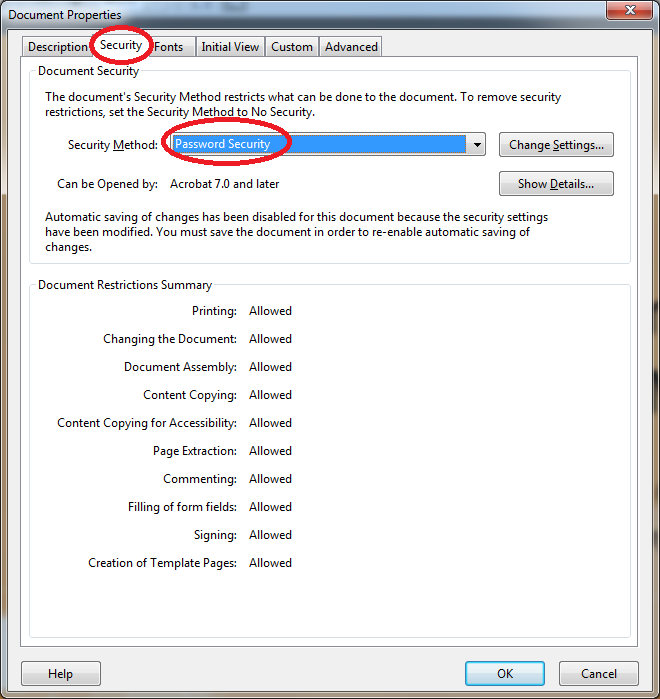
- Then tick the option Require a password to open the document and enter the password in the Document Open Password box. (We highly recommend you to set a STRONG password. You can refer to the indicator on the right.)
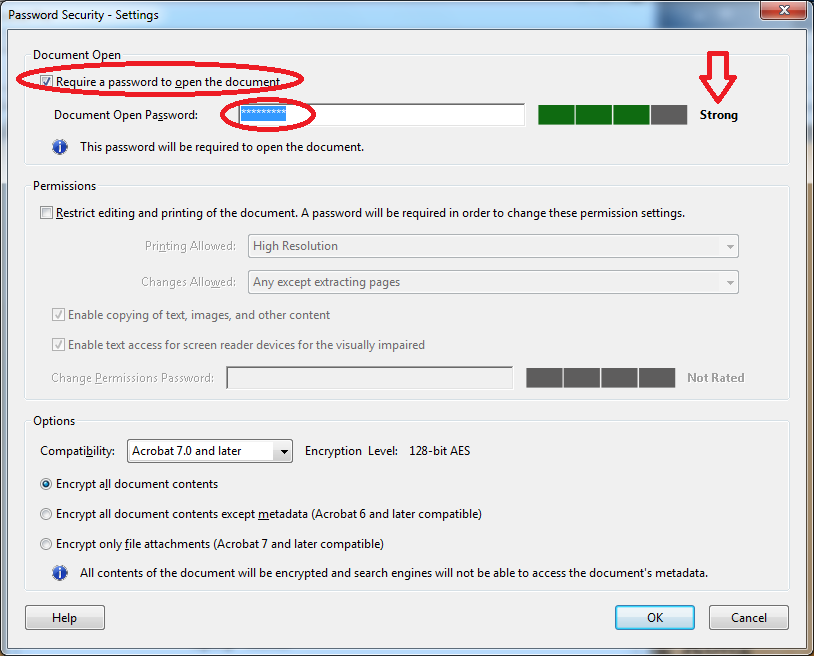
- Re-enter the password when prompt.
- You are recommended to use the STRONG password. You can refer to the indicator on the right.
- Finally, save the file.
For Foxit
- Open the PDF file.
- Click the "Protect" tab. Then choose "Password Protect" from "Secure Document".

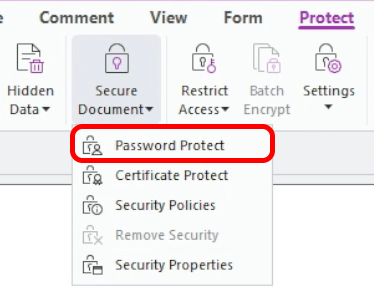
- Then check the option "Require a password to open the document" and enter the password in the "Password input" box.
Re-enter the password in "Password Confirm" box
Click "OK" (We highly recommend you to set a STRONG password. e.g. Password with more than 8 characters, consisting of both alphabets and numbers.)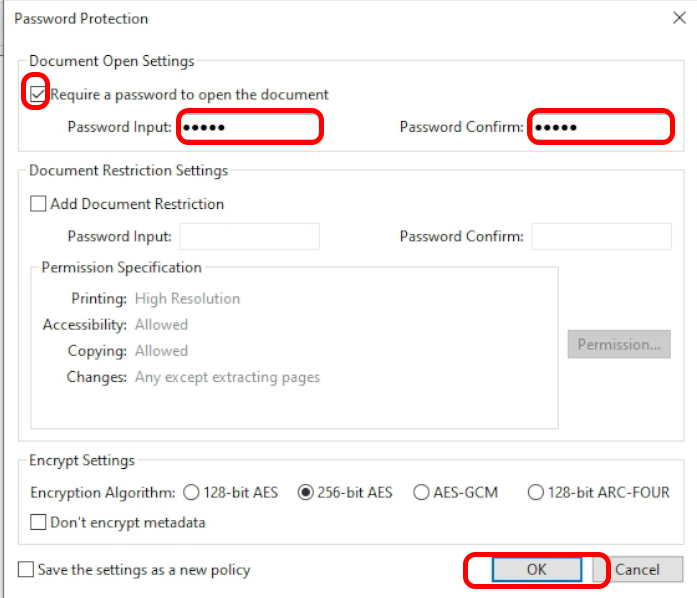
- Finally, save the file.
How to apply open password on Word, Excel file?
Procedures
For Word or Excel 2019 or higher
- Open your file first.
- From the ribbon menu, click "File" and then click "Save As"
- Then click "Tools" -> "General Options"
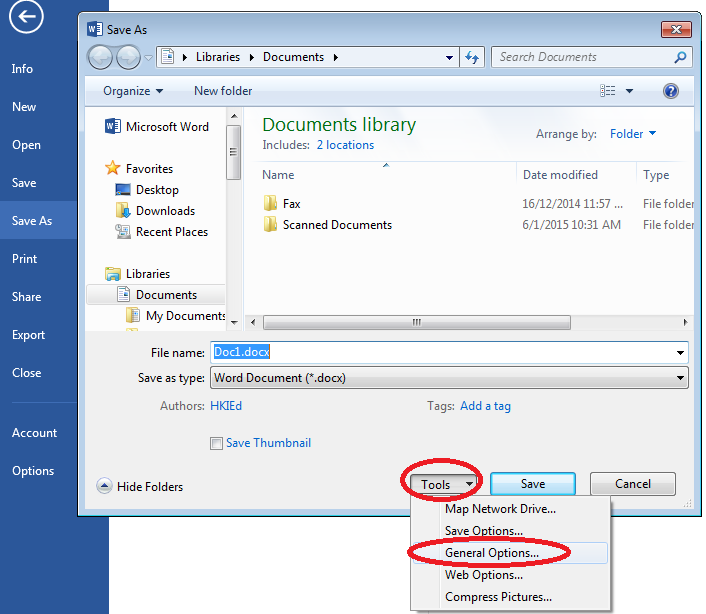
- Enter your password on the "Password to open" box, and click "OK"

- Finally, "Save" your file.
How to get the latest Windows update?
Windows devices may get new functionality at different times as Microsoft delivers non-security updates, fixes, improvements, and enhancements via several servicing technologies—including controlled feature rollout (CFR). Windows will let you know if you need to restart your device to complete an update, and you can choose a time that works best for you to complete that update.
For details, please refer to the link below:
support.microsoft.com/en-us/windows/get-the-latest-windows-update-7d20e88c-0568-483a-37bc-c3885390d212 (external site, opens in new tab)
How to identify phishing emails?
Recently, there is a growing number of phishing emails sent to our users. In order to help user to identify phishing emails, you can refer to the following video for more information:
If you cannot view the video, please click here (video, opens in new tab) to open the video.
To protect yourself, please take good care of your passwords, PCs and mobile devices. If there is any doubt, change your password immediately and report the case to OCIO IT Help Desk at 2948 6601.
How to make a secure connection to the FTP server (SFTP) using WinSCP?
In order to make a secure connection to the FTP server, you can use any applications that support SFTP. SFTP (commonly referred to as Secure File Transfer Protocol (external site, opens in new tab)) can perform secure file transfers. For secure transfers, it uses Secure Shell (SSH) and supports the SCP protocol in addition to SFTP.
For Microsoft Windows: (Network computers at EdUHK)
WinSCP (external site, opens in new tab) is an open-source SFTP client. Its main function is to secure file transfer between a local and a remote computer. All the network computers at EdUHK can access WinSCP through "Network Teaching Software".
- You can invoke WinSCP via the "Network Teaching Software".
- Choose one of the servers from the preset list (e.g. N, S Drive) and click "Login".
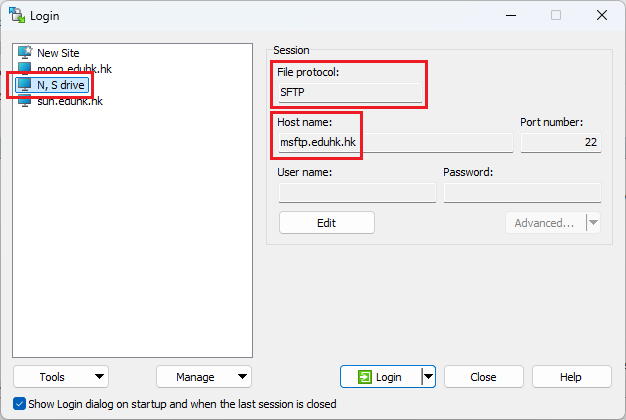
- Enter your username and password when prompted.
- Now you can transfer files between your PC and the server by dragging and dropping.
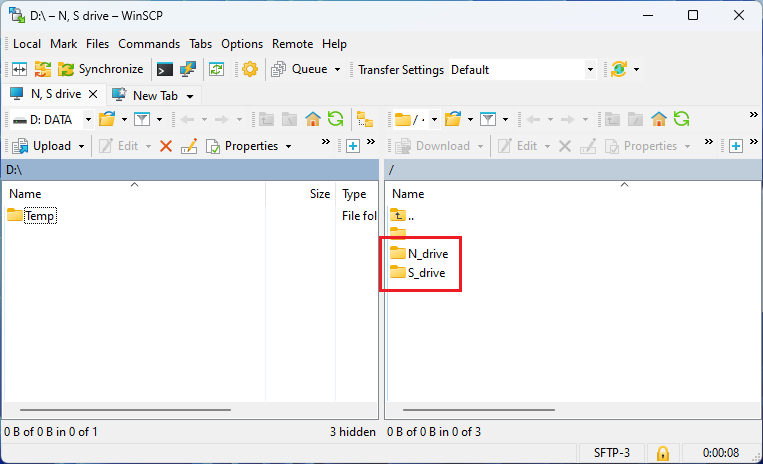
- To disconnect, click "Tabs" and "Disconnect Session" from the toolbar.
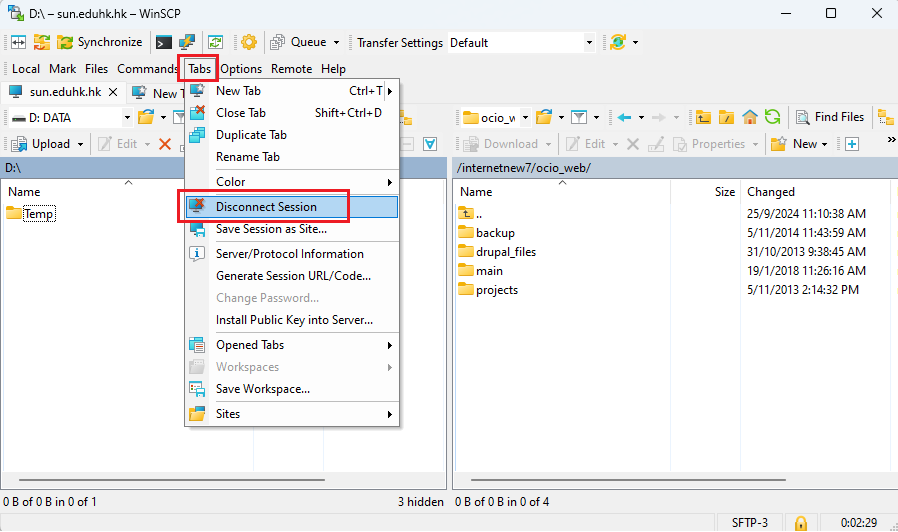
Note:
- If you want to create a new server list in the main windows, click the "New" button on the left-hand side.
- Give a "Session Name" to it. Then enter the hostname, "File Protocol" and click the "Save" button.
For Microsoft Windows: (Non-EdUHK computers)
If users want to install WinSCP on their own PC/notebooks and access our FTP server through secure FTP, they have to install WinSCP to the computer and configure it to access the ftp sites using SFTP protocol. To download WinSCP, please kindly visit http://winscp.net (external site, opens in new tab). To configure WinSCP to access the following SFTP sites, you need to configure WinSCP with the right hostname (e.g. msftp.eduhk.hk, sun.eduhk.hk or moon.eduhk.hk) and also the right protocol (i.e. SFTP). The following is a screen capture for the configuration.
If you are accessing outside the campus network. You need to connect to the SSL VPN beforehand.
| Host | Server Name | File Protocol |
|---|---|---|
| N, S Drive | msftp.eduhk.hk | SFTP |
| SUN | sun.eduhk.hk | SFTP |
| MOON | moon.eduhk.hk | SFTP |
For Apple Mac
There are various open-source FTP/SFTP client software for Mac OS X like Cyberduck (external site, opens in new tab).
How to make secure connection to a Unix base computer?
In order to make a secure connection to a Unix base computer, you can use any application that support SSH. SSH (Secure Shell (external site, opens in new tab)) is a common network protocol for remote administration of Unix computers.
For Microsoft windows
PuTTY (external site, opens in new tab) is a terminal emulator application which can act as a client for the SSH, Telnet, rlogin, and raw TCP computing protocols.
How to use:
- You can invoke PuTTY via the Network Teaching Software.
- Enter the host name or IP address (e.g. sun.ied.edu.hk) then click Open
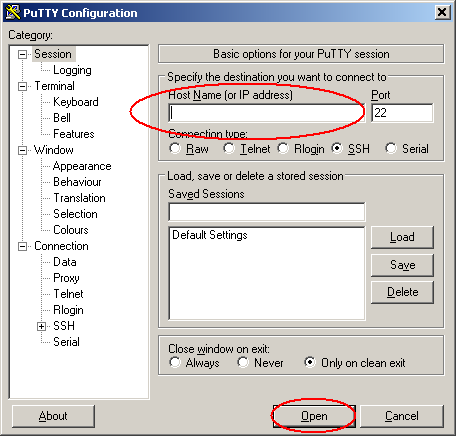
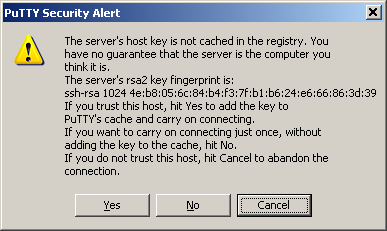
- If this is the first time you connect to the server, the following security alert will pop-up. Click Yes to continue.
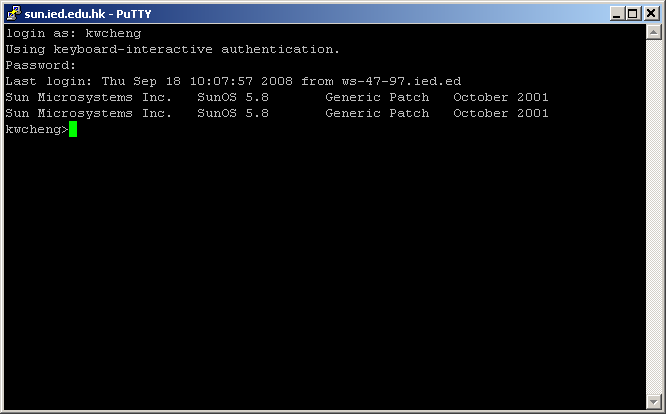
- Then a terminal windows will pop-up. Enter your username and password when prompt.
For Apple Mac
Mac OS X includes the full suite of OpenSSH client and server functionality, including SSH for command execution, SFTP for file transfer, and SCP for file copies.Command:
iSSH (external site, opens in new tab)
A front-end application to the command line application ssh. It provides a quick and easy way to start an SSH connection to a remote computer.
How to modify network drive access permission?
To modify the access permission on network drive (S Drive, N Drive), you can refer to the steps below:
How to check the current access permission list (Screen capture for Windows 10)
- Right click the folder you want to modify the access permission and choose “Properties”.
- From the Security tab, then you can check the current user list in the "Group or user names:"
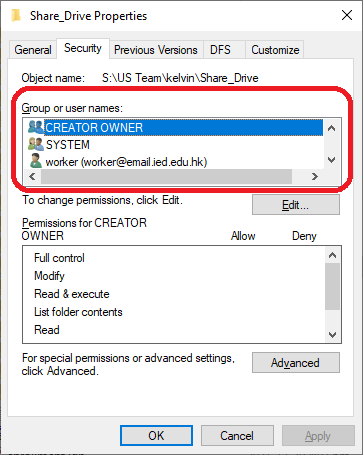
How to modify the access permission
- To ADD user
- Right click the folder you want to modify the access permission and choose “Properties”.
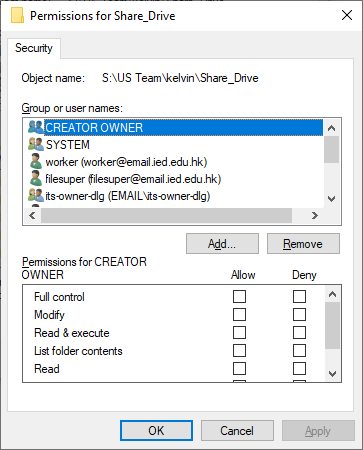
- From the Security tab, click "Edit" button.
- Then click the "Add" button.
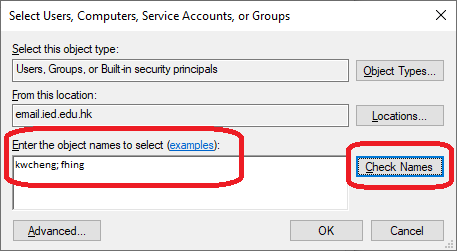
- Enter the user name in the "Enter the object names to select" then click "Check Names". (You can add multiple users and separate it with semicolon ";".)
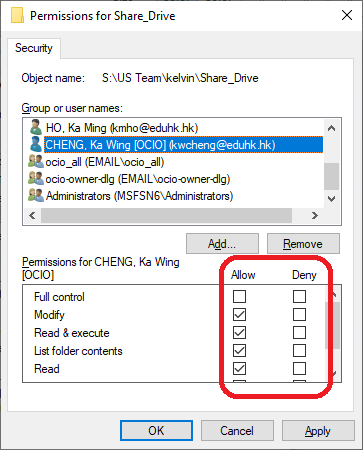
- Select the user name you want to set the access permission. Tick the access rights you need then click "OK".
- Click "OK" to apply the changes.
- To Modify user permissions
- Right click the folder you want to modify the access permission and choose “Properties”.
- From the Security tab, click "Edit" button.
- Select the user name you want to set the access permissions. Tick the access rights you need then click "OK".
- Click "OK" to apply the changes.
- To Remove user
- Right click the folder you want to modify the access permission and choose “Properties”.
- From the Security tab, click "Edit" button.
- Select the user and click the "Remove" button.
Note: Permissions will be inherited from the current folder to all sub-folders by default.
How to password protect my documents with 7-ZIP?
7-Zip's encryption facility protects sensitive documents from unauthorized viewing. The contents of the files that you want to protect are encrypted based on a password that you specify.
To setup a password for ZIP file, please follow the steps below (screen capture based on 7-Zip):
Procedures:
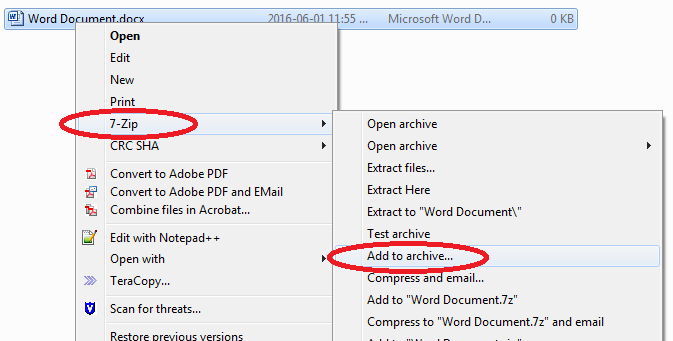
- Select the file(s) you need to compress. Then right click the selection and choose "7-Zip" -> "Add to archive..." from the menu.
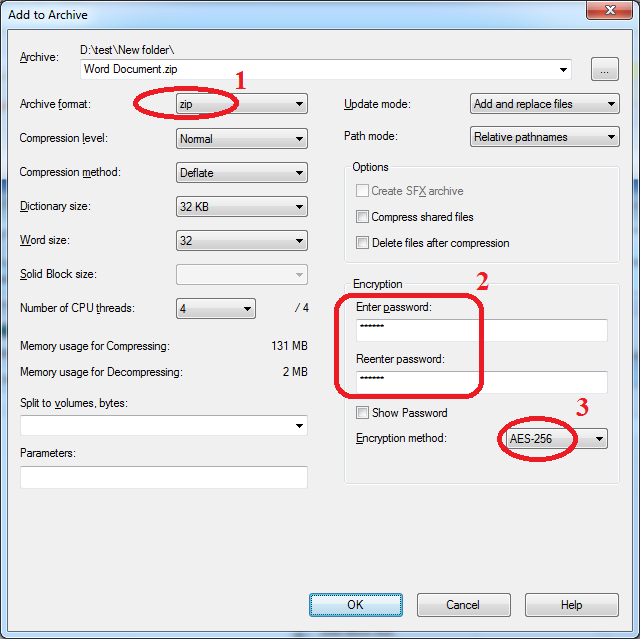
- Make sure to choose "zip" for the archive format. Then enter your password (We highly recommend to set password with more than 8 characters which consists of alphabets and numbers), and choose the "Encryption method" you prefer. Then click "OK".
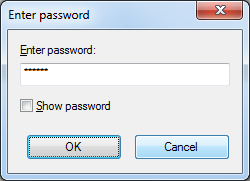
- Now the file is encrypted with password. To open the file, you will need to provide the password.
Note:
- 7-Zip uses password-based encryption, and even a strong encryption algorithm like AES is of little or no benefit if the passwords you use are weak, or you do not keep track of them in a secure manner.
- In particular, encrypted files can be deleted from a Zip file, or renamed within a Zip file while new, unencrypted files can be added to a Zip file without a password.
- For details on AES encryption method, please refer to en.wikipedia.org/wiki/Advanced_Encryption_Standard (external site, opens in new tab) from Wikipedia.
How to renew the license key for ESET Endpoint AntiVirus?
ESET NOD32 Antivirus will only receive updates once activated using your License Key. If you did not enter your License Key after installation, your product will not be activated. You can change your license in the main program window.
For Windows (Screen capture base on NOD32 Antivirus 12.1.34)
- Firstly, get the license key for ESET NOD32 Antivirus (EdUHK system, opens in new tab). You are recommended to copy & paste them to a file (e.g. a text file) so that you could use it later for license renew.
- Open the ESET Cyber Security from the upper menu bar
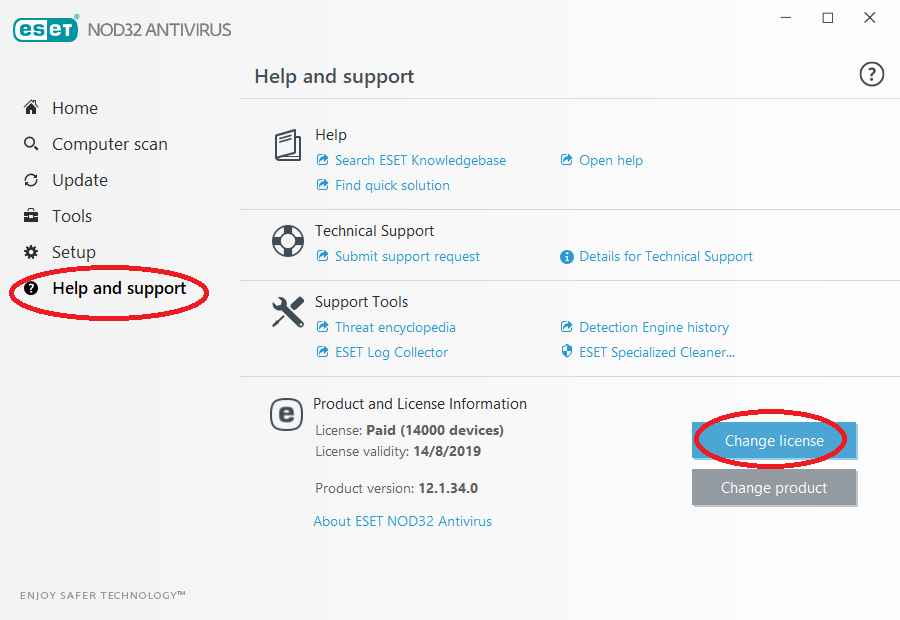
- Go to Help & Support on the left panel and click "Change license" on the right panel.
 <
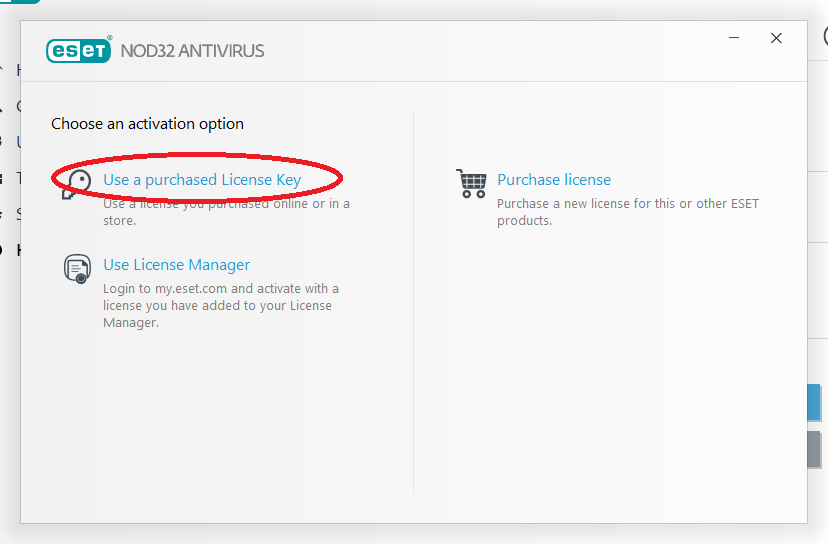
- Click Use a purchased license key.
 <
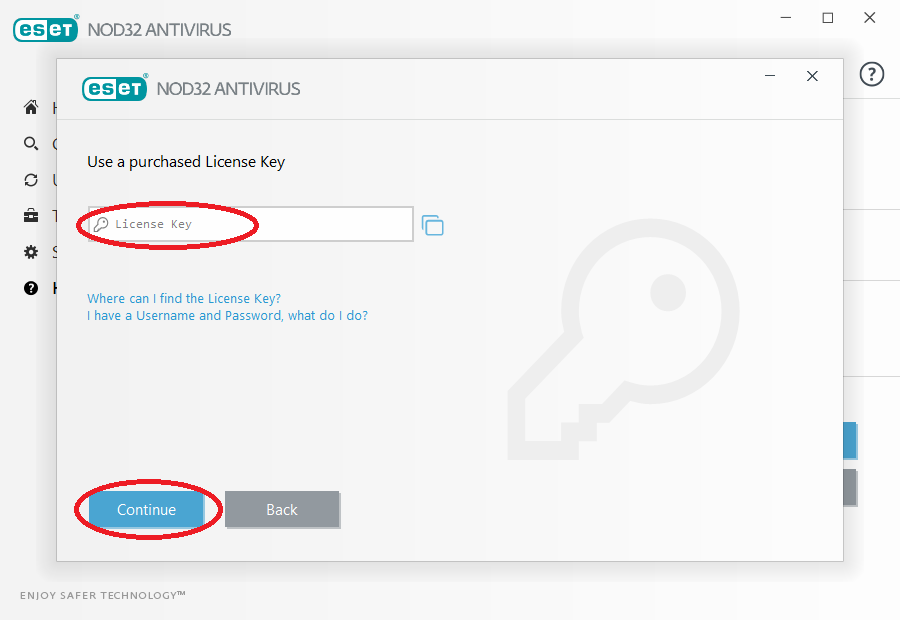
- When it prompts for License Key, copy them from the file (see step 1) and paste to the spaces provided (Your License Key is a unique string in the format XXXX-XXXX-XXXX-XXXX-XXXX). Then click continue.
 <
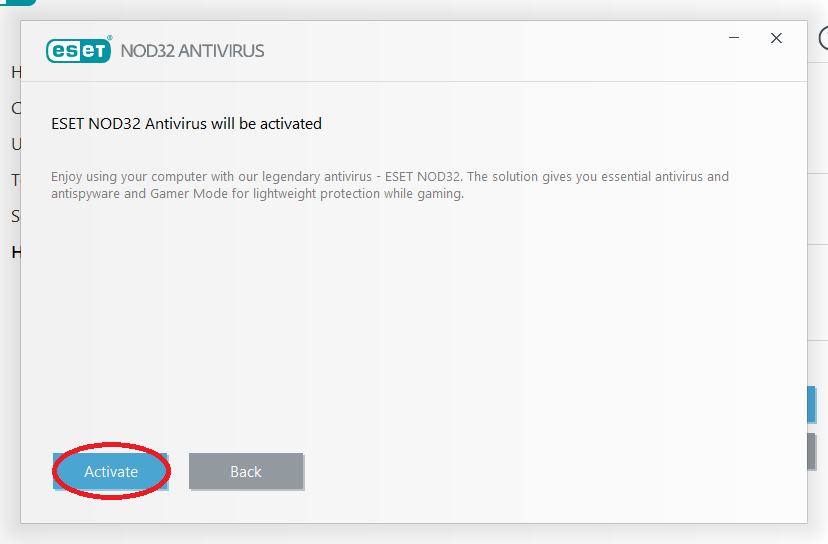
- Click Activate when prompt.
 <
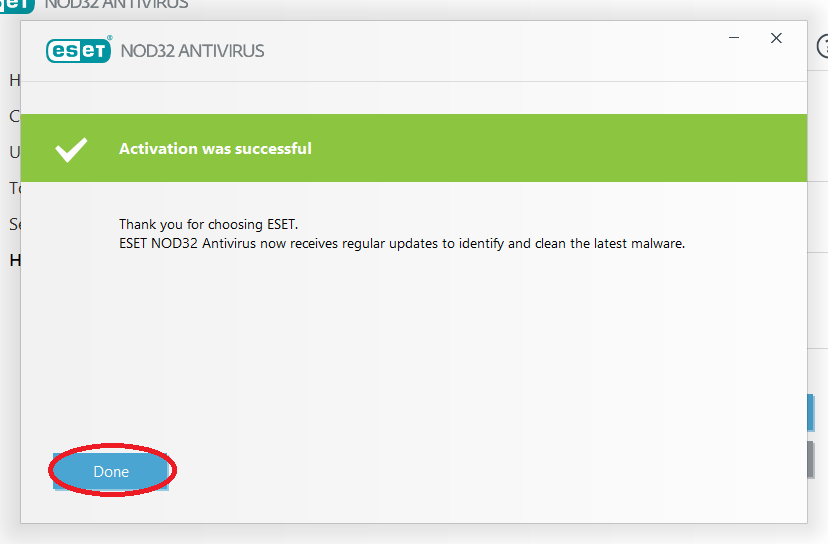
- Click Done when you see the "Activation was successful" screen.
 <
For Mac (Screen capture base on Cyber Security for Mac 16.7.876.0)
- Firstly, get the license key for ESET NOD32 AntiVirus (external site, opens in new tab). You are recommended to copy & paste them to a file (e.g. a text file) so that you could use it later for license renew.
- Click the ESET NOD32 AntiVirus icon from bottom right on the system tray and choose "Open ESET Cyber Security.

- Click the menu bar icon on the upper right and choose Product Activation....

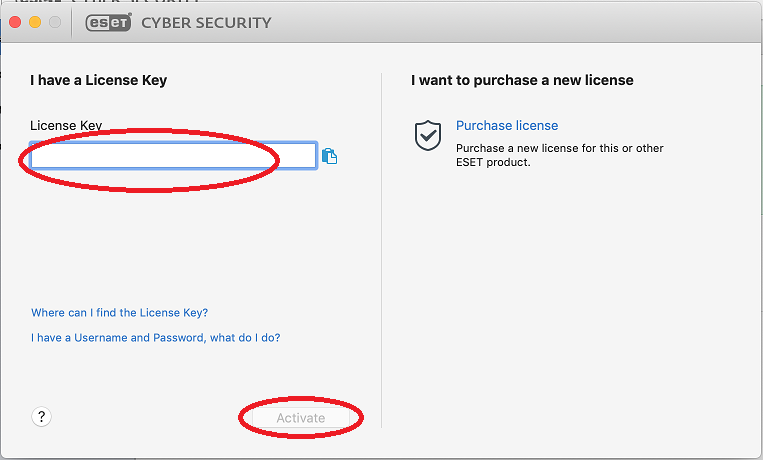
- When it prompts for License Key, copy them from the file (see step 1) and paste to the spaces provided (Your License Key is a unique string in the format XXXX-XXXX-XXXX-XXXX-XXXX). Then click Activate.
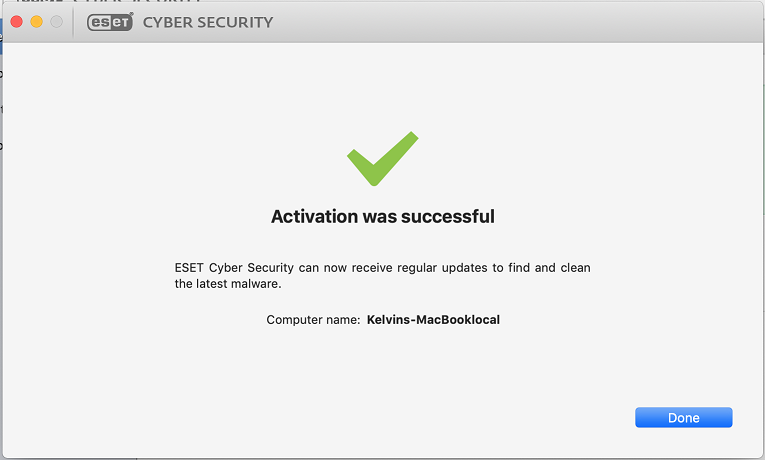
- Click Done when you see the "Activation was successful" screen.
How to scan my computer for virus?
Windows OS include Windows Security, which provides the latest antivirus protection. Your device will be actively protected from the moment you start Windows. Windows Security continually scans for malware (malicious software), viruses, and security threats. In addition to this real-time protection, updates are downloaded automatically to help keep your device safe and protect it from threats.
Please refer the link below regarding how to run a malware scan:
support.microsoft.com/en-us/windows/stay-protected-with-windows-security-2ae0363d-0ada-c064-8b56-6a39afb6a963 (external site, opens in new tab)
How to set up Personal Firewall in Windows?
Microsoft "Windows Firewall" is a part of Microsoft Windows. Windows Firewall does offer some protection from network attacks from malicious software known as worms.
You can refer to "Using Windows Firewall (external site, opens in new tab)" from Microsft for more details.
Permanent removal of data with wiping tools
Information can be stored on various computer systems and other electronic devices like portable storage media. It is important to ensure that confidential information; in particular, highly confidential and confidential data, are completely removed before disposal as files may be recovered even though they are "deleted". There are commercial service providers who could recover data from damaged hard disks. To minimize the risk of information leakage, extra steps to permanently remove/wipe out the data should be taken before disposing storage media holding highly confidential or confidential data.
There are basically 3 kinds of storage media and different types of storage media require different methods of wiping. The following are some examples:
- Optical: CD /DVD discs => physical destruction
- Magnetic: Zip disks, floppy diskettes, hard disk drive, magnetic tapes => overwriting or degaussing
- Electronic: USB Flash drives and memory cards => overwriting
How should I remove data on different types of storage media?In order to securely and permanently remove data from a device, various methods are used on different types of storage media.
- Overwriting (Wiping) - Overwriting is an approved method for removal of data on electronic or magnetic storage media. Overwriting of data means replacing previously stored data on a drive or disk with a predetermined pattern of meaningless information. This effectively renders the data unrecoverable, but the process must be correctly understood and carefully implemented.
- Degaussing (for magnetic storage media only) – A process whereby the magnetic media are erased with strong magnetic field. It is a proven method to permanently wipe out the data on magnetic media. However, the magnetic field may destroy the magnets in the motors and markings, rendering the degaussed media dead for good.
- Physical destruction – Physical destruction is recommended for media that cannot be wiped nor degaussed, such as CD-ROMs, broken disk drives, DVDs, tapes, or other damaged media devices.
For more information on the use of degausser available at OCIO, please kindly contact IT Help Desk.
Using encryption tools to protect confidential information
What is encryption?
Encryption is the conversion of information into a format that is unreadable by unauthorized users. An encrypted computer file can only be opened with the appropriate key or password. When an encrypted message is converted to readable information, it is said to be decrypted.
When should I use encryption?
Users having confidential information under their custody have the responsibility to prevent it from leakage or unauthorized access. Confidential files downloaded to a portable storage media, such as USB thumb drive, must be encrypted. Loss of USB thumb drives or other portable storage media with strongly encrypted files is considered to have lower risk of information leakage because it is very difficult to break the password. Mobile devices (i.e. smartphones and tablet) pose the same risk in information leakage as desktop and laptop computers. Users should take the necessary precautions and steps to encrypt and delete confidential data.
OCIO recommends the AES-256 or stronger encryption standards to encrypt sensitive information. There are a number of software applications that support the use of these encryption standards, e.g. WinZip + password, Acrobat (PDF) + password, MS Word/Excel + password, and BitLocker.
Please refer to the following on different encryption procedures:
Finally, the loss of encryption password of the encrypted document will mean the file can never be opened.
What is Windows Update?
Windows Update are essential software patches released by Microsoft to improve your operating system's security, performance, and functionality. You need them to keep your computer safe from vulnerabilities and ensure it runs smoothly.
For details, please see:
support.microsoft.com/en-us/windows/windows-update-faq-8a903416-6f45-0718-f5c7-375e92dddeb2 (external site, opens in new tab)
What is computer virus?
A computer virus is a program designed to replicate and spread on its own secretly. Usually, you are hardly aware of its existence. Computer viruses spread by attaching themselves to the boot sectors of diskettes and hard disks, to application programs (such as your word processing and spreadsheet programs) or to WORD and EXCEL documents.
Latest alert could be found in:
www.infosec.gov.hk/en/news-events/phishing-attack-alerts (external site, opens in new tab)
www.infosec.gov.hk/en/news-events/security-alerts-and-advisories (external site, opens in new tab)
Computing Facilities for Teaching & Learning
How can I book a computer room for a class?
Users can book the teaching venues (i.e. classroom, lecture theater and computer lab) or the non-departmental meeting room through the iBooking system at the Portal (ie. From the top menu bar, click Others > iBooking). Please check Booking of Teaching Venues for the details.
How to reset the setup of the PCs in central computer rooms?
In an central computer room, how can I share a folder in the teacher's computer to give student access to the files in this folder?
There is a shortcut icon on the desktop named with the room number (e.g.  "B1LP01 Share Folder" in B1LP01 computer room.). Teacher can share files for students by placing the files in the SHARE folder.
Students can find the same shortcut on the desktop too. The files are read only to students' PC.
What are the normal opening hours of the computer rooms?
Please kindly refer to our normal opening hours of the computer rooms.
What should I do if I have a problem using a PC in TKO Study Centre?
Follow the steps:
- Check this FAQ and see if answers to your questions are available.
- Seek advice from the staff on duty in TKO counter room G01.
- Call TKO IT Help Desk Hotline at 2190 8581.
What should I do if I need support services during class?
OCIO provides one-stop classroom support services for all central teaching venues.
If you need assistance during class, you can call the Classroom Service hotline on 2948-6529 for the Tai Po campus. For details, please check on the Contact Us page.
What software are available in Central Computer Rooms?
Please refer to the following online document: Standard Software Configurations for PC in OCIO Computer Rooms
Which lecture theatres or classrooms are equipped with a PC?
For the detailed list of teaching facilities, please refer to:
For Departmental Support (DCC/SAMCO)
Can department borrow PCs for short term use?
OCIO manage a PC loan service to address department's short term needs. Subject to the availability of the PCs, department can borrow PCs from the pool for short term use. Apply through F008 - Computer Equipment Loan Form
How to manage the license acquired by departments?
For department acquired a lot of software, there should be procedures and policies in department in managing the software license so that the usage will not infringe any copyright law, such as, using pirated software and insufficient software licenses.
Further enquiry on the license management issues, please kindly contact 2948 6601.
Reminders on setting up servers in departments
OCIO manages central servers, e.g. email, ftp, news, internet, intranet, UNIX, servers for personal web pages, file servers, network print servers and other central servers. Departments are welcome to use them as these servers are maintained and supported by OCIO and their reliability are closely monitored. For special needs that cannot addressed by central, departments can set up their own servers. The followings are some reminders for department:
- Most of the IP address are assigned dynamically through DHCP. Departmental server could apply for a fixed IP address and DNS name.
- Department should ensure the servers are properly managed against hackers and virus attack.
- Servers should refrain from generating a lot of broadcast traffics to the network which might interfere the normal operation of the campus network.
- Assign an administrator to manage the server.
- Ensure that proper software license are acquired to cover the server.
OCIO provides departmental private cloud service for the hosting of departmental servers and websites on Virtual Machine (VM). The virtual servers provided are functionally similar to a physical server. For details, please visit Private Cloud Service.
Using Bulk Tenders for computing equipment
To facilitate department to acquire PC/notebook and enjoy a better volume discount. There are bulk tender for PC and notebook for department to use. If users found the equipment covered by the bulk tender meet their needs, they can speed up the procurement process and enjoy a better discount. Please indicate in your Purchase Requisition form to use the bulk tender. List of bulk tenders are available in here.
What are the procedures for acquiring computing equipment in department?
The following are the typical steps for acquiring non office automation related computing equipment (Hardware or Software).
- Secured funding for the purchase (e.g. through department's annual equipment budget) - by Dept.
- Raise Purchase Requisition Form with justifications, budget code and budget holder's endorsement - by Dept. (Please refer to Financial and Purchasing Policies & Guidelines - Finance Office (EdUHK system, opens in new tab) for details.
- PR Vetted - by OCIO (Please refer to Purchasing Activities - 4. A List of items to be vetted by Asset Administrators before purchase (EdUHK system, opens in new tab) on items to be vetted by OCIO.
- FO conduct the purchasing process - by FO
- Price Summaries send to department for endorsement and comment - by FO and Dept
- Purchase Order issued by FO to selected supplier - by FO
- Hardware/Software Delivered - by Vendor
- Department file the Good Received Note (GRN) - by Dept
- According to the Asset Management Policy (EdUHK system, opens in new tab), Department complete the Asset Recording Worksheet and stick the Asset Tag (Barcode label) on the assets - by Dept
- OCIO update the Asset Record in the central database which will be verify through the annual stock take exercise. (by OCIO and FO)
Note: All software acquired by your department should be recorded in the "Software Inventory System for SAM - https://sam.eduhk.hk (EdUHK system, opens in new tab)", please visit Software Asset Management @ EdUHK for details.
What is Departmental Computer Coordinator or DCC?
DCC is the focal point(s) in the department to liaise with OCIO on services and resource provided by OCIO. They will work closely with OCIO as a communication channels between OCIO and the departments concerned.
What resources are provided by OCIO to department?
OCIO provide PC, printer, notebook and other peripherals for the office automation use. Each staff could have a desktop PC and access to printer (network or local) according to the norm. Notebook computers and other peripherals are provided to department for share use according to the norm. Discuss with your Departmental Computer Coordinator (DCC) in your department regarding your PC provision. The Office PC provided to each staff will have standard software provided. These equipment provided by OCIO will be maintained and support by OCIO.
Department's special needs, such as hardware and software for teaching and research will be budgetted by departments and other funds (e.g. Research Grant) and will be acquired and supported by the department concerned.
Network Infrastructure and cabling are provided centrally. For additional datapoints, please kindly apply using F012 - New Data Point Request Form and F006 - Data Point Activation Request Form
Enquiry on resources allocated by OCIO, please kindly contact 2948 6601.
What software site licenses are available to departments?
The the updated list of site license, please kindly refer to Software Site Licenses covered by OCIO.
When departments buy a PC/notebook, do they need to buy a Windows License?
YES. The Microsoft Campus Agreement only cover the Windows OS upgrade, so you need a Windows license to enjoy the upgrade. Windows OEM license come with PC cannot transfer to other PC. Please kindly check the Software Site Licenses covered by OCIO.
Where can I get the CDROM covered by the Microsoft Campus Agreement?
EdUHK joined the Microsoft Enrollment for Education Solutions (EES) (formerly Microsoft Campus Agreement). Click the link to get the media/CDROM covered by the agreement (site license). They can also borrow the CDROM from IT Help Desk in person.
Please check the loan service for the details. Staff or departments are advised to read the relevant licensing information carefully before using it.
General Information
How can I change the network account password?
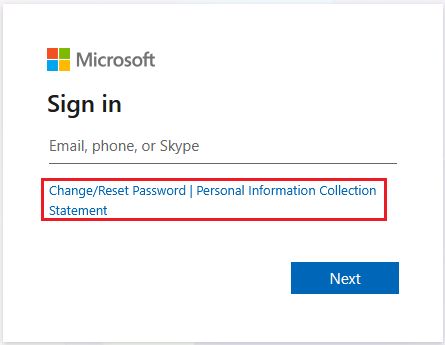
- Open a web browser (e.g. Chrome), and go to The Portal at portal.eduhk.hk (EdUHK system, opens in new tab) and click Change/Reset Password | Personal Information Collection Statement. Then, click Password Change on the Password Change and Reset webpage.
- In the Password Change page:
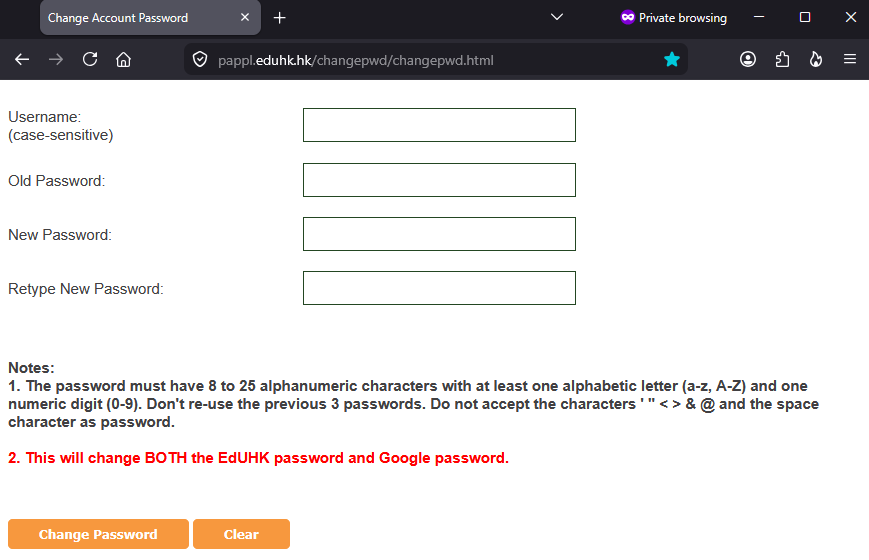
- Enter your account username in the Username field.
- Enter your Current Password, or initial password for new users, in the Old Password field.
- Enter a new password
- Note:
- The password must have 8 to 25 alphanumeric characters with at least one alphabet (a-z, A-Z) and one numeric digit (0-9). Don't re-use the previous 3 passwords. Do not use characters like ' , " , <, >, &, @ and "space" in the password.
- This will change BOTH the EdUHK password and Google password.
- Note:
- Enter the new password in the Retype New Password field.
- Finally, click Change Password to finish and you will get a confirmation like Account password has been changed successfully.
- It takes around 5 minutes to synchronize your new password to all systems. Please try login with the new password after 5 minutes.
I got the error 'Access forbidden' or 'Access Denied' when I access certain systems
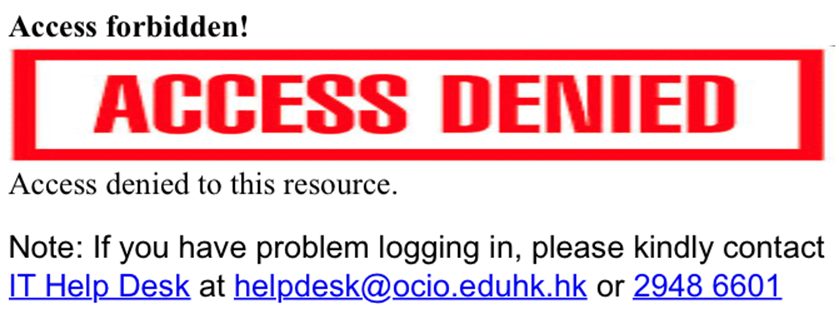
Some systems are accessible only within the campus network for security reasons. When you access these systems off campus, you will be prompted with an error message "Access forbidden" or "Access Denied" (as below). Please connect the EdUHK SSL VPN before accessing these systems off campus. For details, please visit SSL VPN Service.
What channels are available for complaints about message posting on Intranet?
To monitor the use of the Intranet about message posting, two arbitration groups were formed - one on student e-com governance (membership: SAO, CO and student representative) and one on staff e-com governance (membership: CO and HRO). In case of misuse, such as multiple posting of the same messages/messages with similar content:
- Misuse by staff, complaints should be sent to CO
- Misuse by students, complaints should be sent to SAO.
Upon receiving a complaint about an Intranet message which might violate the defined terms and conditions, the relevant arbitration group will arbitrate and decide the appropriate action to be taken. When needed, OCIO will help suspend repeated offender from posting to Intranet for a period of time.
What should I do if I have problem logging in?
Try the following steps:
- Check if 'Caps Lock' on the keyboard is ON. If so, turn it OFF by pressing the 'Caps Lock' key and try again.
- Is your account password expired? Your account password will expire if you have not changed it for more than 90 days. In this case, you should change your password on The Portal (portal.eduhk.hk (EdUHK system, opens in new tab)). For details on how to change the account password, please click here. Please note The password must have 8 to 25 alphanumeric characters with at least one alphabet (a-z, A-Z) and one numeric digit (0-9). Don't re-use the previous 3 passwords. Do not use characters like ' , ", <, >, &, @ and "space" in the password.
- Have you just changed your account password? It will take a while for the new password to become effective in all related systems. In this case, please try again in 5 minutes.
- Did you mistype or forget your username or password? Make sure you enter the correct username and password. If you have forgotten the password, please check here.
If you still have any problems, please contact IT Help Desk.
What should I do if my account password expired?
You may change your account password on The Portal at portal.eduhk.hk (EdUHK system, opens in new tab). Please see the steps in How can I change the network account password?. Account password expires every year (and 180 days for staff functional accounts). Users are required to change it regularly.
[Staff Only] What files in my PC should I backup ?
Staff Only Please refer to the document What files in my PC should I backup?
[Staff Only] What should I do if I have a problem with the office PC?
Staff Only
- Check this FAQ and see if answer of your question is available. Your can search the FAQ with keywords.
- Send an email describing your problem to helpdesk@ocio.eduhk.hk if it is not an urgent case.
- Call the IT Help Desk Hotline at 2948 6601 during office hours. Our duty staff will help you over the phone. If necessary, we'll arrange a technician to visit your office.
- Visit IT Help Desk in person during opening hours.
[Staff Only] What training is available to staff?
Staff Only OCIO organise IT Training workshops quarterly. The workshop includes hands-on training on commonly used software packages.
For enrollment and details, please kindly refer to IT Training web page. There is also information on the same web page about Computer Based Training (CBT) accessible in Campus PC.
OCIO will also invite hardware and software vendors to talk about new technologies through the IT Technology seminar. Announcement of IT Technology Seminar will be posted in "The Portal (EdUHK system, opens in new tab)".
[Student Only] How can I connect my computer to the network in Hostels
Student Only Student can connect their own PC to the hostel network. No application is needed. For detail, please kindly check 'Hostels and Quarters Network'
[Student Only] I used to receive the Intranet summary email every day. I am sure I have not unsubscribed the service, but recently I've found that I did not get any. Why?
Student Only Please check if your email usage has exceeded the quota. If yes, you will not get the summary email. Please clean up your mailbox as soon as you can.
[Student Only] Where to go if I have problem connecting to the Hostel network?
Student Only If you have problem connecting to the network please kindly contact IT Help Desk. OCIO could schedule student helper to check the data point.
OCIO will only support the hostel network up to the data point (socket on the wall). Students should take care of their own equipment by themselves.
Google Workspace for Students
How can I block or filter spam emails in Gmail?
You can keep a specific sender from sending emails to you by blocking, or sending their emails straight to a folder. Gmail also automatically identifies suspicious emails and marks them as spams.
Block a specific email address or sender
When you block a sender, emails they send will go to your Spam folder.
- Log in your Gmail account at www.gmail.com (external site, opens in new tab).
- Open the email message.
- In the top right-hand corner, click the More button (the 3 vertical dots).
- Click “Block [sender’s name]”.
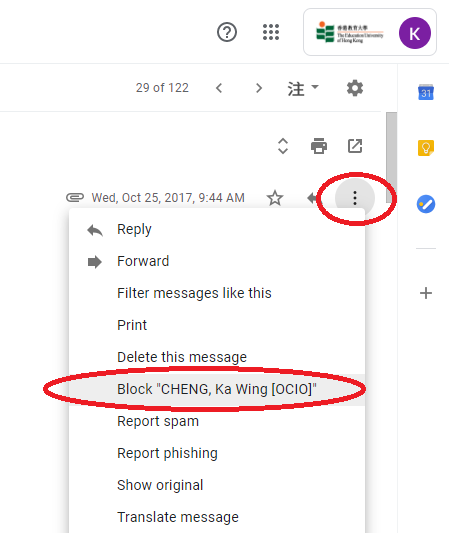
- If you have blocked someone by mistake, you can unblock them using the same steps.
For details, please visit Block an email address (external site, opens in new tab).
Create rules to filter your emails
For details, please visit Create rules to filter your emails (external site, opens in new tab).
Note: This function does not work for internal emails, e.g. emails from domain @s.eduhk.hk.
Mark email as Spam
For details, please visit Mark or unmark Spam in Gmail (external site, opens in new tab).
Report Spam or phishing emails
If an email is identified as phishing or suspicious by Gmail, a warning might be shown or the email might be marked as Spam. If an email was not marked correctly, please see Avoid and report phishing emails (external site, opens in new tab) on how to mark and unmark it.
If you want to learn more about how to identify phishing emails, please see FAQ: How to identify phishing emails?.
How can I download a file in Google Drive or Photos to a local disk?
FAQ: How can I download a file in Google Drive or Photos to a local disk?
Google Drive
- Go to Google Drive at drive.google.com/ (external site, opens in new tab).
- Select "My Drive" on the left-hand column to view all the files and folders.
Select the files or folders and right-click to choose "Download".

When download completes, choose a file location and click "Save".

Google Photos
- Go to Google Photos at photos.google.com/ (external site, opens in new tab).
- Select "Photos" on the left-hand column and select the photos.

- Click the More button in the top right-hand corner.

- Select "Download".

Choose a file location and click "Save".

How can I enable 2-Step Verification to better protect my account?
To better protect your Google accounts, you are strongly advised to enable Google 2-Step Verification. 2-Step Verification, which is similar to MFA on O365, adds an extra level of security to protect your accounts in case of password leakage.
Once enabled, you will need to enter your password and provide an one-off code sent separately to your phone via text, voice call or Google mobile app when you log in.
For details of Google 2-Step Verification and the setup procedures, please visit How it protects you (external site, opens in new tab) and Turn on 2-Step Verification (external site, opens in new tab).
How can I export data in my Google account using Google Takeout?
You can export and download data in your Google account using Google Takeout (external site, opens in new tab), including data in Gmail, Docs, Calendar, Photos and etc. The exported data can be kept as backups or be used with services out of Google.
What can I export using Google Takeout?
The data in your Google account such as Gmail, Contacts, Photos, Keep notes, Chrome history and bookmarks, will be listed when creating a new export. You can select or deselect the items as you need.
For a full list of data types and the corresponding storage, sign in to your Google account and visit Google Dashboard (external site, opens in new tab).
How to use Google Takeout?
Visit Google Dashboard (external site, opens in new tab) and click “Download your data”. Or simply visit Google Takeout (external site, opens in new tab) to start.
Resources
How to download your Google data (external site, opens in new tab)
Note: Downloading your data does not delete it from Google’s servers. Learn more at Delete your Google Account (external site, opens in new tab) or Delete your Activity. (external site, opens in new tab)
How can I forward emails to another account?
You can choose to forward incoming emails to another address in Gmail. For details, please see How to forward mail to another account (external site, opens in new tab).
Note:
1. If an invalid email address is used for email forwarding while “Delete a Mail copy” is selected, all your emails will be lost.
2. Users should clean up the mailbox regularly, particularly when “Keep local copy” is selected. Otherwise, you cannot send or receive when email usage exceeds the quota limit.
How can I set up email client to retrieve Gmail via IMAP?
Students and alumni Gmail users can sync their account data via IMAP/POP in Outlook, Apple Mail, Thunderbird and etc., please see Check Gmail through other email platforms (external site, opens in new tab) for details.
How can I share a file in Google Drive?
With Google Drive, you can share files like documents, images and PDFs without having to email them as attachments. Sharing is as easy as indicating which email addresses or mailing lists should have access to a file.
- Go to Google Drive at drive.google.com/ (external site, opens in new tab).
- Select a file or folder by checking the box next to it.
- Click the Share icon.
- Type the name/email address of the person you want to share the file with. You can share with a person, mailing list or choose a person from Contacts.
- Click the arrow on “Can view” to change the permissions, including view, comment and edit.
- Click “Share” and “Save”.

Note: If you want to share with an EdUHK staff, enter the email address in the following form: username@s.eduhk.hk.
The invited users will receive an email and gain access to the shared file or folder upon log in with their Google accounts (username@s.eduhk.hk).
How can I synchronise my Google account to mobile devices?
You can set up your mobile devices to retrieve data from your Google account.
Google Sync, which uses Microsoft Exchange ActiveSync, allows users to synchronize their Google Apps Gmail, Contacts, and Calendar to their mobile devices. You can also set up alerts (sound or vibration) for incoming messages and upcoming meetings.
What devices support Google Sync?:
- iOS, Nokia, SyncML, Windows Phone, and Windows Mobile devices
(Please see Google Sync for your phone (external site, opens in new tab) for setup instructions.) - Android devices does not require Google Sync, but connects natively to Google Apps
(For details, please see Get Mail and Calendar on your Android (external site, opens in new tab).)
How do I change my Google password?
To change your Google password, please follow the steps below.
For security reasons, users are highly recommended to change the password upon first-time login, and thereafter, change it regularly.
- Log in your Gmail account at webmail.eduhk.hk/ (EdUHK system, opens in new tab) and select Google.
- Click the email address in the top right-hand corner, then choose “Account settings".
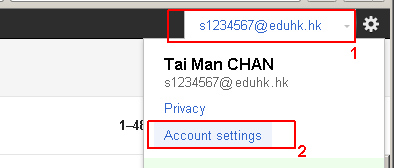
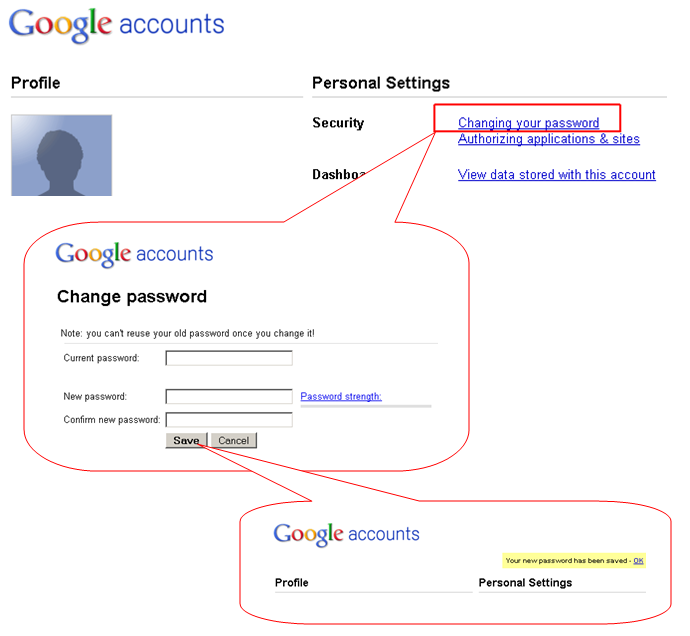
- In Account, click “Changing your password” under Security session.
- Enter your current password and new password accordingly. Then, click “Save”.
Note:
Change of Google password does not change your password on other systems.
However, if you change your password on The Portal, your Google password will be changed automatically.
What if my storage exceeds the limit for my Google account? (@s.eduhk.hk)
If you exceed your storage quota, you will be blocked from:
- Creating Google Docs, Sheets, and Slides
- Uploading files or images to Google Drive
- Backing up photos and videos to Google Photos
- Creating new files in collaborative content creation apps like Google Docs, Sheets, Slides, Drawings, Forms, and Jamboard. Others cannot edit or copy files, or submit forms owned by you until your storage usage is lowered.
- Recording new meetings in Google Meet.
However, you are still able to:
- Sign in to and access your Google account
- View and download files
- Send and receive emails
What is the initial password for my Google account?
The initial password for Google account is the first 6 digits of your EdUHK student number plus the last 4 digits of your HKID number (including the check digit) or the last 4 digits of your Chinese Mainland ID number (中國內地身分証號碼) (for Chinese Mainland students) / passport number (for overseas students).
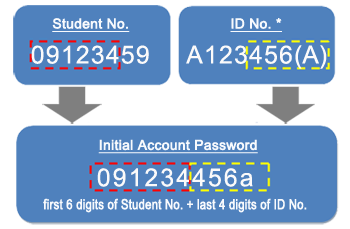
* ID No. refers to HKID or Chinese Mainland ID or Passport.
For example, if the student number is 09123459:
- HKID holders: If the HKID number is A123456(A), the initial password is 091234456a;
- Chinese Mainland students: If the Chinese Mainland ID is 220890199008075678, the initial password is 0912345678.
- Overseas students: If the passport number is ABC12345678, the initial password is 0912345678;
What should I do if I have forgotten my Google password?
If you have forgotten your Google password, please contact IT Help Desk Hotline at 2948 6601 during service hours to reset your password.
What should I do if I receive an email with garbled text (亂碼)?
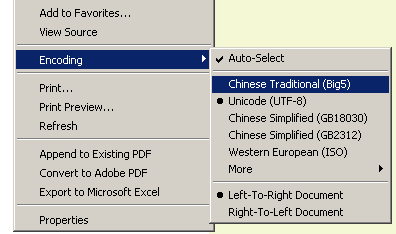
An email with garbled text can be caused by the use of non-standard email system, which does not specify the message encoding scheme, by the sender. To view the email, you can select a suitable character set in the browser.
The encoding options for different languages are listed as follows:
"BIG5" for Traditional Chinese
“GB2312” for Simplified Chinese
“UTF-8” for Unicode
Internet Explorer (IE)
Right click on the webpage, then choose "Encoding" and select a suitable code.
Firefox
From the menu bar, click "View" and select "Character Encoding", then select a suitable code.

Note: Emails with Chinese characters that are garbled to question marks cannot be fixed. Senders should set the encoding to a Chinese encoding scheme, e.g. GB, Big5, or UTF-8, to ensure the email is readable.
[Students Only] Why can’t I log in my Google account after changing my EdUHK password?
Google has its own authentication method and each student has a separate password for the Google account. This password can be different from the EdUHK password for accessing The Portal (EdUHK system, opens in new tab) and various information systems.
Changing the EdUHK password on The Portal will change both EdUHK password and Google password at the same time.
IP Phone System
I have deleted a voice message. Can I get it back?
No. Once a message has been deleted, it cannot be restored.
My information in the IP Phone display is incorrect, what should I do?
If you find your information in the IP Phone display incorrect, please fill out the online form F021 IP Phone Display / Staff Communication Directory Update Request Form.
My office is having a new staff who needs a phone. What should we do?
If your office has a spare phone, you should assign the phone to the new staff. You can then notify OCIO about the change of user of the phone. If you do not have a spare, you can make a request for another one. In either case, please use the online form F020 IP Phone Add / Move / Change Request Form.
Who do I contact when I have trouble with my office phone?
In case you have trouble with your office phone, please contact IT Help Desk Hotline at 2948 6601.
MFA on M365
How can I change my MFA verification method on M365?
Using the Microsoft Authenticator app on your mobile device as a security token is the most convenient way to complete verification. If you want to change your MFA verification method, please follow the steps below.
- Open a browser on your computer and sign in to M365 at login.microsoftonline.com (external site, opens in new tab).
- Sign in with your EdUHK email address and password, then click "Next".
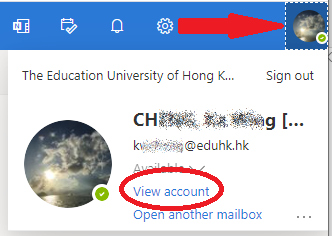
- Click your profile icon in the top right-hand corner and select "View account".
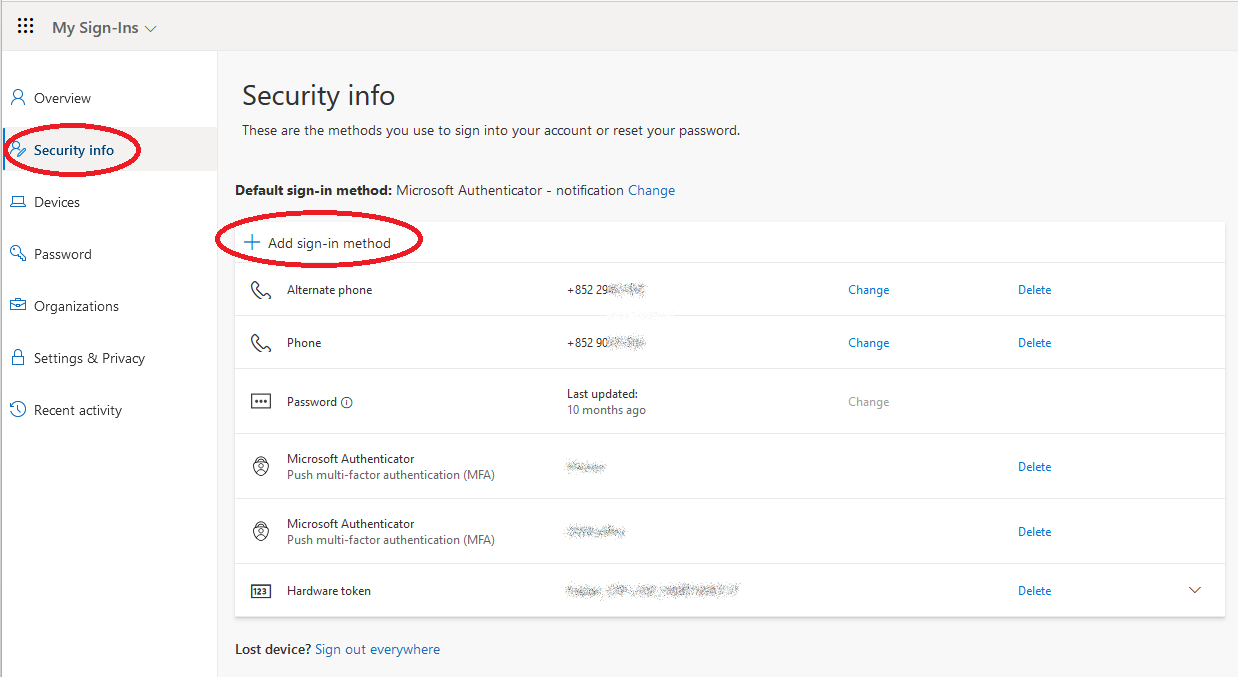
- In the left menu, select "Security info". Then look for "Default sign-in method" and click "Change" on the right.
- Open the drop-down list and choose a verification method that you want.
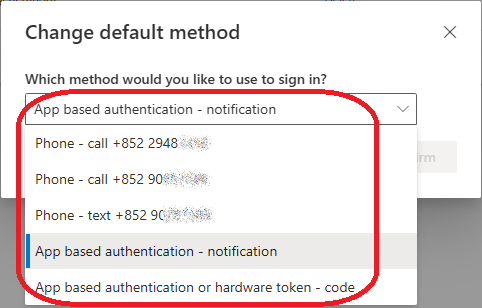
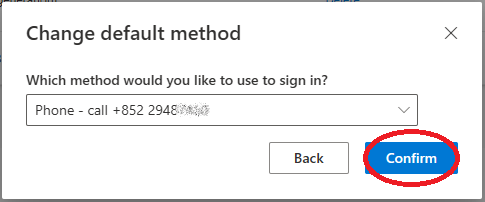
- Then click "Confirm".
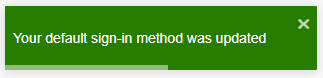
- A confirmation message will pop up.
How can I create an app password if my device doesn't support MFA?
With some old devices or apps, you may have problems to receive notification after enabling MFA. If your device does not support MFA, you can create an app password to sign in. Please note the following when you create an app password:
- You should create one app password for each device.
- You can use the same app password for multiple applications on the same device.
- If you have forgotten the app password, you should create a new app password and delete the old one.
- If your account has been compromised, clear all the app passwords and change your password immediately.
- Never use an app password on a shared device.
- Never give your app password to others. Keep it in a safe place until you have it configured on a device.
Note: For Android users, you are highly recommended to use the Microsoft Outlook Android app (external site, opens in new tab) instead of your native email app with an app password.
How to create an app password?
- Open a browser on your computer and sign in to M365 at login.microsoftonline.com (external site, opens in new tab).
- Sign in with your EdUHK email address and password, then click "Next".
- Then click your profile icon in the top right-hand corner and select "View account".
- Choose "Security info" from the left menu, then click "+ Add sign-in method".
- Choose "App password".
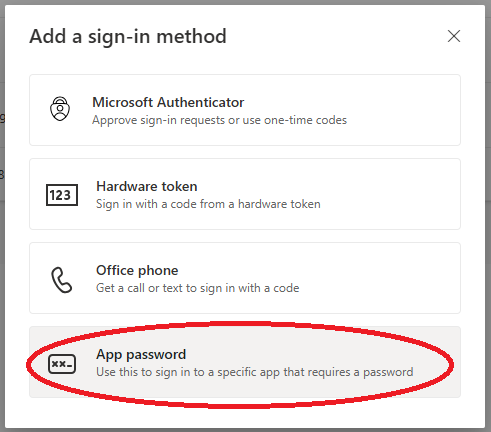
- Enter a name for your app password and click "Next".
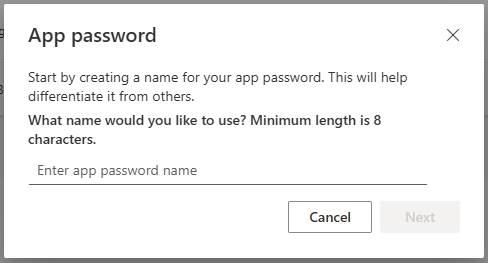
- Now copy and paste the app password on your application. Click "Done" when finished.
Note: You cannot retrieve the app password once you close the window. You need to create a new app password again.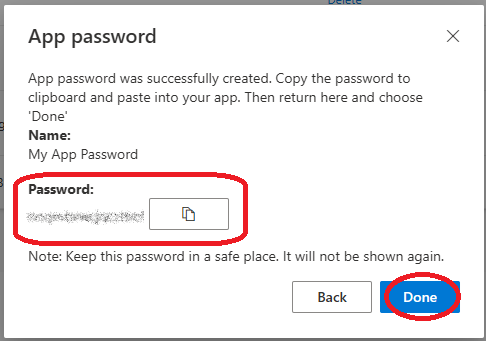
How to delete an app password?
- Open a browser on your computer and sign in to M365 at login.microsoftonline.com (external site, opens in new tab).
- Sign in with your EdUHK email address and password, then click "Next".
- Then click your profile icon in the top right-hand corner and select "View account".
- Choose "Security info" from the left menu.
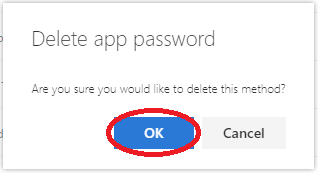
- Look for the app password that you want to delete, and click the "Delete" link next to it.

- Click "OK" to confirm deleting the app password.
How can I set up the Microsoft Authenticator app for MFA on multiple devices?
To set up the Microsoft Authenticator app on multiple devices, please follow the steps below.
- Install the Microsoft Authenticator app on your second device.
- Open a browser on your computer and sign in to M365 at login.microsoftonline.com (external site, opens in new tab).
- Sign in with your EdUHK email address and password, then click "Next".
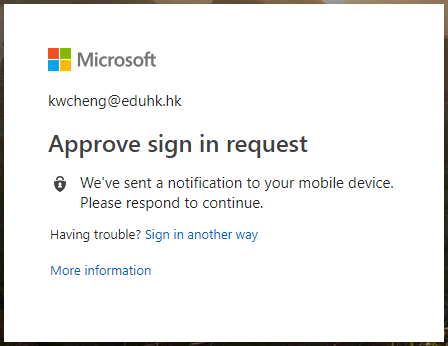
- Your will receive a notification on your registered device. Tap on the notification and choose "Approve".
- Then click your profile icon in the top right-hand corner and select "View account".
- Choose "Security info" from the left menu, then click "+ Add sign-in method".
- Open the drop-down list and choose "Microsoft Authenticator".
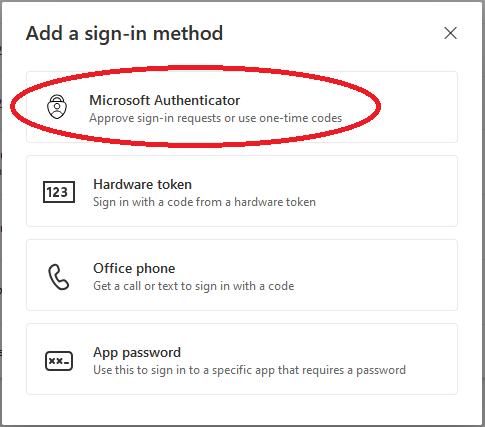
- Click "Next" if you have installed the Microsoft Authenticator app. If not, click "Download now" to get the app.
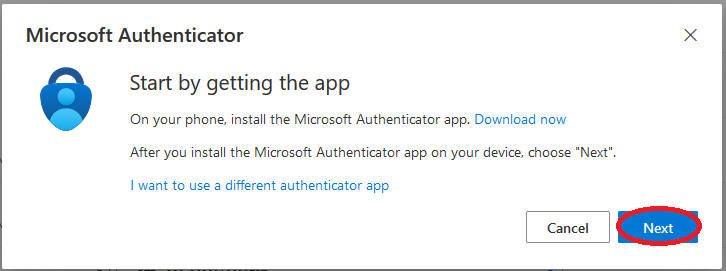
- Click "Next".
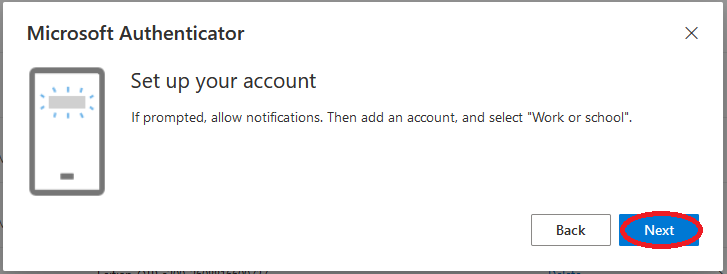
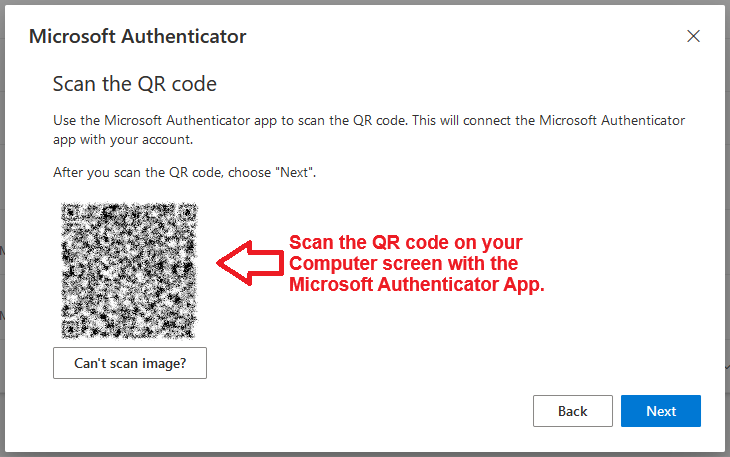
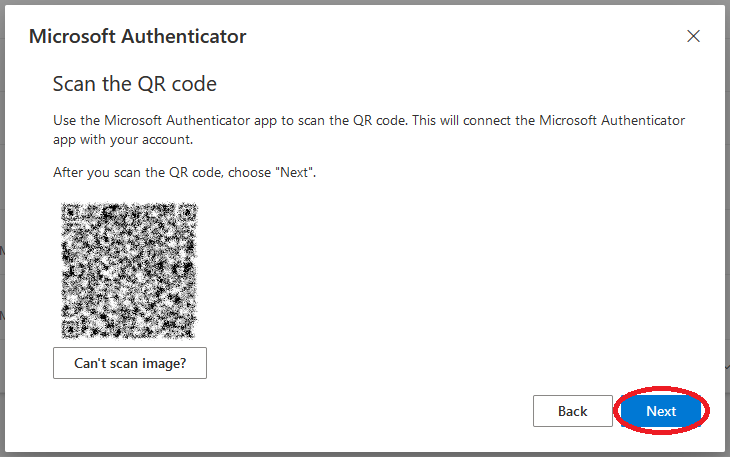
- When you see the following screen, open the Microsoft Authenticator app
 on your second device.
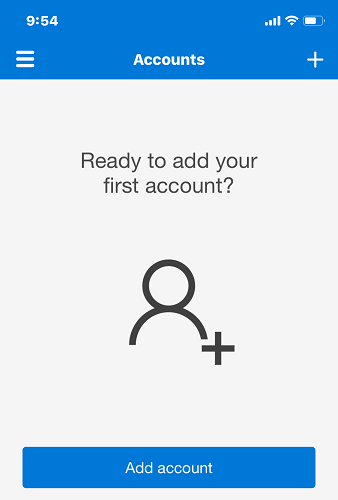
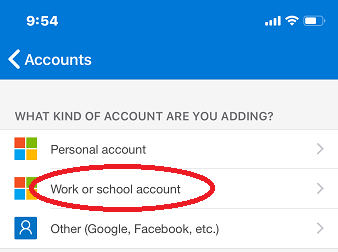
- On the mobile device, click the + button in the top right-hand corner and choose “Work or school account”.
- Now scan the QR code on the browser with your device. If you cannot use your phone camera, click "Can't scan image?" to enter the 9 digit code and the URL instead.
(Note: For iPhone users, you may need to change the app permission to scan the QR code: Settings > Authenticator > Camera)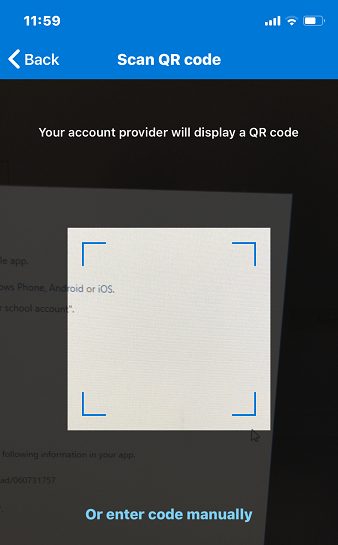
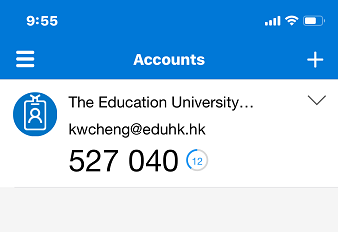
- A 6 digit code will be shown and your account is added.
- Click "Next" on your computer.
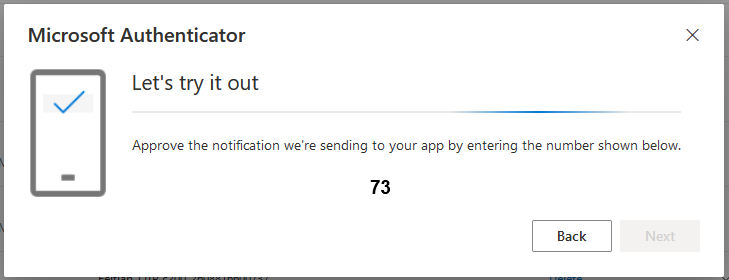
- A notification is sent to the Microsoft Authenticator app on your second device.
- You will receive a notification on your second device.
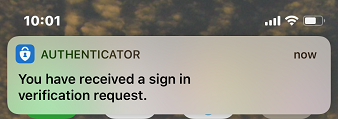
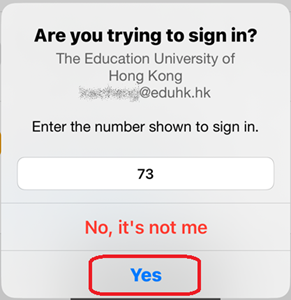
- Tap on the notification, enter the number displays and tap “Yes” for verification.
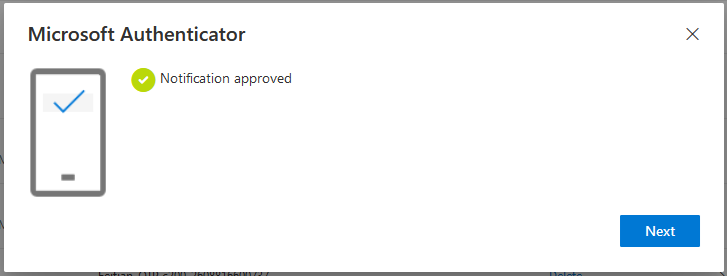
- When you see the following screen, click "Next".
- Your second device is registered successfully and it will be shown in the list of security info methods.
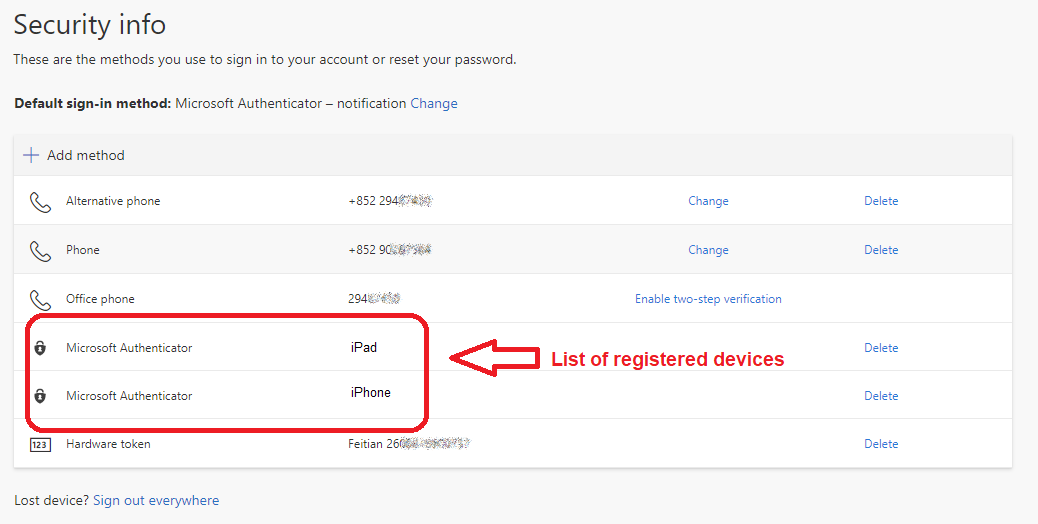
- From now on, all your registered devices will receive notifications from the Microsoft Authenticator app when you sign in. You only need to verify on one of the devices.
How can I verify my identity for MFA on M365?
Using the Microsoft Authenticator app on your mobile device as a security token is the most convenient way to complete verification. You can also receive a text message or phone call on your mobile phone to verify your identity. Below are the four verification methods:
When you sign in to your account, you can choose the verification method on the identity verification page. Click the link " I can't use my Microsoft Authentication app right now". Then choose the verification method you preferred
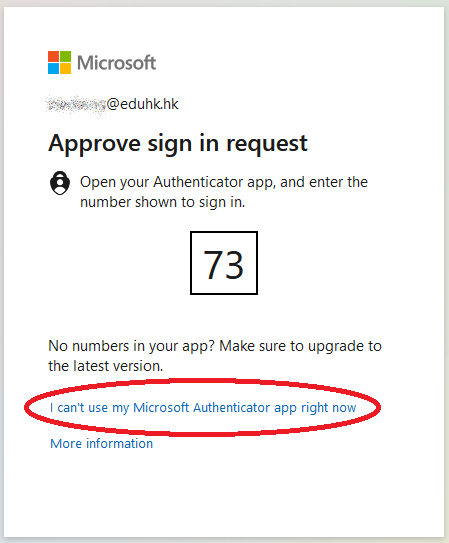
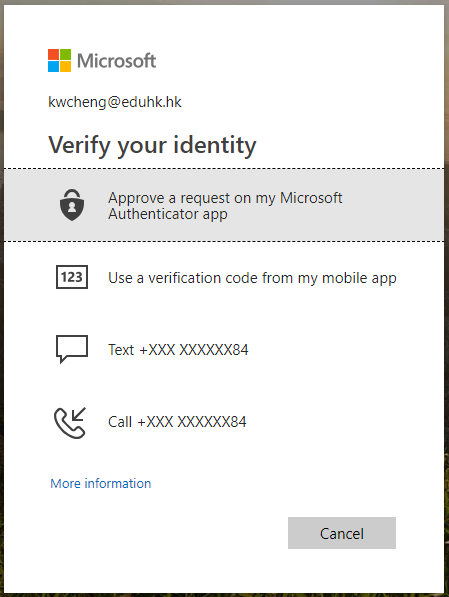
Verification Methods
| Verification Method | Description |
|---|---|
 App notification (Recommended) |
Using the Microsoft Authenticator app to receive notification (If you cannot view the video, please click here (video, opens in new tab) to open the video.)
|
 Verification code |
Users can retrieve the verification code generated with the Microsoft Authenticator app even when there is no Internet connection. The code is renewed every 30 seconds. Using the Microsoft Authenticator app to retrieve verification code (If you cannot view the video, please click here (video, opens in new tab) to open the video.)
|
 Text message | Verifying identity with a text message (SMS)
(If you cannot view the video, please click here (video, opens in new tab) to open the video.)
|
 Phone call | Verifying identity by phone call (If you cannot view the video, please click here (video, opens in new tab) to open the video.)
|
How can I verify my identity if there is no Internet connection on my registered device?
Using the Microsoft Authenticator app on your mobile device as a security token is the most convenient way to complete verification. When there is no Internet connection, users can still use the verification code option on the app. Users are suggested to test this option on their mobile devices if they know they will be travelling.
- When you sign in to your account, click "I can't use my Microsoft Authentication app right now" in the Approve sign in request prompt.
- Choose "Use a verification code from my mobile app".
-
Open the Microsoft Authenticator app to retrieve the verification code. Then enter the 6-digit code and click "Verify".
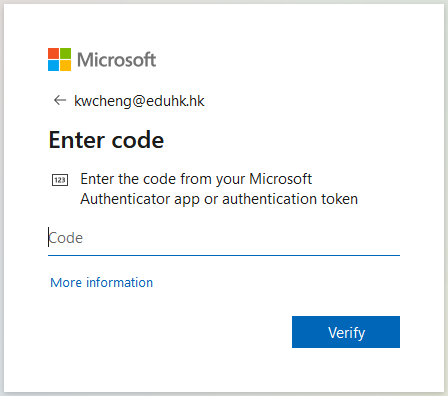
How do I sign in to Microsoft 365 portal with MFA?
After setting up MFA on M365, you will need to verify your identity when you sign in to Microsoft 365 portal. Using the Microsoft Authenticator app on your mobile device as a security token is the most convenient way to complete verification. You can also choose to receive a text message or phone call on your mobile phone to verify your identity. Below is a guide using the Microsoft Authenticator app as an example.
Note: The use of number matching in the Microsoft Authenticator app will be effective from 27 Feb 2023.
- Open a browser on your computer and sign in to Microsoft 365 portal at portal.microsoftonline.com (external site, opens in new tab).
- Sign in with your EdUHK email address and password, then click "Next".
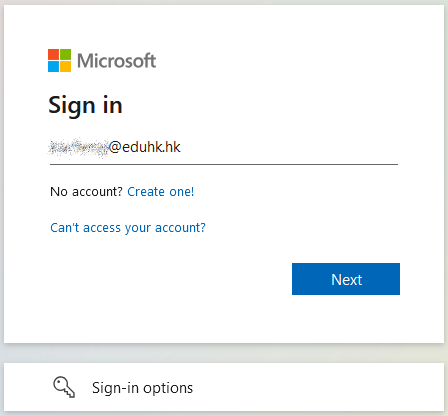
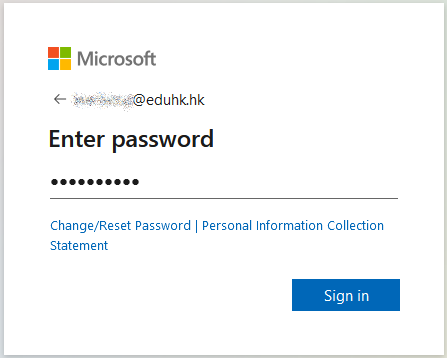
- When you see the following "Approve sign in request" message, open the Microsoft Authenticator app on your registered device.
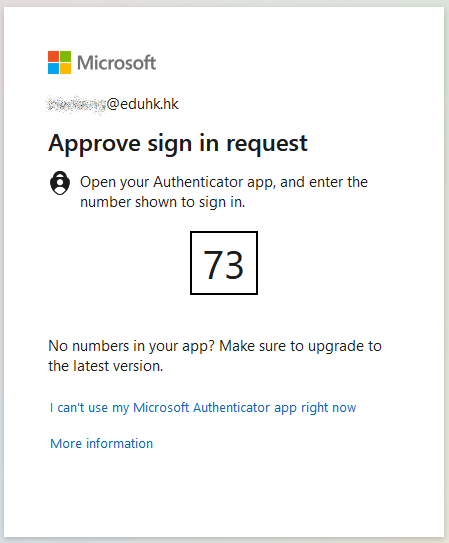
- You will receive a notification on your device. Tap on the notification, enter the number displays on the browser and tap "Yes".
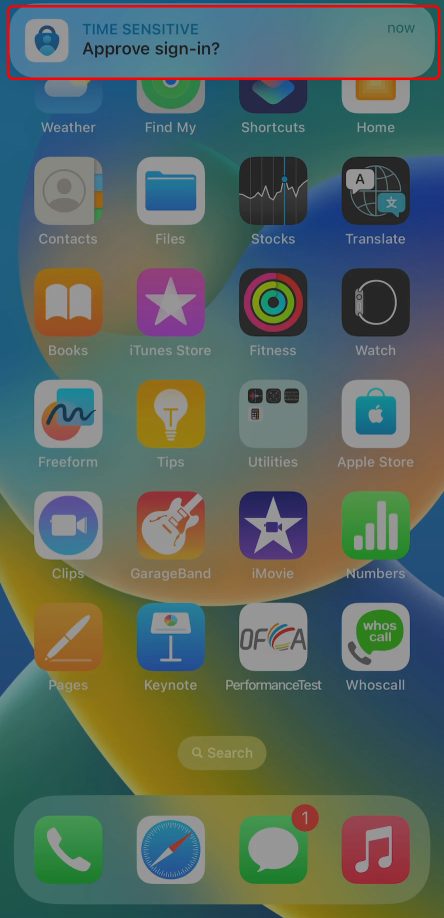
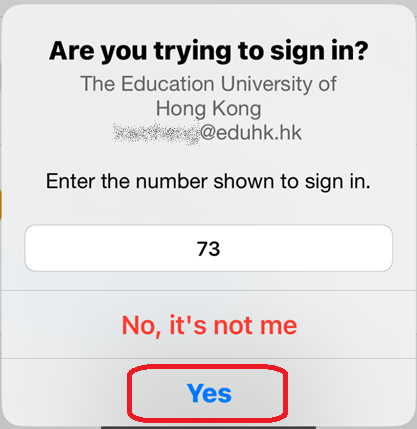
- Enter the passcode of your device.
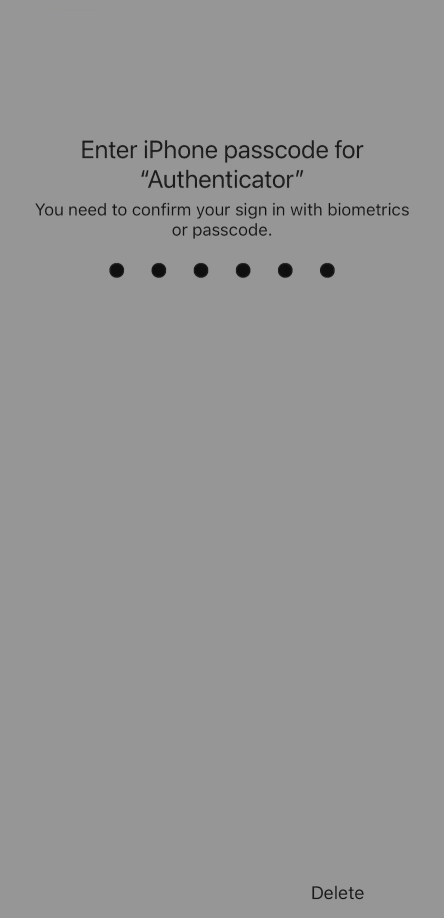
- You are now signed in to your account successfully. You can access to M365 services.
Note: After signing in, you can click "Yes" to stay signed in when prompted. Please do not choose this option when using a shared or public computer.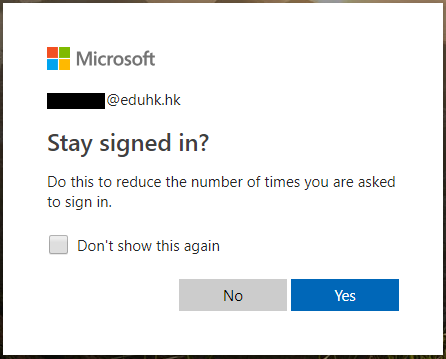
How should I reconfigure MFA on M365 when I have my mobile device replaced?
When you have your mobile device replaced, you need to enrol a new one on M365.
- Install the Microsoft Authenticator app on your new device.
- Open a browser on your computer and sign in to M365 at login.microsoftonline.com (external site, opens in new tab).
- Sign in with your EdUHK email address and password, then click "Next".
- Verify your identity as usual. If you do not have your registered device (the old one) with you, click "I can't use my Microsoft Authentication app right now" and choose "Call +XXX XXXX XXXX" or "TEXT +XXX XXXX XXXX" to verify your identity.
- Then click your profile icon in the top right-hand corner and select "View account".
- Choose "Security info" from the left menu, then click "+ Add sign-in method".
- Open the drop-down list and choose "Microsoft Authenticator".
- Click "Next" if you have installed the Microsoft Authenticator app. If you have not downloaded the app, click "Download now".
- Click "Next".
- When you see the following screen, open the Microsoft Authenticator app on your new device.
- Click the + button in the top right-hand corner and choose “Work or school account”. When prompted, choose "Scan QR code".
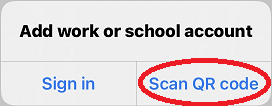
- Scan the QR code on the browser with your device. If you cannot use your phone camera, click "Can't scan image?" and enter the 9 digit code and the URL instead.
(Note: For iPhone users, you may need to change the app permission to scan the QR code: Settings > Authenticator > Camera) - A 6 digit code will be shown and your account is added.
- Click "Next" on your computer.
- A notification is sent to the Microsoft Authenticator app on your new device.
- You will receive a notification on your new device.
- Tap on the notification, enter the number displays and tap “Yes” for verification.
- When you see the following screen, click "Next".
- Your new device is registered successfully and it will be shown in the list of security info methods.
- From now on, all your registered devices will receive notifications from the Microsoft Authenticator app when you sign in. You only need to verify on one of the devices. If you want to remove the old device, click "Delete" next to the name of the device.
Setting up the Microsoft Authenticator app for MFA

Microsoft provides Multi-Factor Authentication (MFA) service to protect users against account takeover and data theft. This additional identification step blocks hackers from logging in your account even when your password is compromised or leaked. You will also be notified when someone tries to log in with your password, providing an additional level of protection to secured login.
Using the Microsoft Authenticator app on your mobile device as a security token is the most convenient way to complete verification. You can choose to approve a request on the app for a quick log in, or use a verification code when your device has no internet connection.
Note:
- For new users, please change your password on The Portal (EdUHK system, opens in new tab) before signing in.
- You can enroll MFA on multiple devices. For details, visit FAQ: How can I set up the Microsoft Authenticator app on multiple devices?
(If you cannot view the video, please click here (video, opens in new tab) to open the video.)
- Install the Microsoft Authenticator app on your mobile device.
- Open a browser on your computer and sign in to M365 at login.microsoftonline.com (external site, opens in new tab).
- Sign in with your EdUHK email address (username@eduhk.hk for staff, sXXXXXXX@s.eduhk.hk for students) and password, then click "Next".
- When you see the following screen, click “Next”.
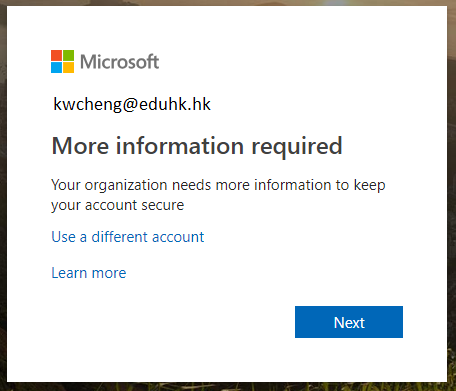
- Choose "Microsoft Authenticator" for the sign-in method.
- A QR code will be shown on your computer. Switch to the mobile device to continue the set up.
- On your mobile device, open the "Microsoft Authenticator" app .
- Click the + button in the top right-hand corner and choose “Work or school account”.
- When prompted, choose "Scan QR code".
- Then scan the QR code on the browser with your device. If you cannot use your phone camera, click "Can't scan image?" to enter the 9 digit code and the URL instead.
(Note: For iPhone users, you may need to change the app permission to scan the QR code: Settings > Authenticator > Camera)
- A 6 digit code will be shown and your account is added.
- On the computer, click "Next" to proceed.
- A number will shown as below. And a notification is sent to the your device. Switch to your mobile device to proceed.
- You will receive a notification on your mobile device.
- Tap on the notification, enter the number displays (the one shown on the computer) and click “Yes” for verification.
- When you see the following screen on your computer, click "Next".
- An app password will be shown. Copy and save the app password in case some of your devices or apps do not support MFA. For details, please see FAQ: How can I create an app password if my device doesn't support MFA?.
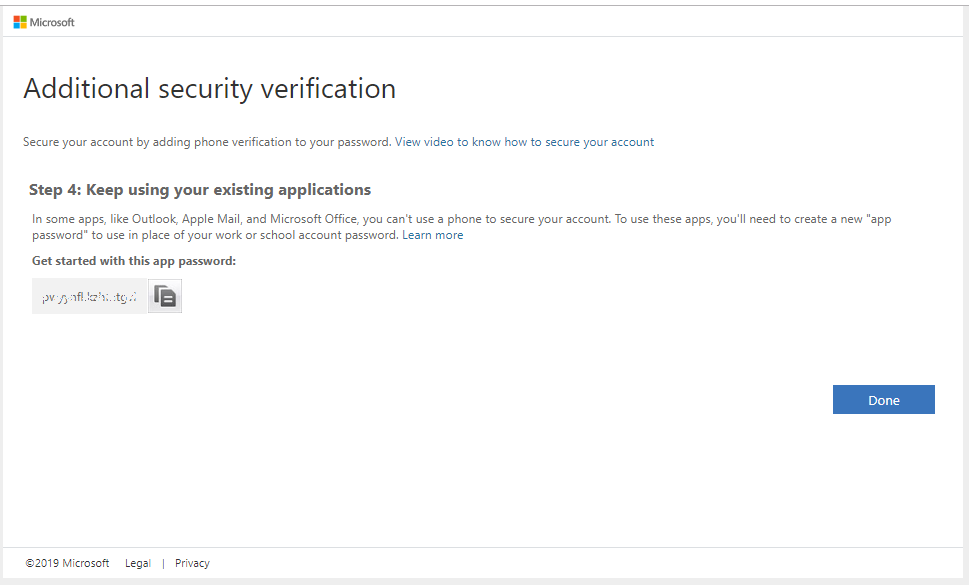
- From now on, you will receive notification from the Microsoft Authenticator app when you sign in. Simply Tap "Approve" on your device to complete verification.
Note: If you want to complete verification with a phone call, choose "Authentication phone" in Step 5. Then choose the correct country code (e.g. Hong Kong +852) and enter your office phone number or mobile number.
Mac OS
Can I print to Multi-Functional Photocopier from Mac OS?
If you want to print to any MFP from Mac OS, pls note the followings:
- For Ricoh MFP, user need to acquire the Postscript module from Ricoh for Mac OS printing. And download and install the corresponding printer driver.
- For Konica Minolta MFP, you only need to download and install the printer driver.
- Then user can print from Mac OS.
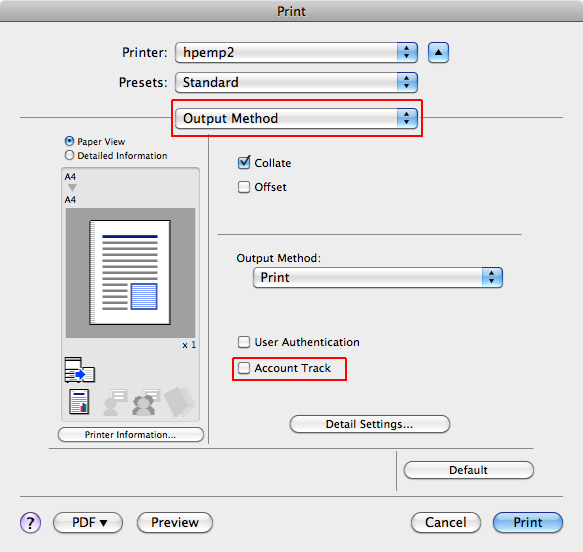
If department enable any account tacking option on the MFP (secure print), you can found the option by select the printer, and then there's a drop down box, which usually shown Layout tab by default. You can find all your printing options here. Then enable the Account Track option.
- For Konica Minolta C253, look for Output Method and tick the Account Track option.
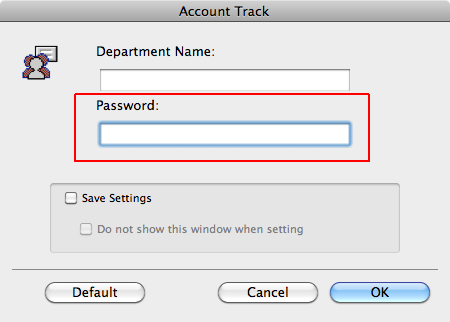
- Then enter the passwcode in the Password field.
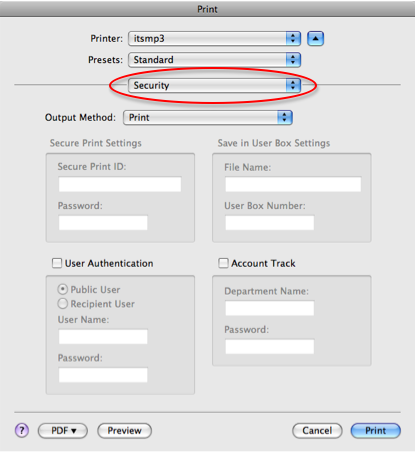
- For Konica Minolta C250, look for Security.
- For other models, please refer to user manual.
Fail to login The Portal using Safari.
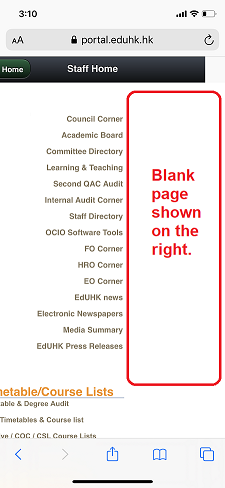
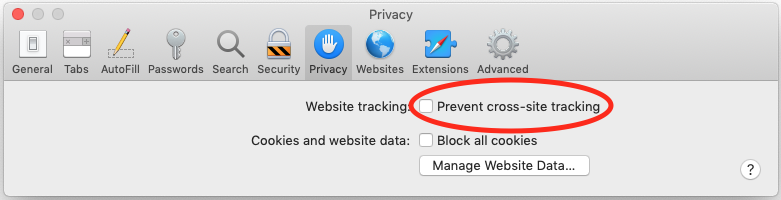
If you encounter problem to login the Portal using Safari on Mac/iOS device, this may due to the "Cross-site tracking" option is turned on. Please follow the steps below to turn it off for accessing the Portal.
Symptoms: (On iOS)
Procedures:
- For macOS
- Open Safari.
- From the menu bar, choose "Safari > Preferences"
- Go to the "Privacy" tab.
- Un-checked the option "Prevent cross-site tracking"
- For iOS devices:
- Go to “Settings > Safari”
- Under the “Privacy & Security” section, make sure the following options are disabled
- Prevent Cross-Site Tracking
- Block All Cookies
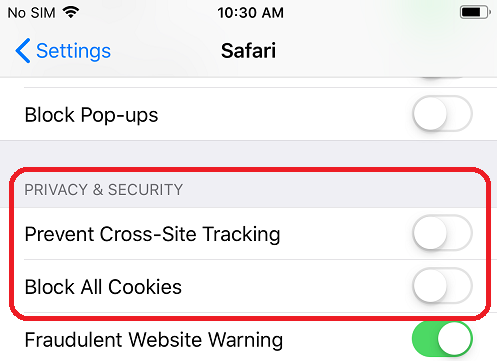
Note: For Chrome on iOS, there is no setting to turn off the cross-site tracking. Please use Safari with "Cross-site tracking" turned off to access the Portal on iOS devices.
How can I connect to campus Wi-Fi network on Mac OS?
Staff and Students could configure their Mac OS devices to access the wireless network within campus area.
Procedures:
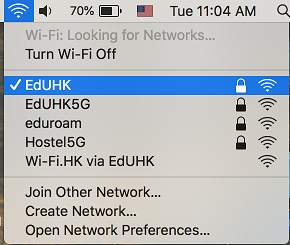
- Turn on your AirPort.
- Select the wireless network named "EdUHK".
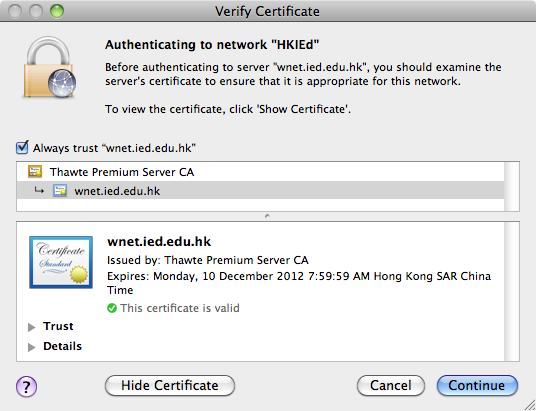
- For the first time, you will prompt for the certificate verification. You can tick the option "Always trust "wnet.ied.edu.hk"" and press "Continue". Then you will prompt for the your Mac OS administrator password.
- Then enter your EdUHK user name and password.
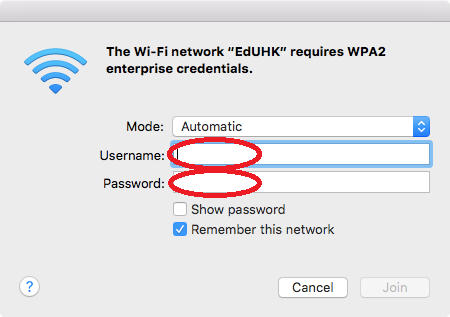
For details about EdUHK wireless network service, please refer to EdUHK Wireless Network.
How to add root certificate to Mac OS X
Firstly, get the root certificate. Then follow the steps below:
Procedures:
- Double click the certificate file (with ".cer" extension)
- Choose "System" from the keychain option. Then press "OK"
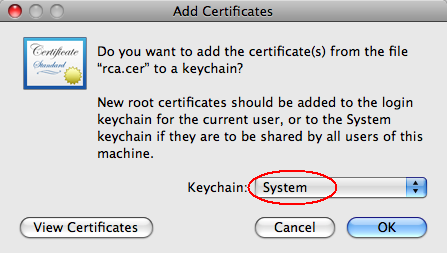
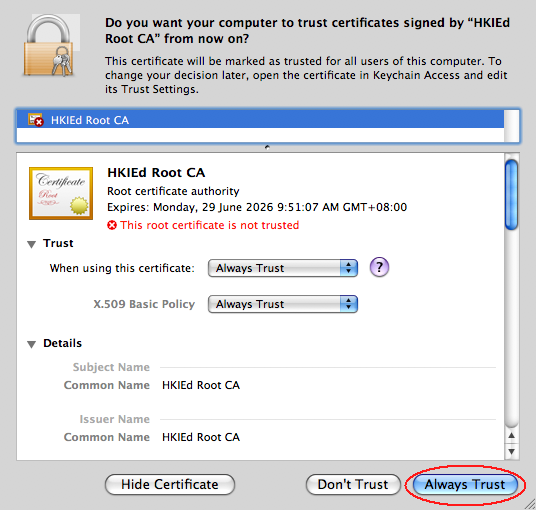
- When the following window pops-up, click the "Always Trust" button.
- Then you will notice that the certificate is added to the system entry.
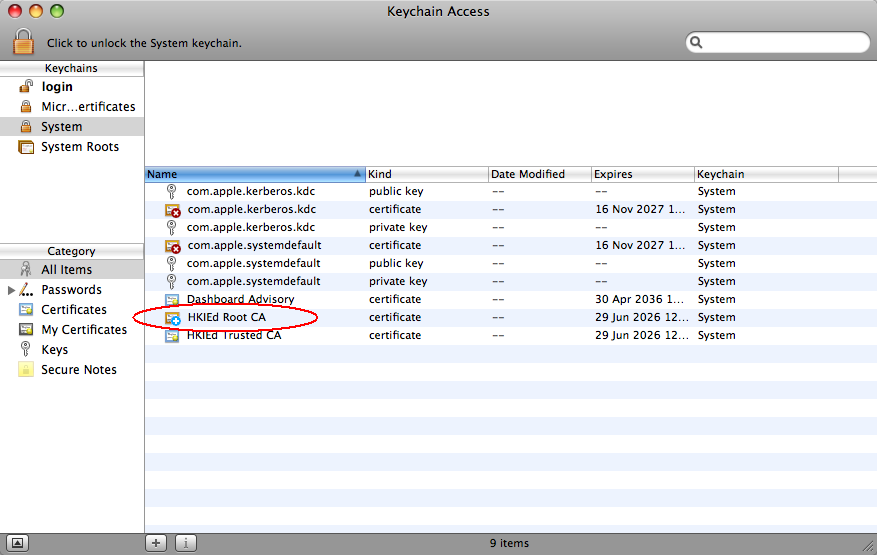
How to archive/export email from Outlook for Mac?
In order to reduce the size of your Inbox, you need to export (manually archive) to an Outlook for Mac Data File (.olm) on your Mac.
You can still access this data at any time, and you can even transfer individual items, or the entire Data File, to Outlook for Mac on another computer.
For information on how to import the data from a "Outlook for Mac Data File (.olm)", please refer to "Import email messages, contacts, and other items into Outlook for Mac (external site, opens in new tab)" for details.
How to export items:
When you export to an Outlook for Mac Data File, you can choose to filter information by category or by item type. For example, if you want to transfer networking information from your work computer to your home computer, you could export only items that you've assigned to the Networking category. Similarly, you might want to export all your contacts on your home computer and then import them on your work computer. During the export process, you can choose to keep the exported items in Outlook, or to delete them after they are exported.
- On the File menu, click Export.
- Click Outlook for Mac Data File.
- Select an option to filter by category or item type. (To export all items in Outlook, click Items of the following types, and then select all the check boxes.)
- Click the right arrow to continue, and then follow the instructions. (The Outlook for Mac Data File uses the .olm extension.)
Note:
- In Outlook for Windows, you can setup "AutoArchive" to archive Outlook items by specific time automatically on a regular interval. This feature is not available on Outlook for Mac, but you can archive data automatically by setting up Time Machine.
- An Outlook for Mac Data File (.olm) does not contain account settings or your Outlook preferences.
- For more information, you can refer to "Export items to an archive file in Outlook for Mac (external site, opens in new tab)"
How to configure Mac Mail to access Office 365?
You can configure the Apple Mail app to connect to your email and calendar events on the Office 365 server.
Procedures: (Screen capture base on macOS 10.14.x with Mail app version 12.4)
- Launch Mail
 . (Click the icon in the dock or go to the Applications folder to open it.)
- Add a mail account:
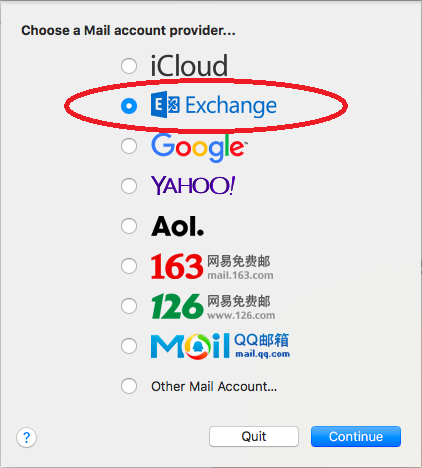
- If you have not previously configured an account in Mail you will be prompted to add an account. Click Exchange and then click Continue.
- Otherwise, go to the Mail menu and click Add Account -> Exchange and then click Continue.
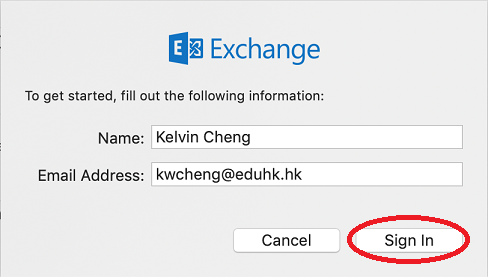
- Enter the following information and then click the Sign In button
- Full Name: the name you want displayed on your outgoing mail
- Email Address: username@eduhk.hk
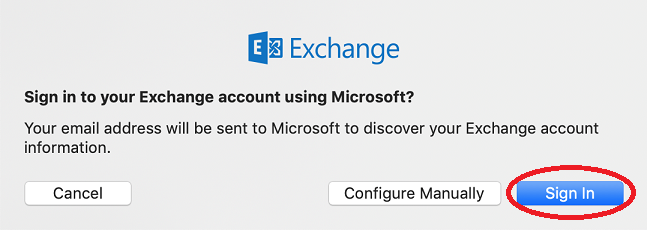
- Choose Sign In when prompt for the setup method.
- If your account is enabled with Multi-Factor Authentication - MFA, you need to "Approve" the login from the Microsoft Authenticator app.
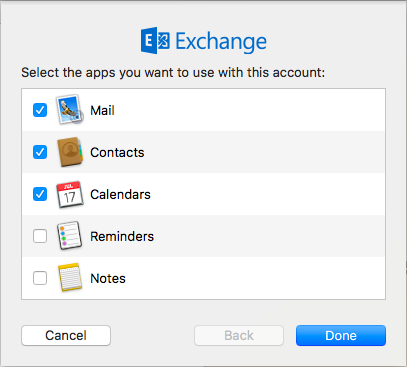
- Select the apps you want to use with this account and then click Done.
- Now the Mail will start to download your emails.
Note: After configuring Apple Mail, be sure to change the Trash setting to never permanently erase messages. Otherwise, you won't be able to restore deleted messages.
How to configure Outlook 2016 for Mac to access Office 365?
After you install the Office for Mac 2016 on your system, you can setup Outlook 2016 to access emails.
Procedures: (For Office 365 Mailbox)
- Open Outlook 2016 for Mac.
- From the menu bar, click Tools -> Accounts.
- In the Add an Account Windows, click Exchange or Office 365
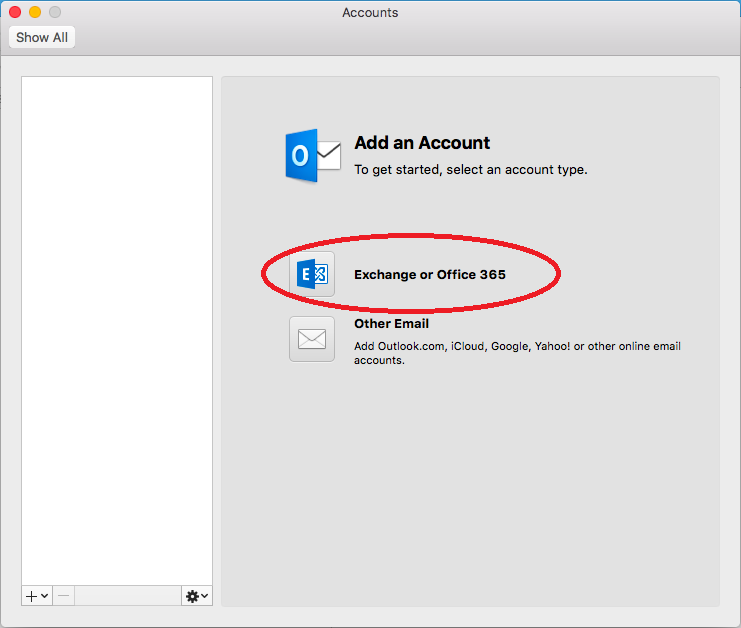
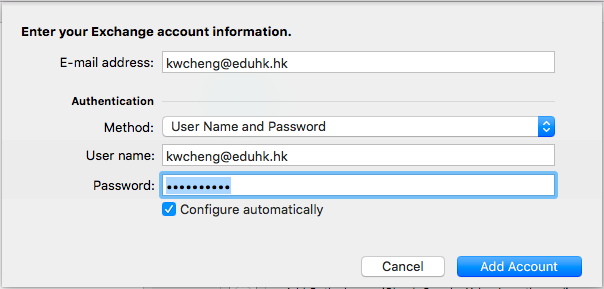
- Then enter your account information as below. Then click Add Account
- Email Address: username@eduhk.hk
- Method: Username and Password
- User name: username@eduhk.hk (Full email address)
- Then click Add Account
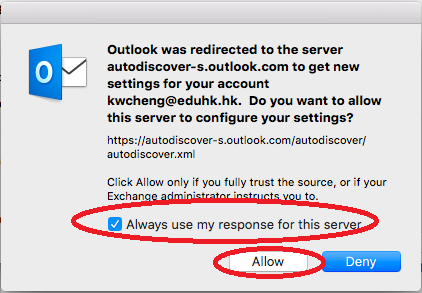
- When the following window pop-up, tick the option "Always use my response for this server". Then click Allow.
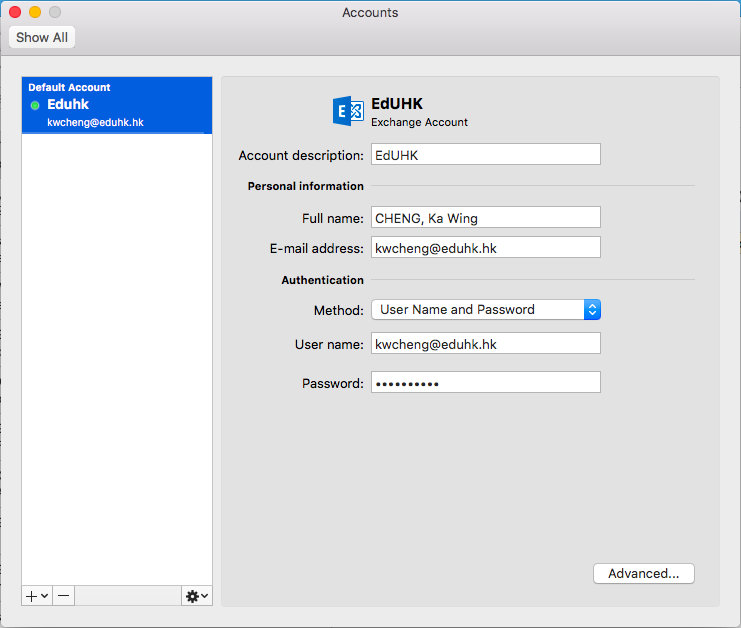
- If you need to modify the display name. You can change it from the menu bar "Outlook" -> "Preferences" -> "Accounts". Then enter your full name and close the window
- Now the Outlook will start to download your emails.
How to create SSL VPN connections on MacOS
Starting from Dec 2024, OCIO rolled out a new SSL VPN using the SonicWall SSL VPN client to allow users to make secure connections to the campus network. Please refer to the SSL VPN for macOS (PDF file) for details.
How to print to a printer on an Windows PC from a Mac machine?
On the Windows PC, enable printer sharing from an account which has administrative privileges and has a username and password used for access.
Enable printer sharing on Windows PC:
- Click Start -> Settings - > Printers and Faxes
- Then right click the printer icon that you want to share out and choose Sharing...
- Choose the option Share this printer and type in the Share Name in the text box.
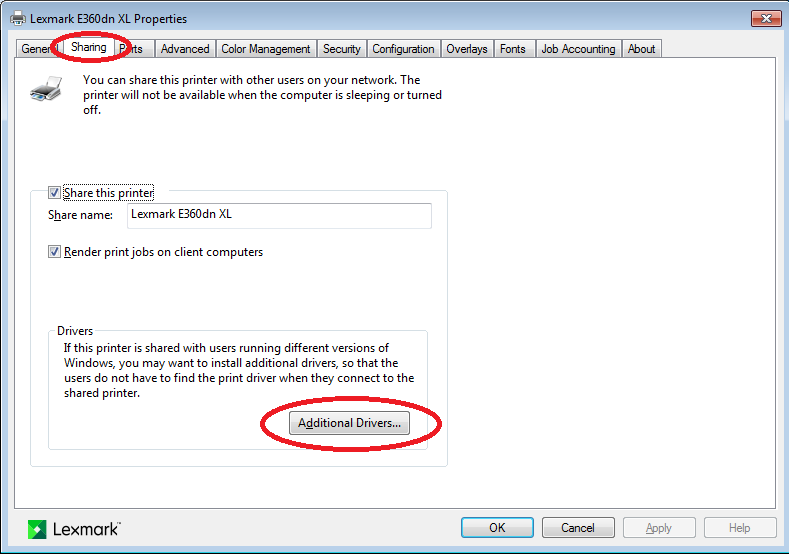
- Press OK to confirm this operation.
- Then you will see a hand appear under the printer icon
 .
On the Mac machine, make sure you are using Mac OS X 10.3.x or later. otherwise this will not work.
Connect to a Windows Shared printer on Mac:
- Double click Printer Setup Utility
 from GO -> Application -> Utilities folder
- Click on the Add
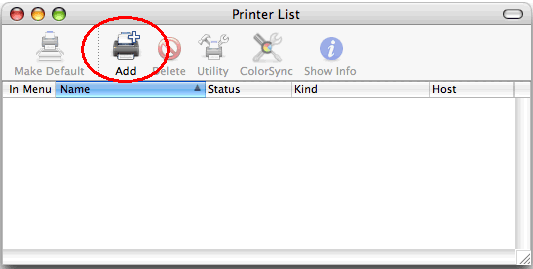
- Change the dropdown box from Windows Printing. In the new dialogue you can see that there is a dropdown box called WORKGROUP and the name of some computers.
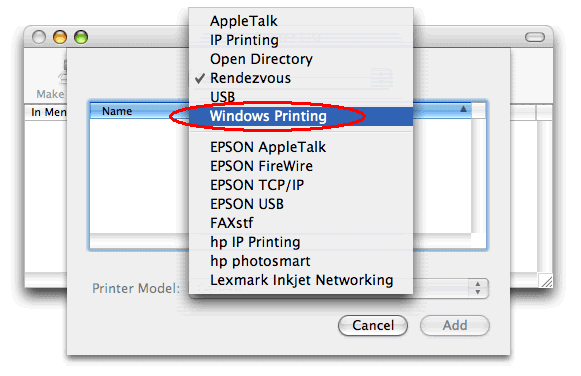
- Use the second drop down box to switch to the entire Network Neighbourhood.
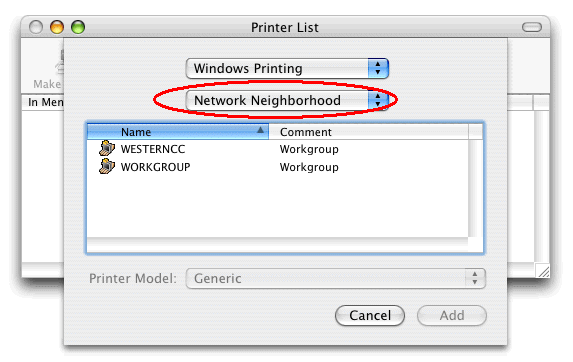
- Select the workgroup you use (e.g. EdUHK) and click Choose.
- Then look for the computer name of your Windows PC and click Choose. You may at this point be asked for a username and password, use the username and password from the PC not your Mac ones (By default the user name is EdUHK with password as blank)
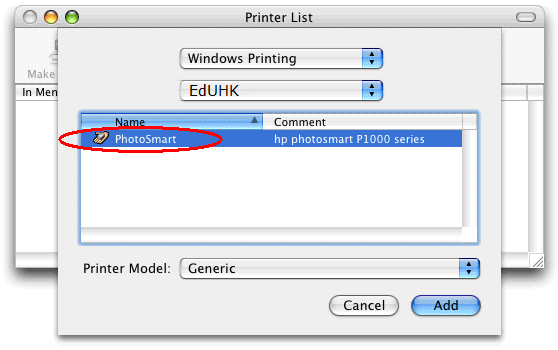
- Now highlight the printer. Under Printer Model, select the brand (e.g. HP).
- Select the correct printer model to install the printer drive. (e.g. HP Photosmart P1000, CUPS+Gimp-Print v4.25 in this example). You may need to use a third-party driver such as the HPIJS (external site, opens in new tab) drivers or the Gimp-Print (external site, opens in new tab) drivers, but this is not the case with all printers.

- Then click Add.
Microsoft 365
How to use Microsoft Outlook Online Archive?
What is the Microsoft Outlook Online Archive?
The Microsoft Outlook Online Archive is a cloud-based mailbox feature that allows you to store older or less frequently accessed emails outside of your main mailbox. This helps you manage mailbox size limits and keep your inbox organised. Starting in October 2025, Online Archive mailbox will be gradually enabled in all email accounts. No user action is required to enable this feature.
How do I access my Outlook Online Archive?
A new Online Archive mailbox will appear below your main mailbox. You can access your Online Archive mailbox via the Outlook Web App (OWA) or the Outlook desktop application. Below are the step-by-step instructions for both methods.
A. Accessing via Outlook Web App (OWA)
- Open your web browser and navigate to outlook.office.com/ (external site, opens in new tab).
- Sign in with your M365 account.
- Scroll down the left navigation panel and look for a folder called In-Place Archive - [Your name] in your mailbox folder list.

B. Accessing via Outlook Desktop App
- Open the Outlook desktop application.
- In the folder list on the left, look for a section labelled Online Archive - [Your email address].
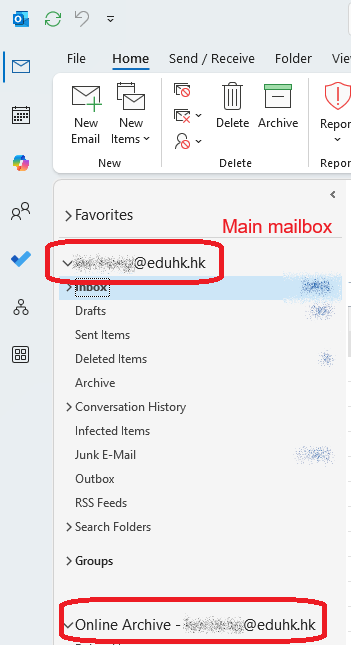
- Click to expand and browse the archived folders and messages.
How do I move emails to the Online Archive?
- Manually: Create sub-folders in Online Archive or In-Place Archive. Then, drag and drop emails or entire folders from your main mailbox to the appropriate folder in Online Archive or In-Place Archive. (Users are recommended not to keep emails directly in Online Archive, as they may not show in In-Place Archive.)
- Automatically: Choose from the preset retention policies that move items to the archive automatically after a certain period. Archived items will retain their original folder structure.
How to set up automatic online archiving?
All email messages and other Outlook items older than the retention period will be automatically moved to the Online Archive mailbox. Archived folders, sub-folders, and messages will retain their folder structure from the Inbox.
Procedures:
- Launch Outlook desktop app (in Classic mode).
- In the Folder list panel, select Inbox (or a folder to which you want to apply an online archiving policy).
- On the ribbon menu, click Folder > Folder Properties.

Note: If you don't see the Folder tab, please turn on the Classic Ribbon used.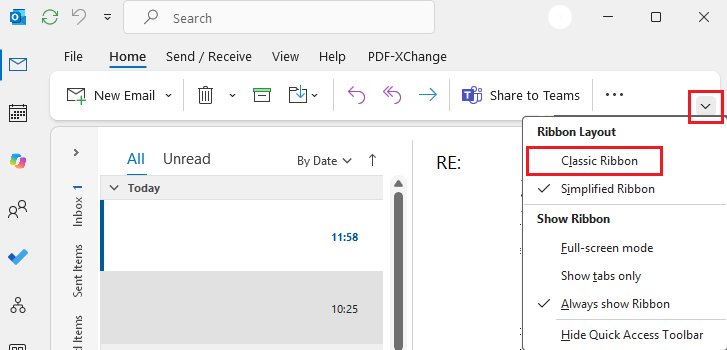
- In the Properties dialog box, choose the Policy tab. Under Online Archive section, select the period that items older than will be archived. Then, click OK when done.
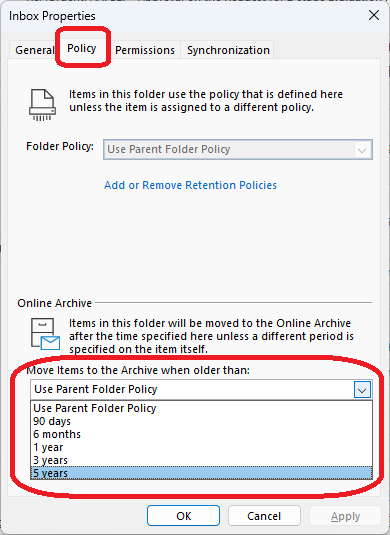
- When prompted, click OK to apply the changes.

- Repeat the process if needed. Sub-folders will follow the policy in their parent folder. For manageability purposes, we recommend that you keep the assignment simple.
- It may take up to 7 days for the policy to take effect.
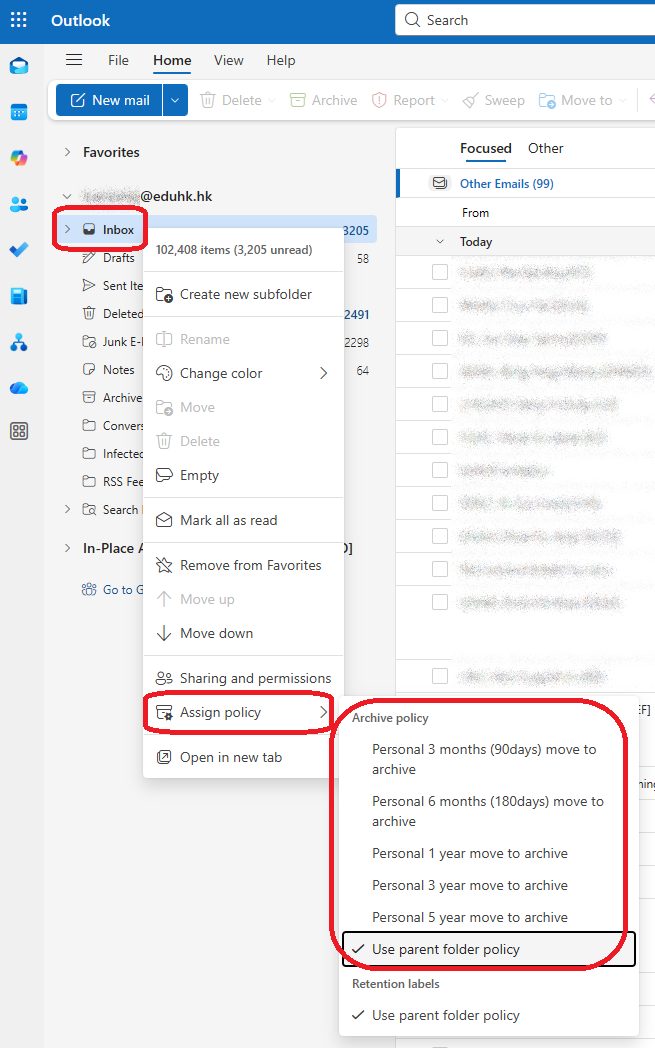
- (Optional) If you are using Outlook Web App (OWA), click menu (…) button next to the folder > Assign policy to select the archive policy you’d like to apply.
Can I search for emails in my Online Archive?
Yes, you can search the Online Archive just like you would from your main mailbox. Use the search box at the top of Outlook or OWA and specify the scope if needed.
Can I access the Online Archive from mobile devices?
Direct access to the Online Archive is not available through the Outlook mobile app. For full access, use a web browser or the Outlook desktop app on your computer.
How to check my M365 usage?
Please visit FAQ - How to check your M365 storage.
Reference
Please refer to Manage email storage with online archive mailboxes (external site, opens in new tab) for details.
How to check your M365 usage?
You can see the M365 usage with the following method:
Procedures:
- For Outlook: Please visit support.microsoft.com/en-us/office/mailbox-storage-limits-in-outlook-f170fe90-b859-4034-bcda-e186fc6a26f5 (external site, opens in new tab).
- For OneDrive: Please visit support.microsoft.com/en-us/office/manage-your-onedrive-for-work-or-school-storage-31519161-059c-4764-b6f8-f5cd29f7fe68 (external site, opens in new tab).
Configure Evolution to access Office 365
To configure the Evolution client to access the Office 365 environment, follow the steps below. Note: These instructions use Evolution 3.10.4 and the evolution-ews plugin version 3.10.4, result may be vary on different versions.
Procedures:
- Open Evolution
- From the menu bar, click Edit -> Preferences
- Choose Add from the Mail Accounts menu.
- Click Continue
- Enter your name as you would like it to display and enter your full email address "username@eduhk.hk" for Email Address, click Continue.
- The account information screen will find incorrect information. Click Go Back
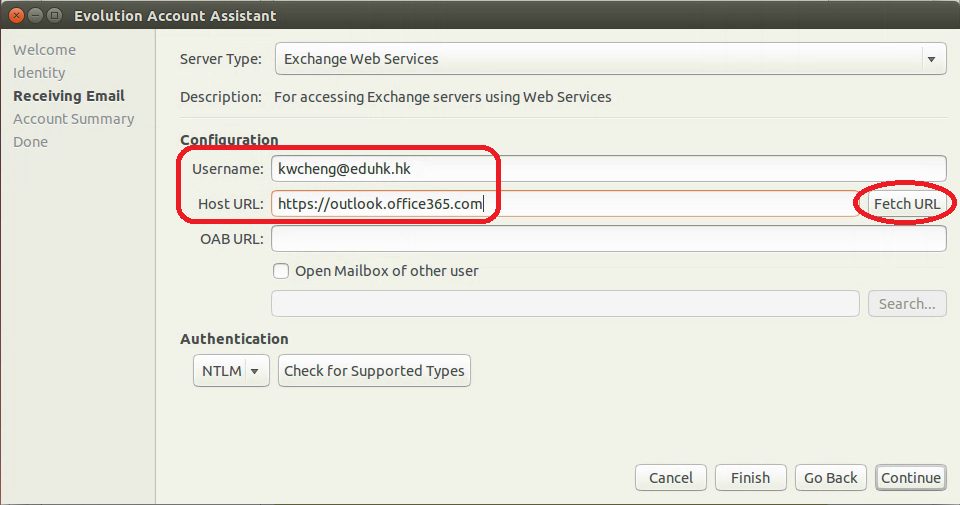
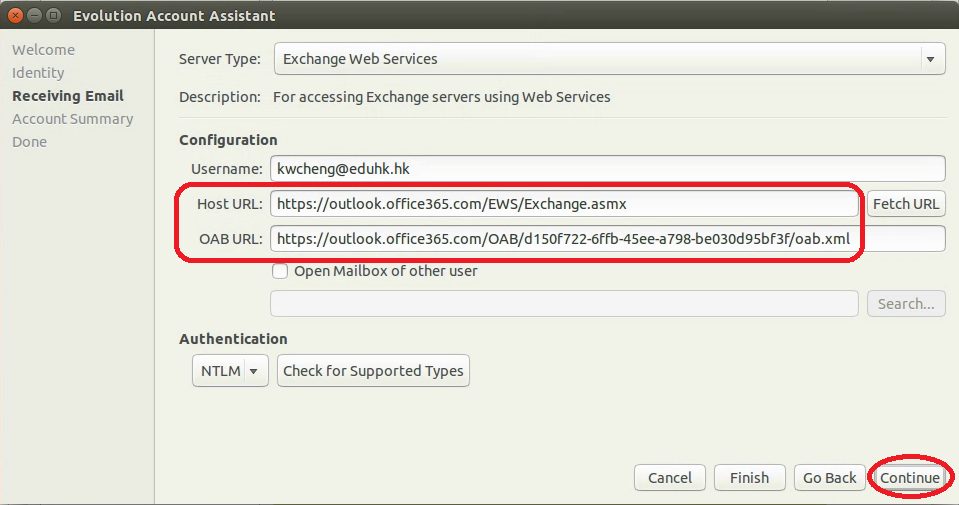
- Enter the following information for each field:
- Server Type: Exchange Web Services
- Username: username@eduhk.hk
- Host URL: https://outlook.office365.com
- Click Fetch URL
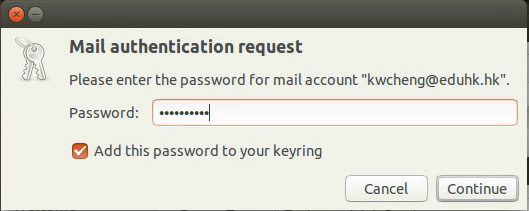
- Enter your password when prompt.
- Then the Host URL and OAB URL should be successfully discovered. Click Continue
- Click Continue to accept Receiving Options
- Enter any name for the account, and click Continue
- Click Apply
- If prompted, enter your password once more.
- Setup is complete. Email and calendar data will take some time to sync.
How can I scan a document or photo into a PDF file on a mobile device?
There are many mobile apps to scan and save a document or photo into a PDF file. Here are a few for your reference.
OneDrive mobile app
As all EdUHK members are using the Microsoft Office 365 service, the Microsoft OneDrive app can help you accomplish this task easily with just a few taps on the mobile device.
Procedures:
Scan documents using OneDrive app on iOS
First of all, you have to get the OneDrive app from App Store for iOS devices.
 (external site, opens in new tab)
- Or scan the QR code:

When you open the app for the first time, you have to login with your Office 365 account using EdUHK email address (i.e. username@eduhk.hk for staff and s1234567@s.eduhk.hk for students).
- In the OneDrive app, tap "Scan
 " from the bottom. (You can also tap "Add
 " at the top right hand side of the screen, then tap "Scan".)
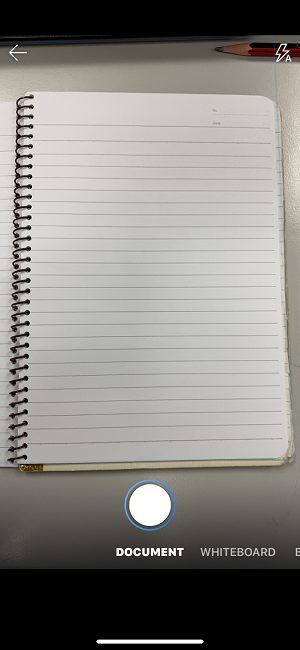
- Select either Whiteboard, Document, Business Card, or Photo, then tap the white circle icon to scan the item. The app takes a photo and automatically crops out the background.
- Once you have scanned your item, you can crop it, rotate it, add text, or highlight part of it. (If you do not like the image, tap the left arrow icon in the upper left hand side to delete the scan and try again.)
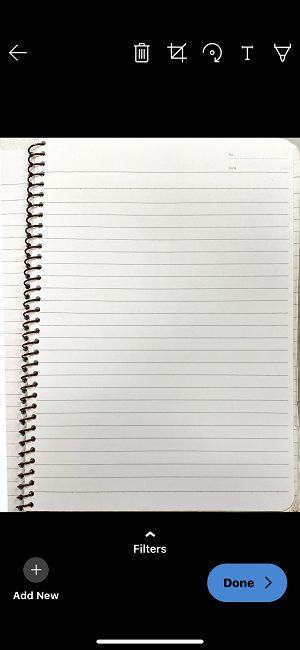
- You can also modify the filter you selected earlier (Whiteboard, Document, Business Card, or Photo), or change the mode (lighting adjustments and grayscale), by tapping Filters at the bottom.
- Tips:
- To combine multiple scans into a single PDF, tap Add New at the bottom on the left, then scan your next document.
- The maximum number of pages/images that can be multi-page scanned is 10.
- Once you are done editing your item, tap Done.
- Enter a file name, then tap the Tick on the upper right hand side to save the PDF file.
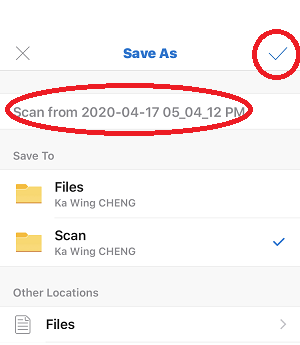
For details, please visit Scan a whiteboard, document, business card, or photo in OneDrive for iOS (external site, opens in new tab) (with a video demo).
Scan documents using OneDrive app on Android
First of all, you have to get the OneDrive app from the Google Play Store for Android devices.
 (external site, opens in new tab)
- Or scan the QR code:

When you open the app for the first time, you have to login with your Office 365 account using EdUHK email address (i.e. username@eduhk.hk for staff and s1234567@s.eduhk.hk for students).
- In the OneDrive app, tap "Scan
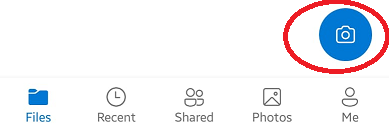 " from the bottom. (You can also tap "Add
 " at the top right hand side of the screen, then tap "Scan".)
- Select either Whiteboard, Document, Business Card, or Photo, then tap the white circle icon to scan the item. The app takes a photo and automatically crops out the background.

- Once you have scanned your item, you can crop it, rotate it, add text, or highlight part of it. (If you do not like the image, tap the left arrow icon in the upper left hand side to delete the scan and try again.)
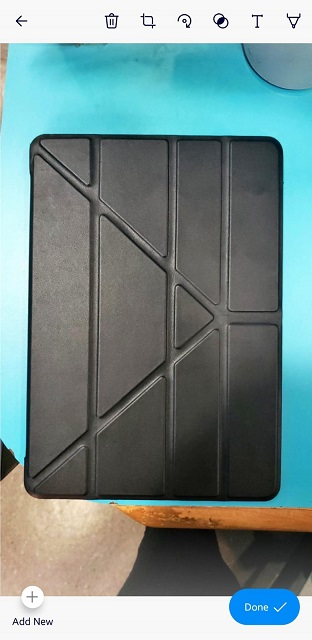
- You can also modify the filter you selected earlier (Whiteboard, Document, Business Card, or Photo), or change the mode (lighting adjustments and grayscale), by tapping Filters at the bottom.
- Tips:
- To combine multiple scans into a single PDF, tap Add New at the bottom on the left, then scan your next document.
- The maximum number of pages/images that can be multi-page scanned is 10.
- Once you are done editing your item, tap Done.
- Enter a file name, then tap the Tick on upper right hand side to save the PDF file.
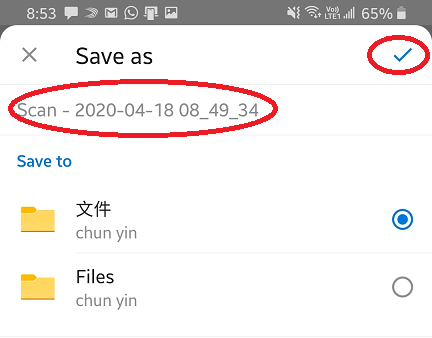
For details, please visit Scan a whiteboard, document, business card, or photo in OneDrive for Android (external site, opens in new tab) (with a video demo).
CamScanner mobile app
Another app we would like to introduce is called "CamScanner". This app provides in-app purchase while the free version is an ad-supported version and scanned documents are generated with a watermark.
Procedures:
Scan documents using CamScanner
First of all, you have to get the CamScnner app from the respective App Store.
- For iOS : (external site, opens in new tab) Or scan the QR code:

- For Android: (external site, opens in new tab) Or scan the QR code:

- Open CamScanner and take photos of your documents.

- Make sure Batch option is selected when taking photos. When all pages have been included, tap thumbnail at the bottom on the right.
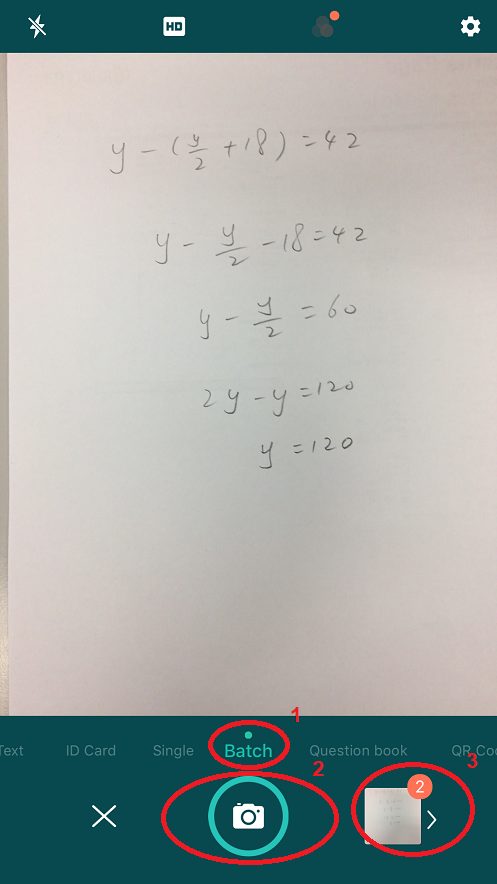
- A preview page will be shown. You can adjust the photo (e.g. rotate, crop, delete or re-take). Swipe left to go to next page. Repeat the checking and adjusting until all pages are done. Then click the "Tick" to finish.

- At this point, all the images shot in the same batch are ready for export.
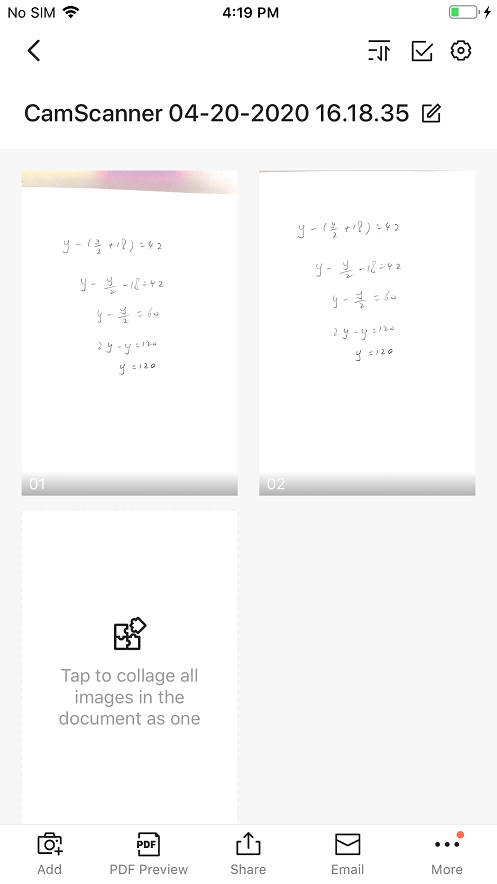
- Tap the Share icon and select PDF in the file type. A preview of the final PDF will be shown.
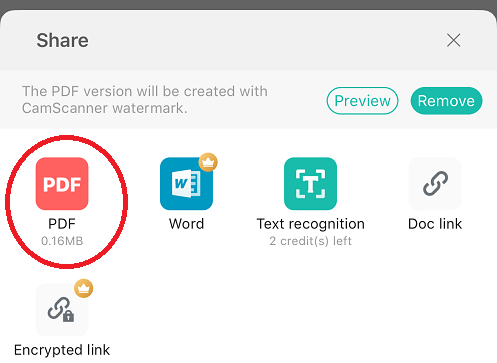
- Tap the Share button on the upper right hand side.

- Choose Save to Files to export the PDF file.

- You can change the "File name", then choose the location by selecting On My iPhone and choose a folder that the PDF will be exported to. Tap Add to finish.

Save Word/Excel/PowerPoint as PDF directly
On a desktop or laptop computer, you can convert your MS Word/Excel/PowerPoint into a PDF file directly.
For Windows:
- Click File > Save As, and change the "Save as type" to "PDF (*.pdf)".
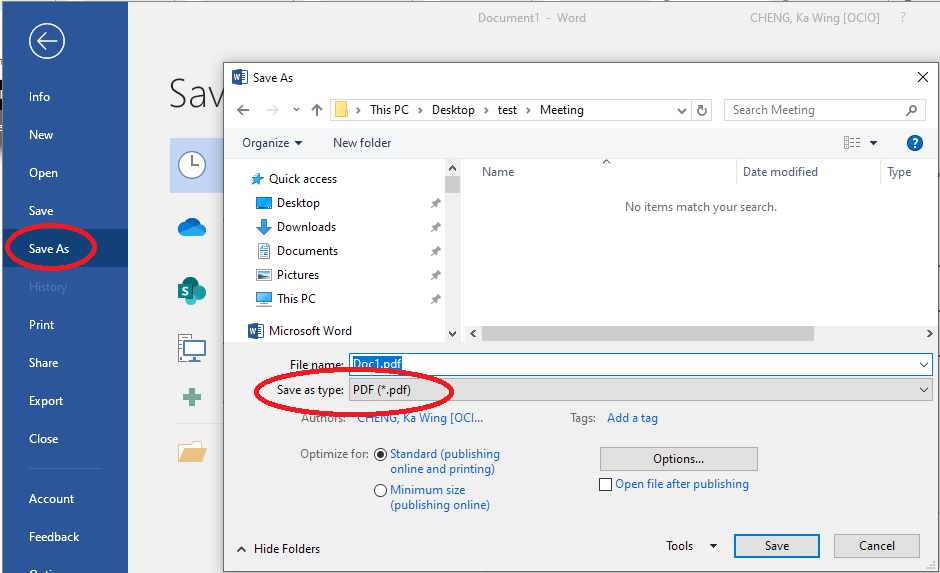
For macOS:
- Click File > Save As, and change the "File Format" to "PDF".
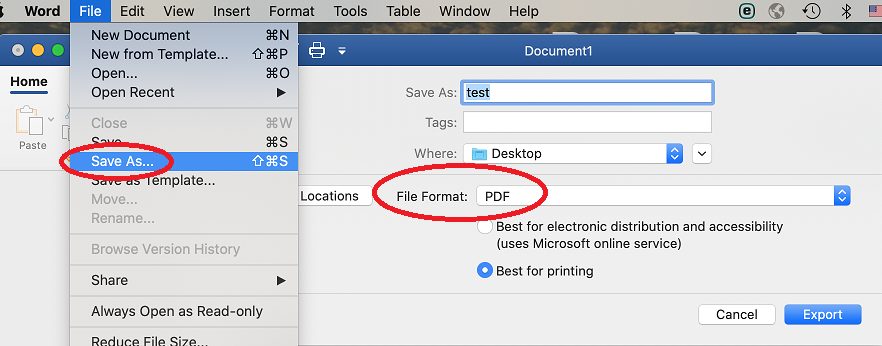
How to install Microsoft 365 Apps to your personal computer?
How to install Microsoft 365 Apps to your personal computer?
Staff and students are eligible to install Microsoft 365 Apps (formerly Office 365 ProPlus), a full version of the Microsoft Office suite, on personal PCs and mobile devices under the subscription by EdUHK.
What is Microsoft 365 Apps?
Microsoft 365 Apps (M365 Apps) is a full version of Office, which includes Word, PowerPoint, Excel, OneNote, Outlook, and more.
Note: "Microsoft 365 Apps for Mac" includes Word, PowerPoint, Excel and Outlook Only.
Each staff and student are eligible to install Microsoft 365 Apps on up to five home or personal PCs/Macs and up to five mobile devices.
Microsoft 365 Apps can be downloaded from Microsoft 365 website. Students can access Microsoft 365 from https://m365.cloud.microsoft/apps (external site, opens in new tab) and log in with their email address (eg. username@eduhk.hk for staff, sxxxxxxx@s.eduhk.hk for student) and network password. Mobile applications are downloadable on iOS and Android phones or tablets, and are pre-installed on Windows phones.
Note: Users are required to log into their Office 365 account every 30 days in order to continue using the fully unlocked versions of Office 365 ProPlus.
How to install?
For PC/Mac:
Note: Make sure you have uninstalled all trial or earlier versions of Microsoft Office on your personal devices before you install the M365 Apps.
- Log in to Microsoft 365 m365.cloud.microsoftapps (external site, opens in new tab).
- On the home tab, click "Install and more ➔ "Install Microsfot 365 apps".
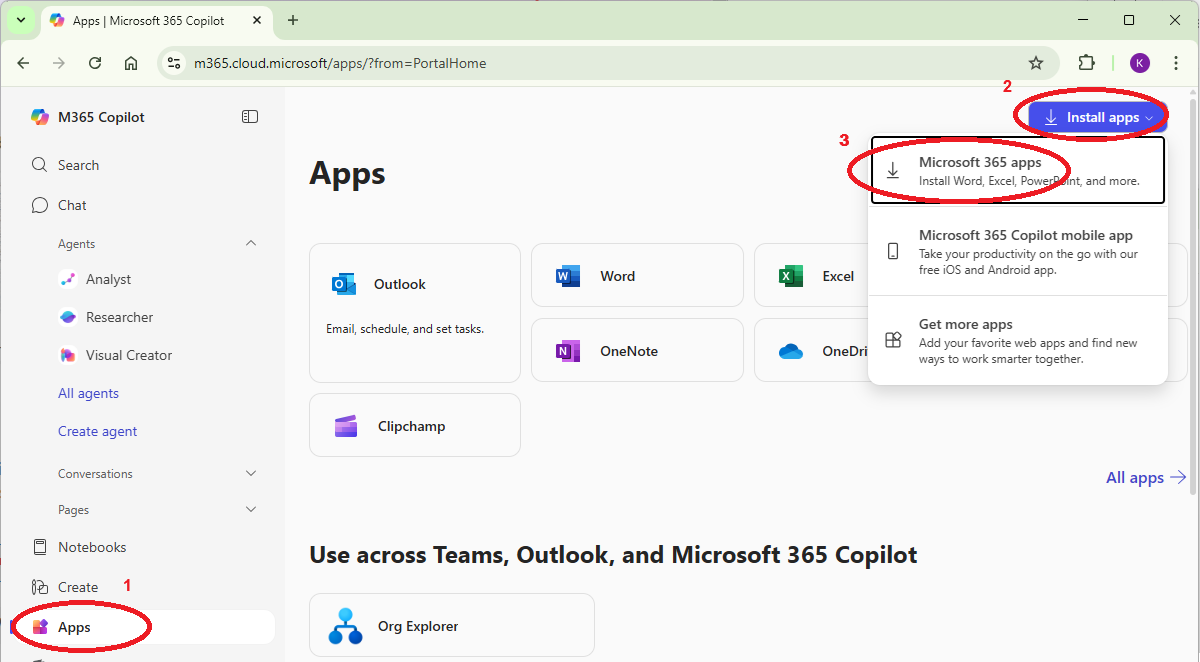
- Choose “Install Office” under the "office apps & devices session".
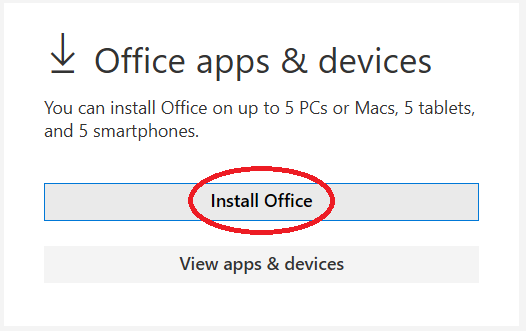
- Execute the installation file downloaded to your download folder of the web browser. Then follow the prompts to complete the installation.
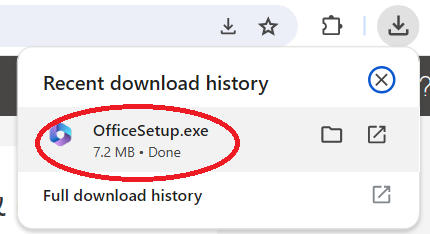
For Mobile Devices:
Please visit the app store (external site, opens in new tab) or (external site, opens in new tab) from your device and download the followings apps:
 Microsoft Word
 Microsoft Excel
 Microsoft PowerPoint
How to Sign Out of Office
If you have already installed the latest version of Office with M365 apps on five computers that you use and you want to install Office on a sixth computer, you have to "Sign out" on one of your current computers. If not, you will be prompt with the following error.
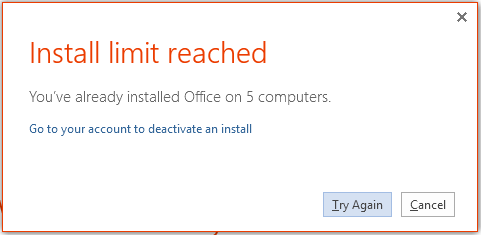
Procedures:
- Log in to Microsoft 365 portal.microsoftonline.com (external site, opens in new tab).
- From the left panel, click "Apps".
- Click "Install Apps ➔ "Microsfot 365 Apps".
- Choose “View apps & devices” under the "office apps & devices session".
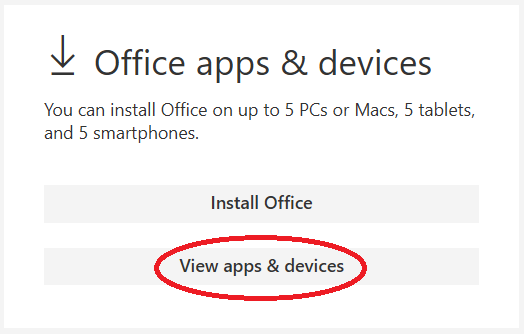
- Click the down arrow next to "Devices".
- Click the Sign out for the device(s) you want to remove the license on that computer.
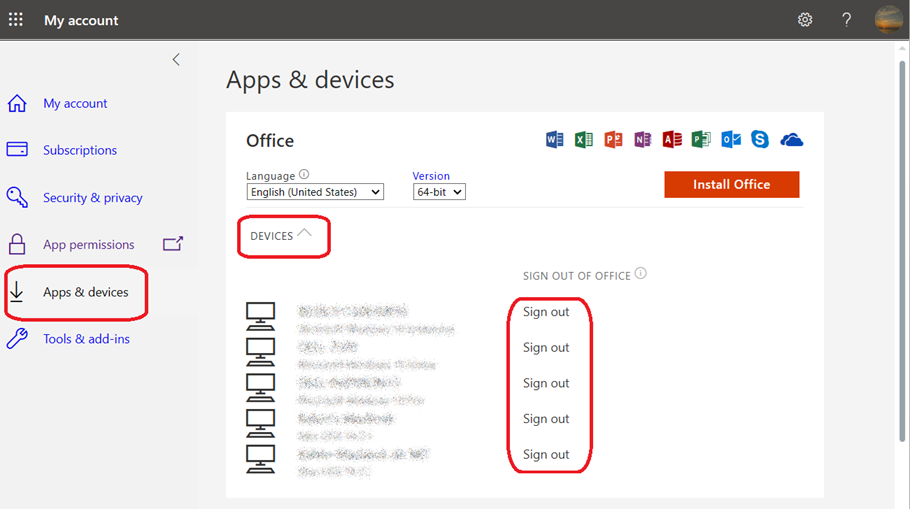
What happens after I cease to be a EdUHK member?
You are not eligible to access Mircrosoft 365 services once you are not a member of EdUHK.
How to log out of all Office 365 devices?
You may be asked to log out of all devices associated with your Office 365 account, in order to prevent or resolve an issue with your access or licenses.
Procedures:
- Please visit account.activedirectory.windowsazure.com/ (external site, opens in new tab), and login with your EdUHK email address.
- In the upper right corner, click the Account icon (this may display as your profile image), and then click Profile.
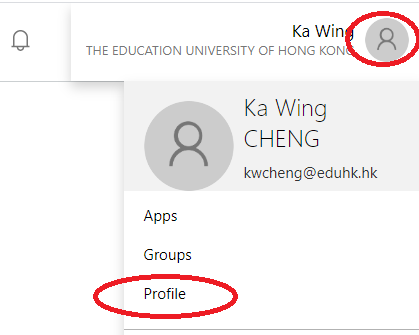
- On the Profile page, click the Sign Out Everywhere link.
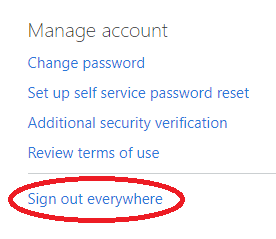
- Click Yes to confirm.
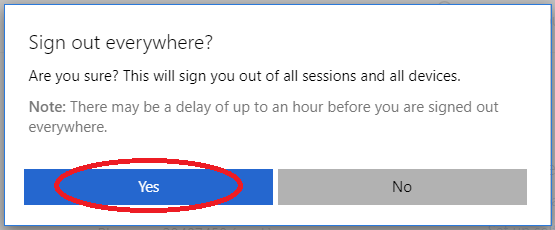
After completing these steps, all websites and software logged into your Office 365 account will be logged out.
To continue using them, just login again when prompted.
How to manage Outlook AutoComplete list
When you send an email from your Outlook account, the AutoComplete list function (also known as suggested recipients or nickname cache) creates a list of people you have previously emailed. In some cases, if you have emailed someone who has left the University and then returned, the cached information may no longer work even if their email address remains the same.
If you receive a bounce‑back message saying that your email was undeliverable even though the AutoComplete list entry contains the correct email address, you can clear your AutoComplete cache in the following ways:
Note
- There may be multiple users with the same display name. Please verify full email addresses before sending emails containing personal data.
- Microsoft does not share your AutoComplete list between your Outlook desktop application and Staff Email Outlook Web App. Each application creates a separate AutoComplete list
Remove AutoComplete list entries one at a time
- In Outlook, click the New Email button.
- In the new message window, in the To field, type the first few characters of the AutoComplete entry that you want to remove to have it appear in the list of suggestions.
- Hover your mouse over the entry to highlight it but do not select it, and then click X to remove the entry from the list.
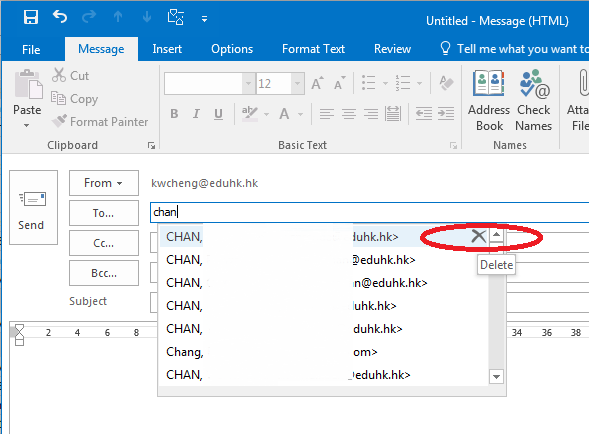
NOTE: Clicking X will remove the entry from the list and prevent it from appearing in your cache, but it may still appear in other areas of your Outlook, such as search boxes. If you send a new email to the same address, Outlook will add the entry back to the list.
Clear your entire AutoComplete list (For Classic Outlook)
- Click File > Options on the left‑hand panel.
- On the Outlook Options menu, click Mail on the left‑hand panel.
- In the Send messages group, click Empty Auto‑Complete List.
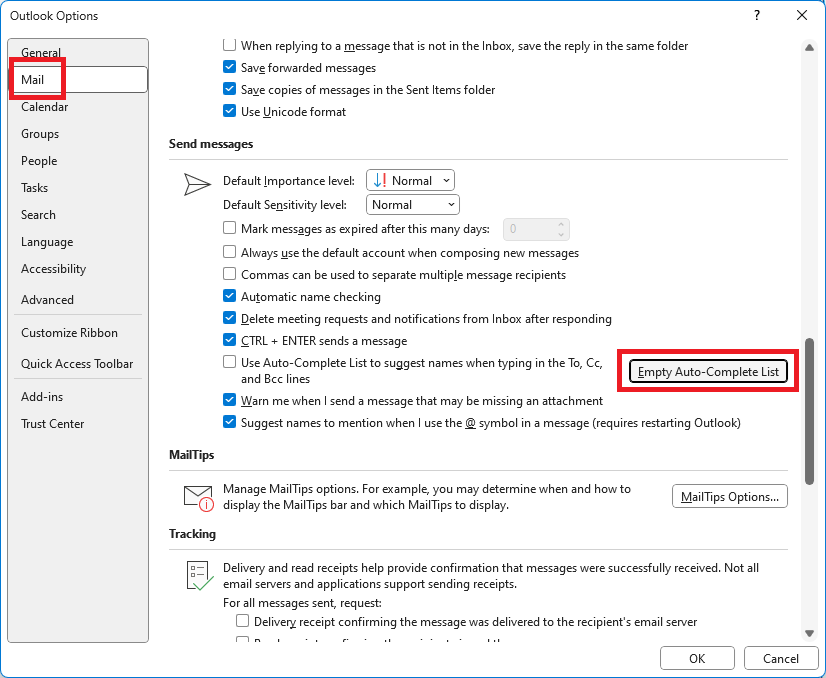
- When prompt for confirmation, click Yes, and then click OK.
Turn off the AutoComplete list function (For Classic Outlook)
- Click File > Options on the left‑hand panel.
- On the Outlook Options menu, click Mail on the left‑hand panel.
- In the Send messages group, clear the Use Auto-Complete List to suggest names when typing in the To, Cc, and Bcc lines check box, and then click OK.
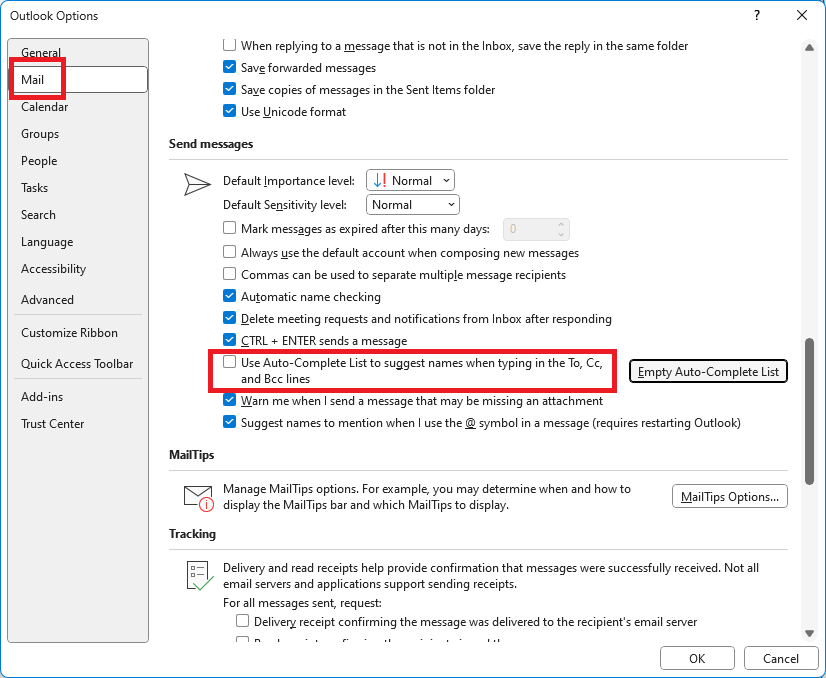
- When prompt for confirmation, click Yes, and then click OK.
For more information, please visit:
How to prevent further share on the shared files or folders to others in OneDrive?
By default, when you share a file/folder to other user with "Can Edit" permission. They can grant the file/folder access to 3rd person. If you want to prevent further sharing from other user, you need to setup the the "Access request and invitation" for your account.
The access request feature allows people to request access to content that they do not currently have permission to see. As a owner, you can configure the feature to send you email when someone requests access to the share file/folder. You can then choose whether to approve or decline their request. If you approve the request, you can also specify the specific level of permission you’d like to assign to a user.
Set up access requests
- Login Office 365 portal (external site, opens in new tab).
- Browse to your OneDrive for Business. (At the top bar, select the Office 365 app launcher icon, and then select OneDrive.)
- Go to "Settings
 " -> "Site Settings".
- Under Users and Permissions, click "Site Permissions".
- On the Permissions tab, click Access Request Settings.
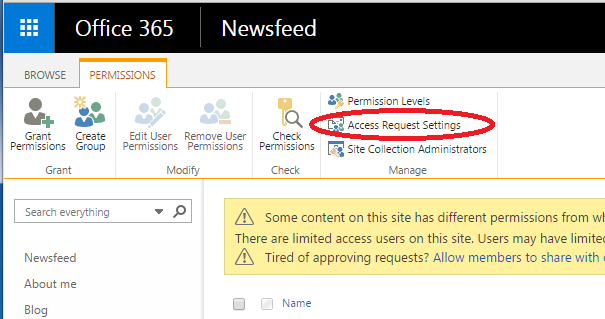
- In the Access Request Settings dialog box, select the "Allow access requests", and then type the email address of the person you want to make responsible for approving access requests (Normally the owner of this account).
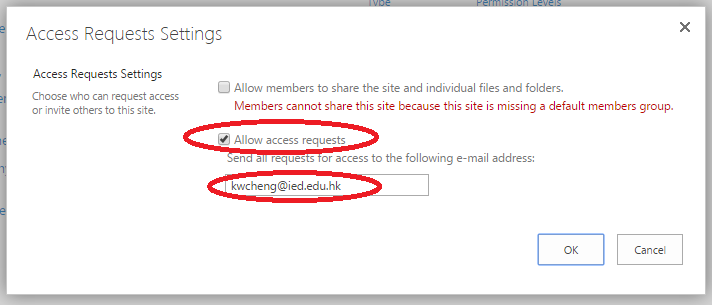
- Click "OK".
Approve or decline access requests for a site:
You will receive a email showing that someone is requesting to share the file/folder to other user. You can click on the provided hyperlink to accept/decline the request.
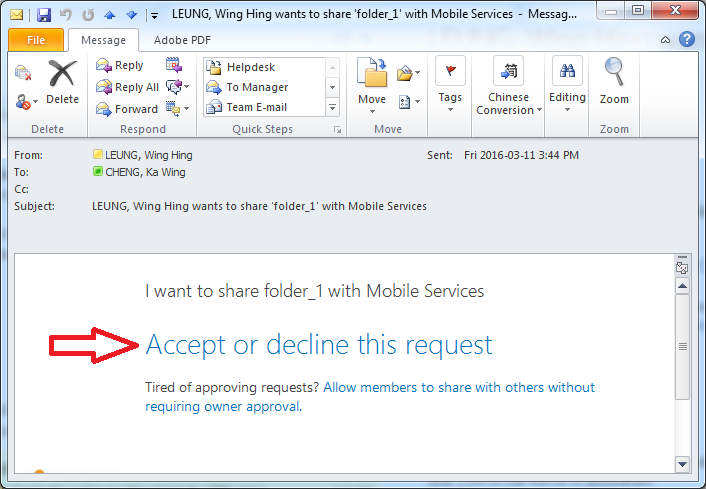
or you can access the Office 365 portal to view the request:
- Go to "Settings " -> "Site Settings".
- Under "Users and Permissions", click "Access requests and invitations".
- Under Pending Requests, find the request you want to update, click the ellipses . . . to open the menu.
- Under Permissions, select the permission level you would like to assign the user (if you plan to approve the request). You can also optionally type a message to the person requesting access.
- Click "Approve" or "Decline".
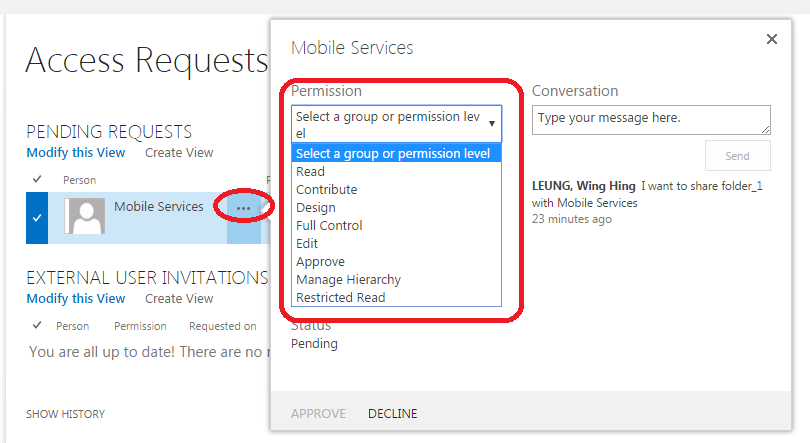
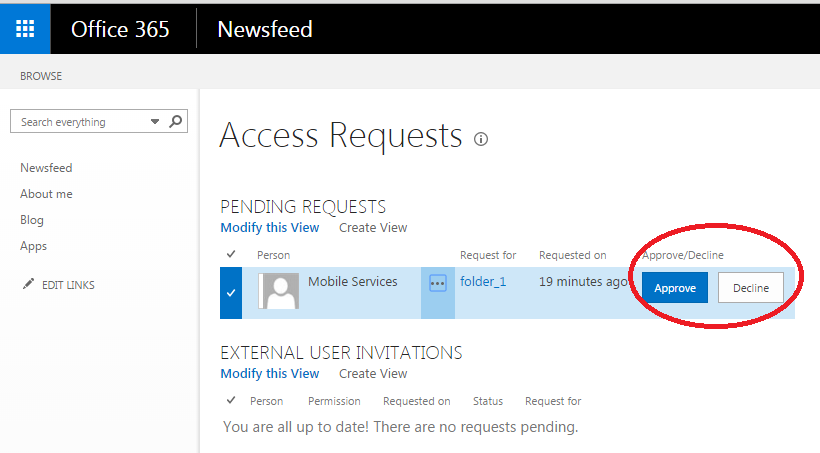
For details, please visit Set up and manage access requests (external site, opens in new tab).
How to redirect email to another account on Office 365 Outlook Web App?
You can have your emails automatically forwarded to another address. You can forward all of your new messages by creating a redirect rule in Outlook Web App on Office 365.
Procedures:
- Login Outlook Web App (external site, opens in new tab)
- Click the Gear icon -> Options -> Organize Email -> Inbox Rules.
- Click the New icon
 and select "Create a new rule for arriving messages..."
- In the Name field, enter the name of this rule. (e.g. Redirect email to another account)
- From the *When the message arrives, and: field, choose "Apply to all messages"
- From the Do the following: field, choose "Redirect message to..."
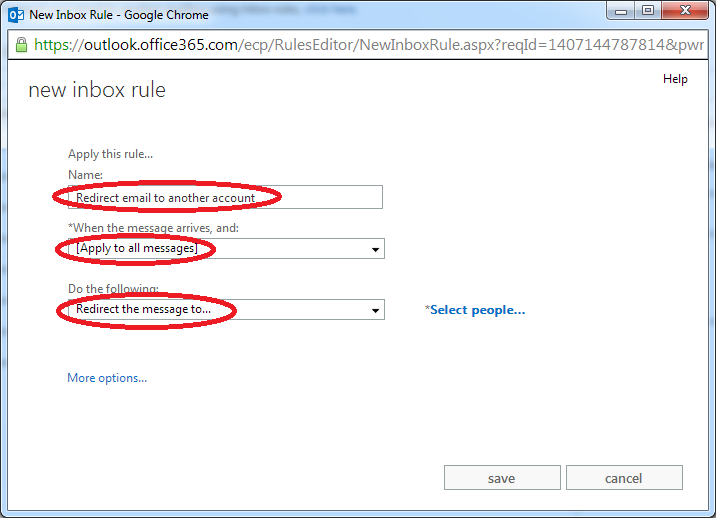
- A pop-up windows will be shown. Enter the email address of account you want to receive the emails. Then Click "OK"
- Then click Save
- Click Yes, when the warning message prompt.
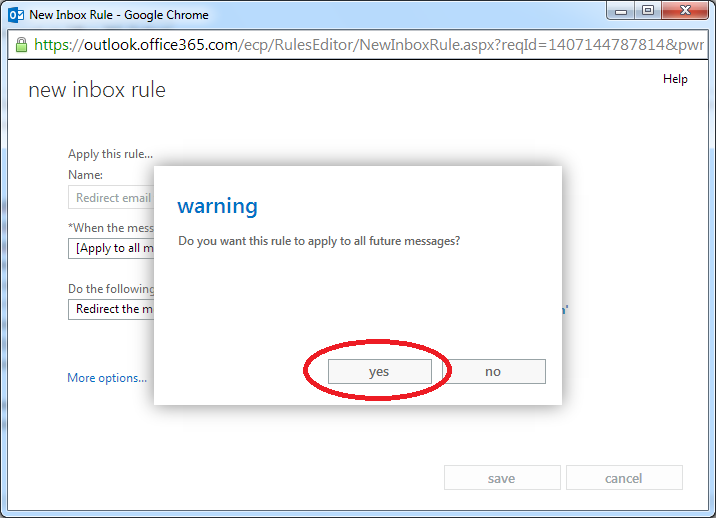
- Make sure there is a tick for the new rule. The rule is effective now. (If you want to turn off the rule, just un-tick it.)
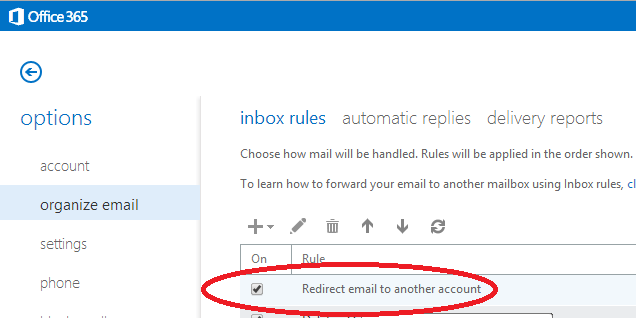
Note:
- If an invalid email address is used, your emails will be lost.
- User should clean up the mailbox regularly. Otherwise, you may encounter problems when email usage has exceeded the quota limit.
How to retrieve the attendance list for a MS Teams meeting?
With the July 2020 updates, meeting organizers can view and download a meeting attendance report on Microsoft Teams. You can find this report in the Participants pane of the meeting, by clicking the download arrow as shown below. You can download the report as a .CSV file (text format).
To retrieve attendance list
- During the Teams meeting, open the "Participants pane".
- Click the download arrow to retrieve the attendance report.

- A .CVS file (text format) will saved to your download folder.
- The report includes the information like "Full Name", "User Action" and "Timestamp" only.
Note: Please be sure to download the attendance report before the class ends.
How to sync OneDrive for Business files with computers?
To work with your OneDrive for Business files directly in File Explorer and access them even when you're offline, sync the files to your computer. Whenever you're online, any changes that you or others made will sync.
To sync OneDrive for Business to your computer, you need to have the OneDrive for Business Sync Client. You can install it from the "Network Teaching Software" or get the latest version from Download OneDrive for Windows (external site, opens in new tab).
-
(Screen capture based on OneDrive client version 2015 Build 17.3.6390.0509)
- Once you start the installation, it will take few minutes.
- Enter your email address (e.g. username@eduhk.hk for staff or sXXXXXXX@s.eduhk.hk for students). Then click sign in
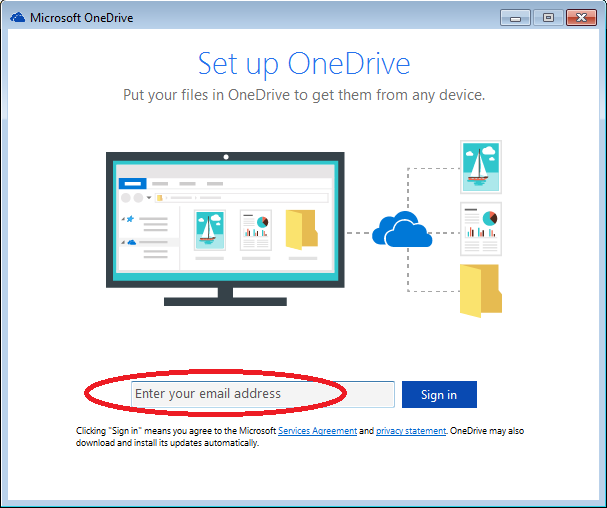
- Enter your password when prompt.Then click "Sign in".
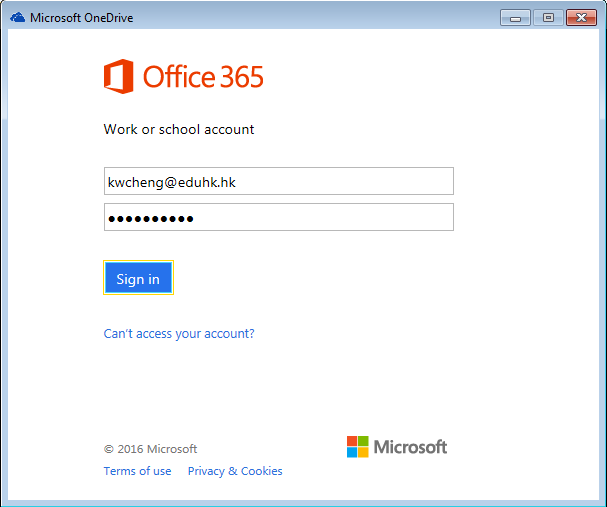
- One drive will create a folder on your computer for synchronization. (The default location would be "C:\Users\username\OneDrive - The Education University of Hong Kong"). Click "Next" to continue.
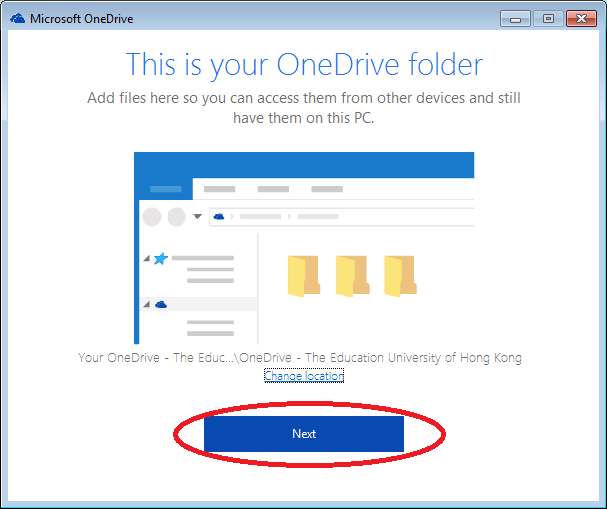
- Choose the folder(s) you would like to sync to your computer (By default, all folders on OneDrive will be selected). Then click "Next".
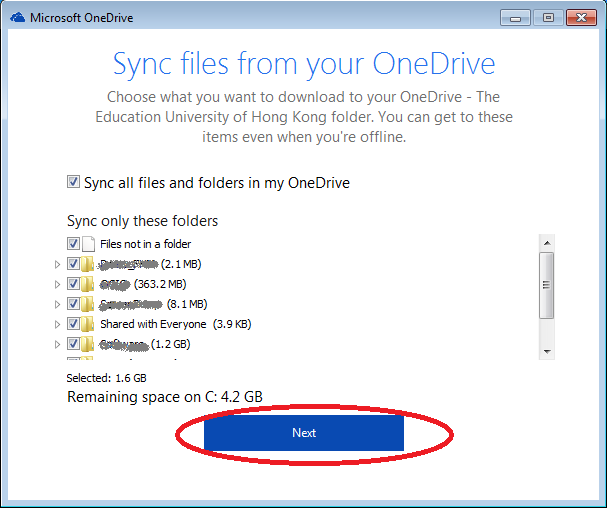
- The OneDrive is completed.
For details, please visit Sync your OneDrive for Business files (external site, opens in new tab).
How to update membership on departmental mailing list/AD group?
Registered user (DCC) can update membership on the departmental mailing list / Active Directory (AD) group.
For mailing list, user need to update membership on the Departmental Add. Members of Staff Mailing List. The updated list will then be replicated to the corresponding departmental mailing list.
Procedures:
- Open "Network Application"

- Choose "AD Group & User Object"
- Type in the keywords (e.g. OCIO), and click Find Now
- From the "Search results:" window, locate the account name with the text add in the middle (e.g. ocio_add_all or ocio_add_academic)
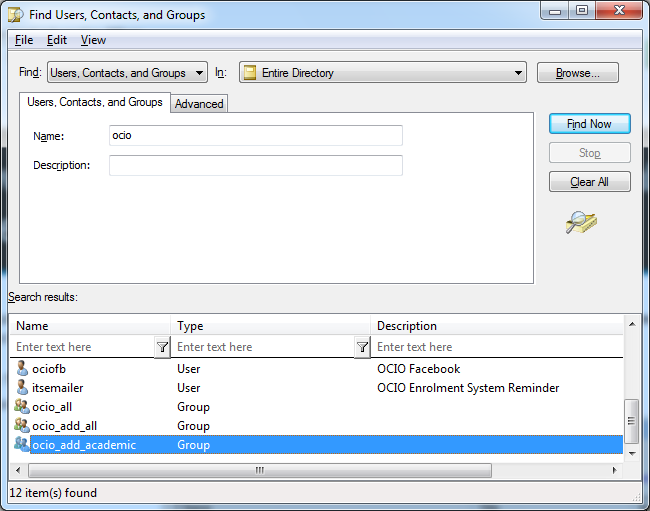
- Double click the desired account (e.g. ocio_add_all)
- Click on the Add... button
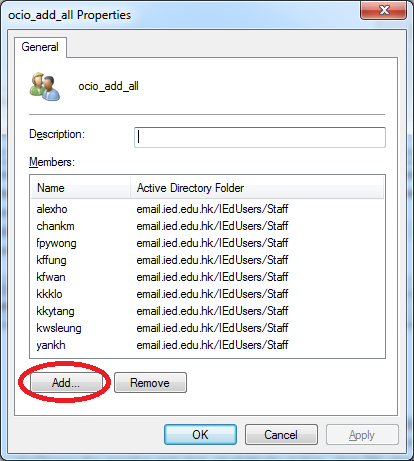
- Enter either the full name or the user id of the user account you want to add in the "Enter the object names to select". Then click "Check Names"
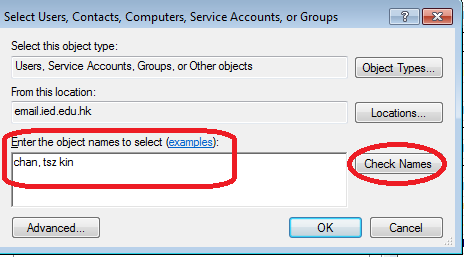
- Valid result will return the user's email address underlined. Then press all OK" to finish.
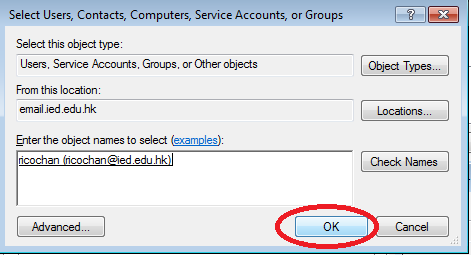
Note: The DCC needs to remove member from the Departmental Add. Members of Staff Mailing List / AD group manually when needed.
How to update my profile photo on Office 365?
Office 365 allows users to add or change their account profile photo with a personal one. The profile photo could be shown on Outlook and other Office 365 services so users can easily identify the right person. To update your profile photo, please see Add your profile photo on Office 365 (external site, opens in new tab) for details.
Notes:
- Your photo will appear everywhere there's a profile photo circle in Office 365.
- The photo uploaded should be a JPG, PNG or GIF format and should not be larger than 4MB.
Settings for POP or IMAP access to Microsoft 365
For staff, you can connect to your Microsoft 365 that use the POP3 or IMAP4 Internet protocols. Connecting to your Microsoft 365 email account using POP3 or IMAP4 only lets you send and receive email. You can’t connect to your contacts, tasks, or calendar when you connect to your account using POP3 or IMAP4.
Do the following to look up your settings.
- Sign in to your account using Outlook Web App (external site, opens in new tab).
- In Outlook Web App, click Settings (Gear icon) and click View all Outlook settings
- Then choose Mail from the left and choose Sync email.
- The POP3, IMAP4, and SMTP server name and other settings you may need to enter are listed.
Here is a quick reference to the Microsoft 365 POP3 and IMAP4 settings but you are recommended to check the latest settings using the above method.
| PROTOCOL | SERVER NAME | PORT | ENCRYPTION METHOD |
| POP3 | outlook.office365.com | 995 | TLS |
| IMAP4 | outlook.office365.com | 993 | TLS |
| SMTP | smtp.office365.com | 587 | STARTTLS |
What are the limitations with Microsoft 365?
Limitations with Microsoft 365
Microsoft 365 Mailbox Staff Only | |
| Mailbox storage limit | 50GB |
| Message size limit | 20MB |
| Attachment limit | With individual attachments limited to 20 MB |
| Subject length limit | 255 characters |
| Recipient rate limit | 10,000 recipients per day. After the limit has been reached, messages can’t be sent from the mailbox until the number of recipients that were sent messages in the past 24 hours drops below the limit. |
| Recipient limit | 400 recipients, distribution group counted as one. |
| Message rate limit | 30 messages per minute |
| Retention period for items removed from the Deleted Items folder | 14 days |
| Maximum message size for large distribution groups (>5000 members) | 2 MB |
Microsoft 365 OneDrive | |
| OneDrive (sharepoint included) storage | 50GB |
| File and path length | Up to 400 characters |
| Invalid file types | Files with a *.tmp or *.ds_store extension, desktop.ini, thumbs.db, or ehthumbs.db (Full list of file type cannot be added (external site, opens in new tab)) Any file that’s currently open by an application. |
| Invalid characters in filename/folder | " * : < > ? / \ | |
| No. of Items (files & folders) can be synced to OneDrive | Up to 300,000 files |
For more information, you can refer to the following links:
What is Focus Inbox (former Clutter) in Office 365?
Focused Inbox is a refinement and improvement of a previous feature called Clutter. Clutter’s purpose was also to help you focus on the most important items in your inbox, but it did so by moving “Other” email to a separate folder. Focused Inbox makes it easier for you to stay on top of incoming email without having to visit another folder.
Active Clutter users will receive the Focused Inbox, but it will be off by default and able to be turned on in Settings. If the users chooses to enable, they will no longer receive less important email in the Clutter folder. Instead, email will be split between the Focused and Other tabs in their inbox. The same machine-learned algorithm that moved items to the Clutter folder now powers Focused Inbox, meaning that any emails that were set to move to Clutter will now be moved to Other.
Turn Focus Inbox on/off
Read the help article (external site, opens in new tab) for more details on the prompts users will see and how to turn Focused Inbox on and off:
PC Hardware
How can I use the Qlity external USB CDRW drive with a PC or notebook?
In order to use the Qlity external USB CDRW drive, please make sure the following requirements are fulfilled:
- The computer has a USB port which is not in use.
- The computer must have Windows properly installed.
- Make sure that necessary software for using the CDRW drive has been installed. Note that Adaptec Easy CD Creator is included in the package (a CDROM and a floppy diskette) so that you could install it in your computer for using the CDRW drive. You may also install the software in your office PC through the online software installation (EdUHK system, opens in new tab) web page.
To use the CDRW drive, please follow the steps:
- Connect the power adapter to the CDRW drive and turn it on. The power switch is at the rear side of the drive.
- Turn on the PC or notebook, if it is not.
- Connect the USB cable (provided) to the drive and then to the USB port on the computer.
- If this is the first time that you are using the CDRW drive with the computer, you will be prompted to install the software driver for the device when you connect the USB cable to the USB port of the computer in step 3 above.
- You will then see a new drive letter for the Qlity CDRW drive.
Important Note:
- Close other software applications while writing to the CDRW drive to avoid buffer overrun.
- If you are using the CDRW drive with a notebook computer, DO use A/C power supply instead of using the notebook battery.
How to Optimize your LCD Display?
Liquid Crystal Display (LCD) monitors are widely used in the Institute. To optimize the performance and the image quality of the LCD monitor, there are a number of set up or fine tunes which users might want to try it out though they are optional.
- There is a common misunderstanding that larger LCD monitor will give larger image just like an old TV set. It is not always true. Most of the computer monitors are of around 100 DPI (dot per inch) which means the dot size remains more or less the same for different size of monitors under native resolution. Unlike the traditional TV set, larger LCD monitor will allow you to squeeze more pixels or dots into the monitor and will not make the image bigger. Nevertheless, you can show more information on the screen e.g reading email and word/pdf document with less scrolling. You might want to change the font size of the menu as indicated below but most of the image and icon size will remain the same.
- Set up the Contrast and Brightness of the LCD monitor through the button at the bottom of the monitor itself so that it blend with the ambient light. It will reduce the stress to your eyes.
- Set up the LCD monitor to native resolution: For 19 or 17 LCD monitor, the native resolution should be 1280x1024. For 15 LCD monitor, it should be 1024x768. Setting a LCD monitor to resolution other than the native one will generate blur images - please kindly refer to ClearType FAQ (external site, opens in new tab) for checking if you are using native resolution. For staff who prefer larger image size, they could set up their LCD monitor to non-native resolutions but the image will not be as sharp as native resolution.
- Set up Large Font if needed: At high resolution, standard font on the menu and label of the windows might be too small to read, users could use Larger font for the menu text and label which means less eye stress. (In Windows, just change it from the Control Panel - Display -> Appearance -> select Large in the font size drop-down box)
- Set up Clear Type to make use of the sub-pixel technology to make the text on LCD monitor looks better. For more information about ClearType Technology in Windows, please refer to ClearType information (external site, opens in new tab). Visit the ClearType Tuner (external site, opens in new tab) and you can enable and fine tune Clear Type setting in Windows. Please note that Clear Type Technology are for LCD monitor only and it is not applicable for conventional CRT monitors.
- For the best color reproduction, you might want to calibrate your monitor with Adobe Gamma in Windows - visit Monitor Calibration and Characterisation (external site, opens in new tab) for detail. Unfortunately, good color reproduction on your LCD monitor might render the monitor too bright and it might induce stress to your eyes.
How to tackle papers jam problem in my local/network printer?
Please use standard photocopy grade papers. Papers should be kept dry. Damp papers have higher chance for paper jam.
If problem persists, report to IT Help Desk Hotline at 2948 6601 so that maintenance work can be arranged.
How to take good care of your laser printer?
Laser printers can be used for years. The fuser unit is one of the most delicate component in the printer. You can use it for years if it is used properly. Nevertheless, a small hard object might damage the unit. Damaged fuser unit might result in bad printing images or lines. It costs HK$1000-2000 to get replaced.
- Small hard objects or materials with low melting points will damage the fuser unit . Staples or pins can ruin the whole fuser unit.
- Recycled paper is not recommended unless it is in good condition.
- Use proper paper - paper too thin, too thick will jam the printer.
- When paper jam, do not use brute force to remove the jammed paper. It might damage the fuser unit. Remove the paper gently.
Be considerate. Please do not let the followings get into printers.

What should I do when PC/printer fails frequently?
Most of PC/printers or peripherals supported by OCIO are under maintenance/warranty. Report the problem to IT Help Desk Hotline at 2948 6601 and professional service engineer will fix the problem.
For equipment that need to return to vendor for repair, subject to availability similar or better model will be provided as a replacement. For equipment which fail frequently, OCIO will replace it with a similar or better model so as to reduce interruption to users' work.
[Staff Only] What if I need a notebook for short term use?
Staff Only Departments have notebooks for share use. You should contact the DCC in your department for details.
PC Software
Can I create a booklet using MS Word?
In Office XP, there is a new feature to create a Book Fold document.When you create a booklet, it's best to start with a blank document so that you have better control over the placement of text, graphics, and other elements. You can also add a Book Fold to an existing document, but you may have to reposition some elements once the book fold is in place.
Procedures:
- Start a new document or an existing one you need.
- From the menu bar, click File -> Page Setup
- From the Margins tab, select Book fold in the Multiple Pages list. If your document is not set to landscape orientation, Microsoft Word sets it to landscape automatically.
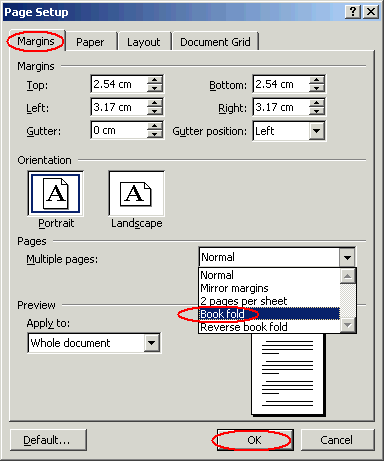
Note:
- If you need to create a booklet with Right-to-Left text orientation, select Reverse book fold in the Multiple Pages list instead.
- If you aren't using a duplex printer, In the Print dialog box, select the Manual duplex check box. MS Word will print all of the pages that appear on one side of the paper, and then prompt you to turn the stack over and feed the pages again.
Change color for items in Holiday Category in Outlook
In order to make the Outlook calendar to show holidays in color, you can apply a category to it.
Procedures: (For Outlook 2021/2019)
- Open Microsoft Outlook and click to view your calendar.
- Select a holiday entry in your Calendar.
- Open the Color Categories dialog by tab Appointment/Meeting-> Categorize-> All Categories…
- Click on the category name: Holiday (not in Master Category List)
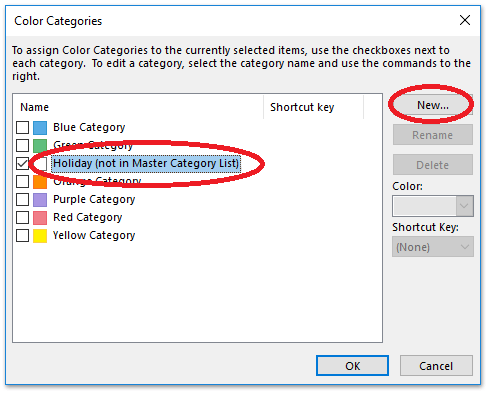
- Press New…
- Leave the name as it is but select a color for it.

- Press OK and OK again to return to your Calendar.
- Now all holidays will be shown in the color you choose.
Excel Data cannot retain the format in Mail Merge?
Issues with Dynamic Data Exchange Option in Excel
Various issues may arise when the Excel option, Ignore other applications that use Dynamic Data Exchange (DDE), is selected.
Workaround: Click the Microsoft Office Button (upper left corner of Excel), and then click Options. In the Advanced category, scroll down to the General options, and then clear the Ignore other applications that use Dynamic Data Exchance (DDE) check box. Restart Excel.
Grammarly for Microsoft Office add-in Document Not Detected Error
On Windows 10, starting with the June 2019 build, users reported issues with Grammarly's Microsoft Office integration. Users would receive an error "No document is open or your document could not be detected. Please try to open your document again." indicating that their document could not be detected when trying to use Grammarly in Microsoft Word 2016 or 2019.
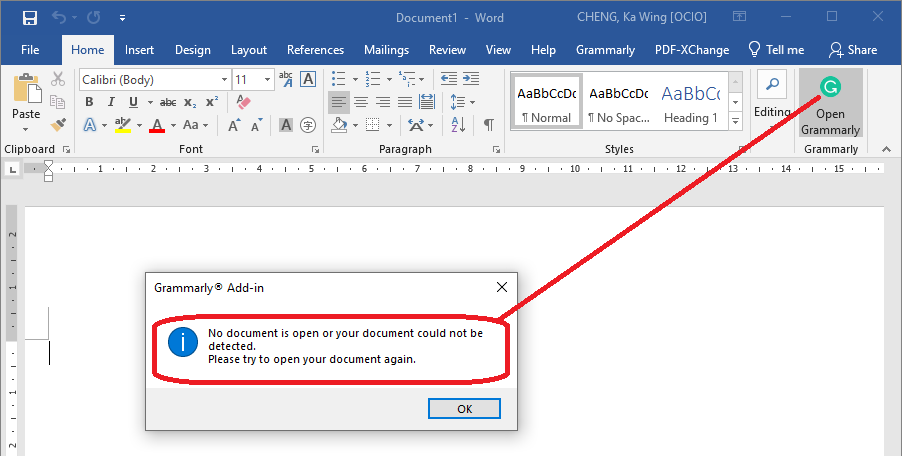
Resolution:
- Uninstall any currently installed versions of Grammarly
- If asked whether you would like to keep any of the sign in or user-specific information, tick the option "remove user settings and login information" to remove it on uninstall.
- Download the latest version of Grammarly for Microsoft Office add-in at - "www.grammarly.com/office-addinwindows (external site, opens in new tab)
- Double-click "GrammarlyAddInSetup.exe" to launch the installer. When prompted, click "Run" to continue the installation.
- On the "Getting Started" screen, press and hold the "Ctrl + Shift" keys simultaneously and then click "Get Started"
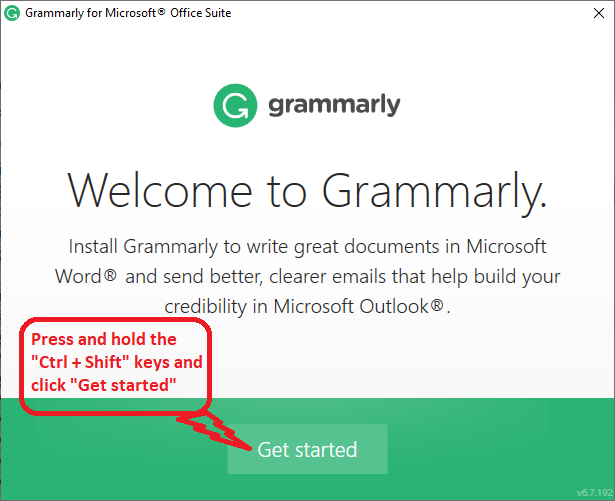
- On the following screen check the box to "Install for all users". Then click "Next" to continue the installation.
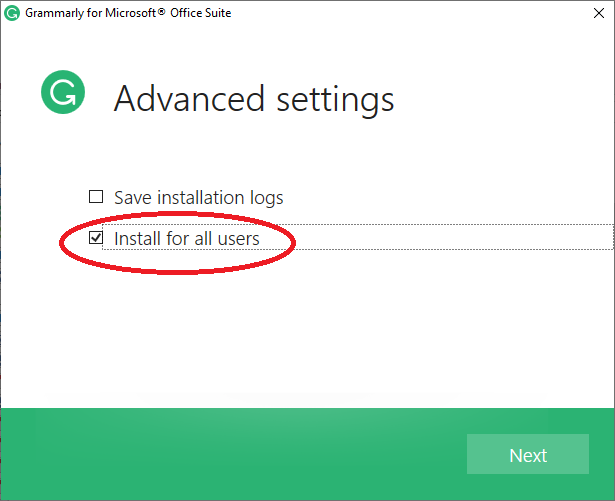
- Click "Next" for the installation path.
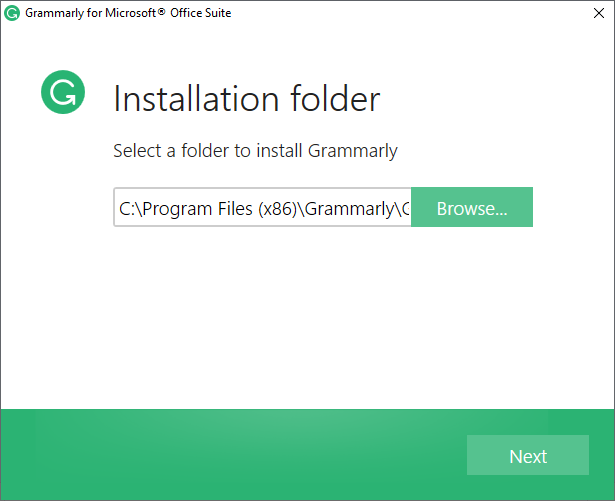
- Make sure to enable the add-in installation for both Microsoft Word and Microsoft Outlook by clicking both checkboxes.
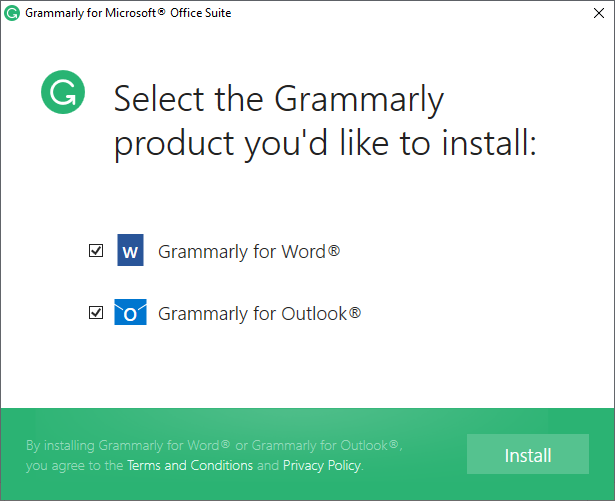
- Click "Finish" when prompt.
- After installing, restart any open Microsoft Office applications for the changes to take effect.
- After installation, you may be required to sign in with your Grammarly account the first time that you wish to use the add-in with Microsoft Word or Microsoft Outlook. Please enter your credentials to sign in.
- To test that Grammarly is working properly, open a Microsoft Word document, and then click the "Open Grammarly" button in the "Home" section of the control ribbon. This should launch a side panel for Grammarly that will show and spelling and grammar suggestions.
How to add ordinal date field when doing Mail Merge?
The default setting in MS Word will not display the ordinal for a date field when doing Mail Merge. To do this, following the steps below.
Procedures:
- Insert your date field twice. (SentDate is the field name in Excel)
- Highlight both field and click the right mouse button. Then choose Toggle Field Codes or press Alt+F9
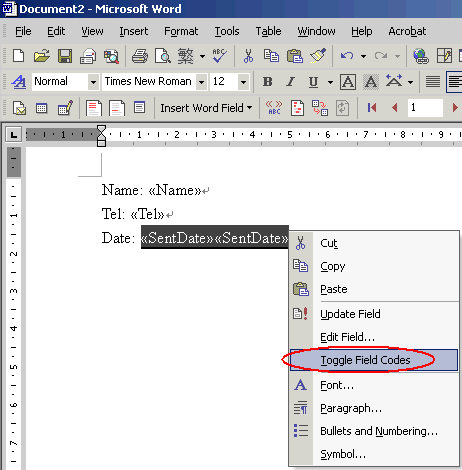
- Then change the content to { Mergefield SentDate \@ d \*ordinal } { Mergefield SentDate \@ MMMM, yyyy }
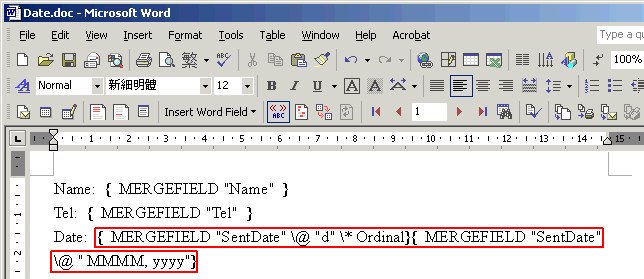
- Then click the View Merged Data.
- Now you can display the date format with ordinal.
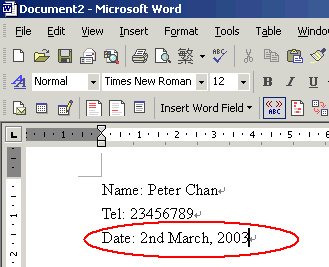 You may notice that the ordinal is not in superscript format. If you need to set the ordinal to superscript format. Follow the steps below.Procedures:
- From the menu bar click Tools -> AutoCorrect Options...
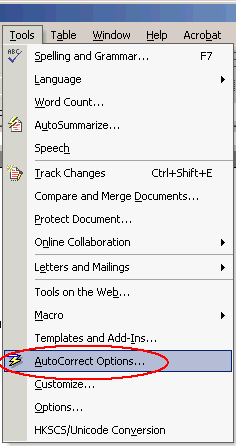
- Then change to the Auto Format tab and clear all options except Ordinals(1st) with superscript, then click OK
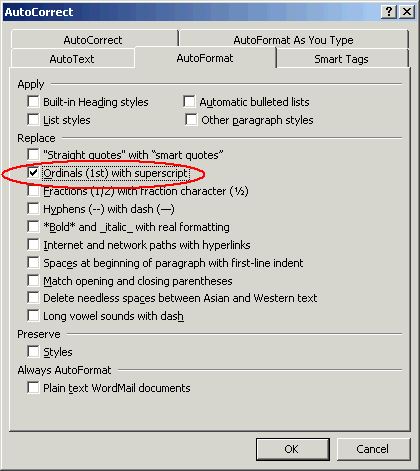
- Now, click Format -> AutoFormat...
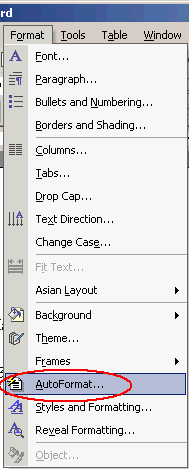
- Choose AutoFormat Now and click OK.
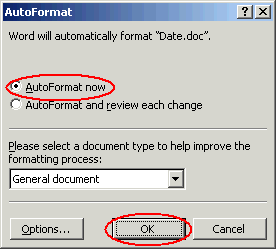
- Now you can display the date format with ordinal in superscript format.
How to clear your browser cache?
Some issues encountered when accessing online services, may be caused by outdated information stored by your web browser. This FAQ provides quick troubleshooting tips and instructions for clearing browser data on common desktop and mobile browsers to help resolve webpage display, sign-in, and functionality issues.
Quick Fix
If a webpage looks outdated or is not displaying correctly, try the following before clearing your browser cache.
Desktop Computers
- Windows: Press Ctrl + F5 or Ctrl + Shift + R
- macOS: Press Command + Shift + R
This forces your browser to retrieve the latest version of the webpage and may resolve the issue without removing any stored browsing data.
Mobile Devices (iOS/Android)
- Pull down on the webpage to refresh it.
- Close the browser tab and reopen the webpage.
- Open the webpage in a Private/Incognito browsing window.
Tip: A hard refresh (desktop) or Private/Incognito window (mobile) is often sufficient and much faster than clearing your browser cache.
When Should I Clear My Browser Cache?
You may consider clearing your browser cache if:
- A webpage appears outdated or displays incorrectly.
- A form does not load or submit correctly.
- You experience repeated login prompts or sign-in loops.
- Recent website updates are not visible.
Desktop Computers
Mobile Devices (iOS/Android)
Desktop Computers
Google Chrome (Windows / macOS)
- Open Google Chrome.
- Press Ctrl + Shift + Delete (Windows) or Command + Shift + Delete (macOS).
- Select the data you wish to remove.
- Clear the browsing data.
For the latest instructions, please refer to Google's official documentation:
Clear cache & cookies - Computer (external site, opens in new tab)
Microsoft Edge (Windows / macOS)
- Open Microsoft Edge.
- Press Ctrl + Shift + Delete (Windows) or Command + Shift + Delete (macOS).
- Select the data you wish to remove.
- Clear the browsing data.
For the latest instructions, please refer to Microsoft's official documentation:
View and delete browser history in Microsoft Edge (external site, opens in new tab)
Mozilla Firefox (Windows / macOS)
- Open Firefox.
- Press Ctrl + Shift + Delete (Windows) or Command + Shift + Delete (macOS).
- Select the data you wish to remove.
- Clear the browsing data.
For the latest instructions, please refer to Mozilla's official documentation:
Clear cookies and site data in Firefox (external site, opens in new tab)
Safari (macOS)
- Open Safari.
- From the menu bar, select Safari > Clear History.
- Select the desired time range.
- Click Clear History.
For the latest instructions, please refer to Apple's official documentation:
Clear your cache and cookies in Safari on Mac (external site, opens in new tab)
Mobile Devices (iOS/Android)
Safari - iPhone
- Open Settings.
- Select Apps > Safari.
- Tap Clear History and Website Data.
- Confirm when prompted.
For the latest instructions, please refer to Apple's official documentation:
Clear your cache and cookies on iPhone (external site, opens in new tab)
Safari - iPad
- Open Settings.
- In the left pane, select Apps, then tap Safari.
- Scroll down and tap Clear History and Website Data.
- Select the desired timeframe, if prompted.
- Tap Clear History to confirm.
For the latest instructions, please refer to Apple's official documentation:
Clear your cache and cookies on iPad (external site, opens in new tab)
Google Chrome (Android)
- Open Chrome.
- Open the browser menu.
- Select the option to delete browsing data.
- Clear the cache and other selected data.
For the latest instructions, please refer to Google's official documentation:
Clear cache & cookies - Android - Google Account Help (external site, opens in new tab)
After Clearing Your Cache
- Close all browser windows.
- Reopen your browser.
- Return to the website.
- Sign in again if required.
Many webpage display and sign-in issues can be resolved after completing these steps.
Need Further Assistance?
If the problem persists after clearing your browser cache, please contact the OCIO Help Desk and provide:
- The website or service you are trying to access.
- The browser and device you are using.
- A screenshot of any error message, if available.
This information will help OCIO investigate and resolve the issue more efficiently.
How to find the Unicode or Big 5 internal code for a Chinese Character?
Every now and then, there is characters which you do not know if it can be input, show and print in a document.
For example, I want to type a chinese character " " and I do not know whether it is available in Unicode, you can make use of the web site - Chinese Character Searching System (漢字查詢系統) (external site, opens in new tab) to search if the internal code of the character by inputting character similar to the character concerned.
For example, I input "雋" in the field and ask the system to search for similar characters.
From the result, locate the word you need and right click the word. Then you will see a new window, similar to the following one.
In this example, the Unicode is 5101. You can input the character using the "Character Map" in Windows XP from the "Start -> "Programs" -> "Accessories" -> "System Tools", type in "5101" into the "Go to Unicode" field and copy the character to the applications. Alternatively, you may input the character using the Unicode IME provided in Windows XP.
Usefull reference:
How to install additional software on my PC?
Additional software are available on the campus network so that you can download and install it by yourself. Check Software Applications. Usage of the software will be lodged for record purpose and license estimate.
How to restore files from the network drive?
If you want to restore files from network drive (N drive or S Drive:), please follow the steps below:
Procedures:
- To restore individual file:
- Right click on the folder you want to restore.
- From the menu, choose "Properties".
- Click on the Previous Versions tab.
- Look for the file version you preferred. Highlight it and click the Open button.
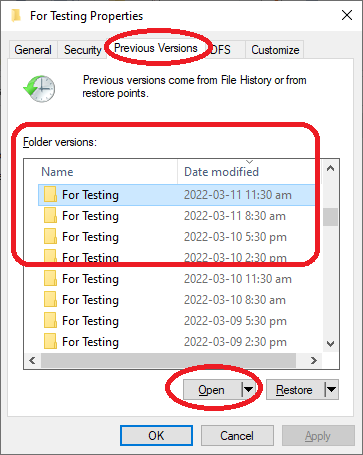
- All files for the version you chosen will be shown.
- Choose any file you want to recovery and copy it to somewhere as you like.
- To restore by folder level:
- Right click on the folder you want to restore.
- From the menu, choose "Properties".
- Click on the Previous Versions tab.
- Look for the file version you preferred. Highlight it and click the Restore button.
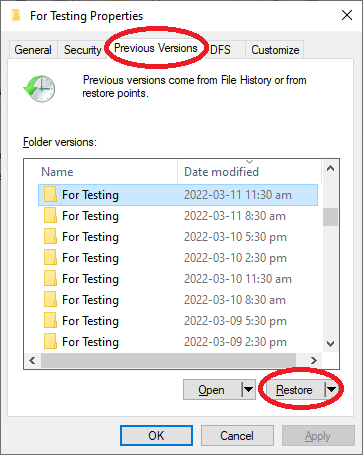
- Click "Restore" to confirm the restoration of the folder.
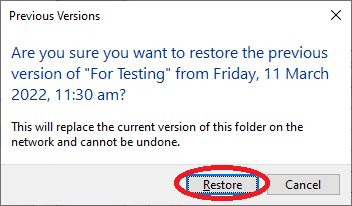
- The following message will be shown. Then click "OK".
How to save energy when the PC is unattended?
Typically a PC consists of a monitor (CRT or LCD) and the computer itself. The following are the typical power consumptions for these components when the PC is used normally or in standby mode:
| Power Consumption (Watt) | |||
| Mode | PC (without monitor) | CRT monitor | LCD monitor |
| Normal | 60-85 | 66 | 36 |
| Standby | 43 | 18 | 8 |
Recommendation for energy saving settings:
A) If the monitor support Energy Star energy saving feature (most monitors do), you can set the monitor (the computer will be running)to go to standby mode automatically when the PC is unattended after 20 minutes. User can bring back the screen by moving the mouse anytime. You are advised to disable the screensaver program as it might interfere the energy star feature. Nevertheless, you will not have significant saving by activating the screensaver program:
- For Windows 9x:
- Right click on the desktop -> choose Properties
- Change to the Screen Saver tab from the Display Properties windows.
- Click Settings button.
- From the Power Scheme tab change the option Turn off monitor. e.g. After 20 mins. Then click OK twice.
- For Windows XP:
- Right click on the desktop -> choose Properties
- Change to the Screen Saver tab from the Display Properties windows.
- Click Power button.
- From the Power Scheme tab change the option Turn off monitor. e.g. After 20 mins. Then click OK twice.
B) It is always a good practice to turn off the PC and monitor before you leave the office for energy saving and safety reasons.
How to type unicode only Chinese character in Windows?
There are some characters that cannot be typed using standard input method (e.g. ). This is a unicode only character so you need to use other input method like "Unicode IME". You need to add the Unicode IME manually in Windows.
Procedures:
- Click "Start" -> "Setting" -> "Control Panel"
- Open "Regional and Language Options
 " by double click.
- Change to the "Languages" tab then click "Details" button.
- Click "Add" button.
- Choose "Chinese (Taiwan)" from the Input language option.
- Check the "Keyboard layout/IME" box then choose "Chinese (Traditional) - Unicode" and click "OK"
- Now, you can open MS Word and change the Input method to "Chinese (Taiwan) - Unicode".
- To type any character, input the Unicode (e.g. 5101 ).
Note: Do not use the "Num Pad" to input the unicode.
How to uninstall PDF-XChange Pro from a Windows-based PC?
To uninstall PDF-XChange Pro from a Windows-based PC, please follow the steps below.
Procedures:
- Open the Start menu and click Settings.
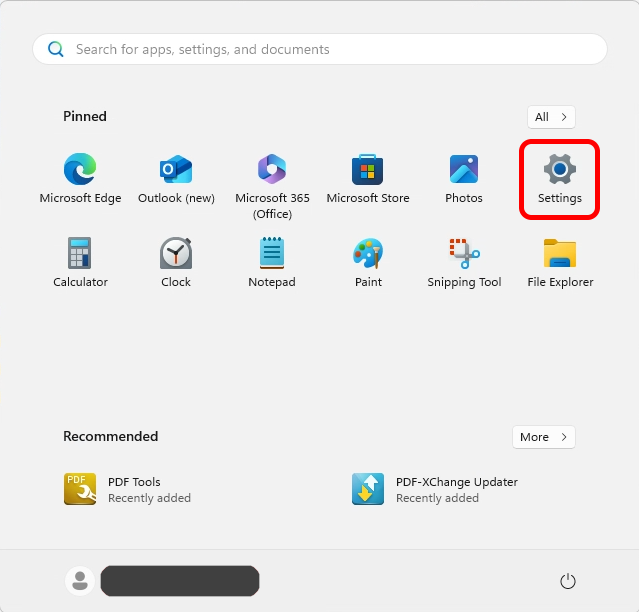
- Click "Apps" in the Settings submenu and click "Installed apps".
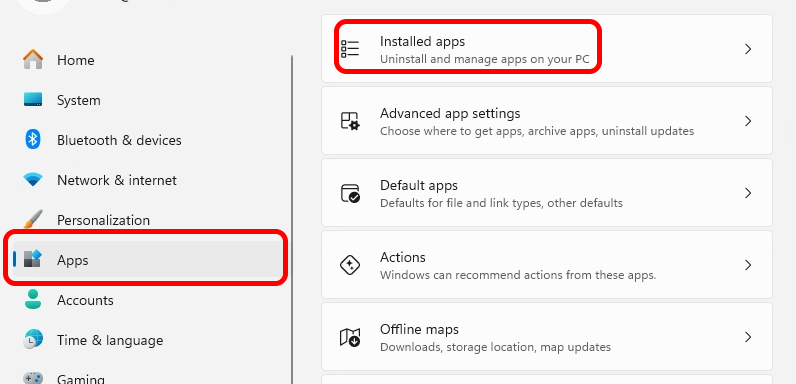
- Find the installed "PDF-XChange Pro" and click "..." .
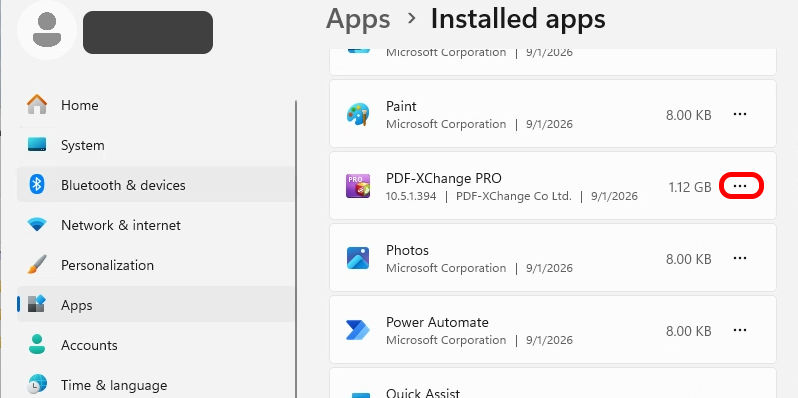
- Click "PDF-XChange Pro" and then click "Uninstall".
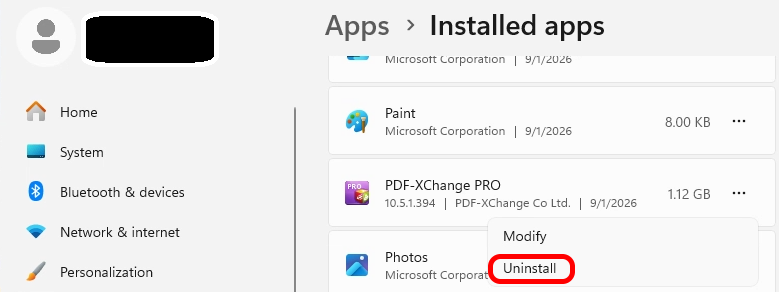
- Click "Uninstall".
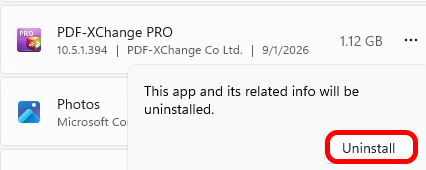
- Wait for the process to complete, and it may take a while.
How to use FTP explorer to connect to network drive?
As a continuous effort to enhance computer and network security, starting from 1 Dec 2010, we will enforce the use of secure FTP (SFTP) and secure Telnet (SSH) to access the central computer servers, and at the same time FTP and Telnet access to the servers will be discontinued. SFTP and SSH provide the same functionality as FTP and Telnet but in a more secure way since all data are encrypted during transmission. In contrast, FTP and Telnet will transmit the data, including password, in clear text and hence could be more likely to be compromised. It is recommended to use the software WinSCP (SFTP). For more details about the secure FTP and Telnet services at the Institute, please click here.
All Notebook prepared by OCIO will install a software called "WinSCP" for ftp access. User can use it to access the Network drive (N:, S: or T: Drive).
Configuration for Network Drive:
- Open "WinSCP"
- Click "Add" button
- Input "Profile Name:" as "N, S Drive"
- Input "Host Address" as "msftp.ied.edu.hk"
- Uncheck the option "Anonymous"
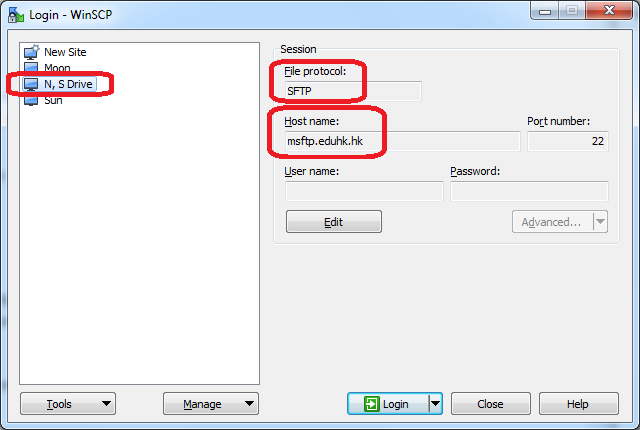
- Then click "Save" to store the settings
Hyperlinks in Excel open wrong page
When you click a hyperlink in a Microsoft Office document, you may experience the behavior that you are redirected to a logon page or an error page.
To fix it, you need to add the following Windows Registry key:
For 32 Bit Office Versions installed on 32 bit Operating Systems or
64 Bit Office Versions installed on 64 bit Operating Systems:
| [HKEY_LOCAL_MACHINE\SOFTWARE\Microsoft\Office\9.0\Common\Internet] "ForceShellExecute"=dword:00000001 |
For 32 bit Office Versions installed on 64 bit Operating Systems:
| [HKEY_LOCAL_MACHINE\SOFTWARE\Wow6432Node\Microsoft\Office\9.0\Common\Internet]
"ForceShellExecute"=dword:00000001 |
I have switched the user interface in Windows to Traditional Chinese, but MS Word still shows interface in English. Why?
Besides Windows MUI, there is a MUI for MS Office too. Windows MUI and Office MUI can be set in different languages. You can setup the Office MUI to match the system language.
Please refer to: Change the language Office uses in its menus and proofing tools (external site, opens in new tab)
I know there is a voice recognition in Windows but how to use it?
Voice access in Windows 11 enables everyone, including people with mobility disabilities, to control their PC and author text using their voice. For example, you can open and switch between apps, browse the web, and read and author emails using your voice. Voice access uses modern, on-device speech recognition to accurately recognize speech and works even without the internet.
Please refer to: Use voice access to control your PC & author text with your voice (external site, opens in new tab)
Manually activate MS Office with KMS license server.
Normally, after you install MS Office 2013/2016/2019, its license will be activated automatically via our KMS license server. If you find that MS Office cannot be activated automatically, please follow the steps below to activate it manually.
Procedures:
- Connect to the campus network. If you are outside the campus network, please connect to the SSL VPN first.
- Launch the "Command Prompt" by clicking the "Search" or "Windows" button on the taskbar and type "cmd". Right-click "Command Prompt" and choose "Run as Administrator" to run the following commands.
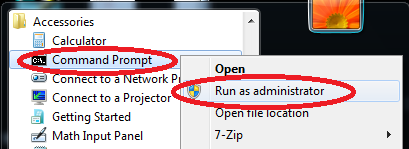
For 32-bit Office on 32-bit Windows or 64-bit Office on 64-bit Windows For Office 2019/2016 For Office 2013 - cd "C:\Program Files\Microsoft Office\Office16"
- cscript ospp.vbs /sethst:kms.eduhk.hk
- cscript ospp.vbs /act
- cd "C:\Program Files\Microsoft Office\Office15"
- cscript ospp.vbs /sethst:kms.eduhk.hk
- cscript ospp.vbs /act
For 32-bit Office on 64-bit Windows For Office 2019/2016 For Office 2013 - cd "C:\Program Files (x86)\Microsoft Office\Office16"
- cscript ospp.vbs /sethst:kms.eduhk.hk
- cscript ospp.vbs /act
- cd "C:\Program Files (x86)\Microsoft Office\Office15"
- cscript ospp.vbs /sethst:kms.eduhk.hk
- cscript ospp.vbs /act
- You will get a message stating "Product activation successful" as below when the activation is successful.

The Portal keeps reload in loop after sign in.
If you encounter problem to login the Portal using Chrome on version 90.0.4430.72, this may due to the "Same Site" setting is turned on. Please follow the steps below to turn it off for accessing the Portal.
Procedures:
- For Chrome v90.0.4430.72:
- Launch a Chrome browser.
- Enter the following into your browser location bar and select “Disabled” in the drop-down.
chrome://flags/#same-site-by-default-cookies
- Enter the following into your browser location bar and select “Disabled” in the drop-down.
chrome://flags/#cookies-without-same-site-must-be-secure
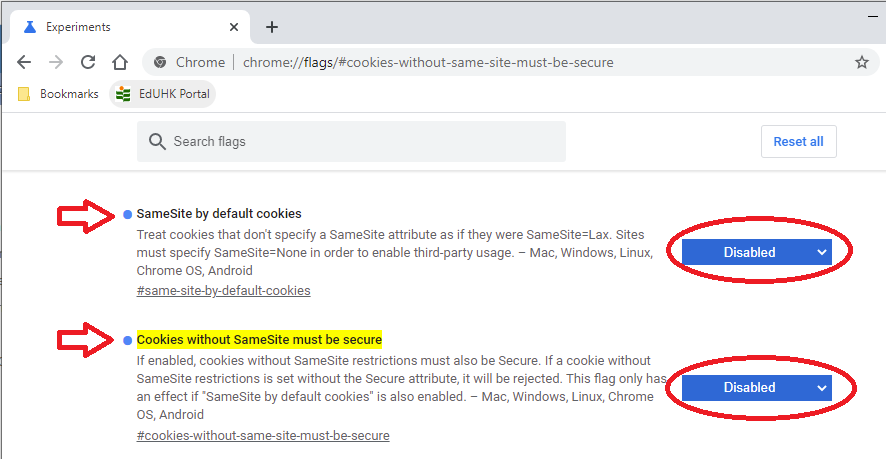
- Then click the “Relaunch” button on the bottom right.
Watermarks print incorrectly using Microsoft Word
When printing a Microsoft Word document that contains a watermark created within Word, an issue may occur in which some of the watermark text characters do not print. The issue may occur with only certain printer model while other models do not experience the issue at all.
Please refer to:
support.microsoft.com/en-us/office/insert-a-watermark-f90f26a5-2101-4a75-bbfe-f27ef05002de (external site, opens in new tab)
When I print my PowerPoint file it hangs.
Users may encounter a situation that when printing a PowerPoint file will cause the application hang. Users can try the below solution to fix it.
Procedures:
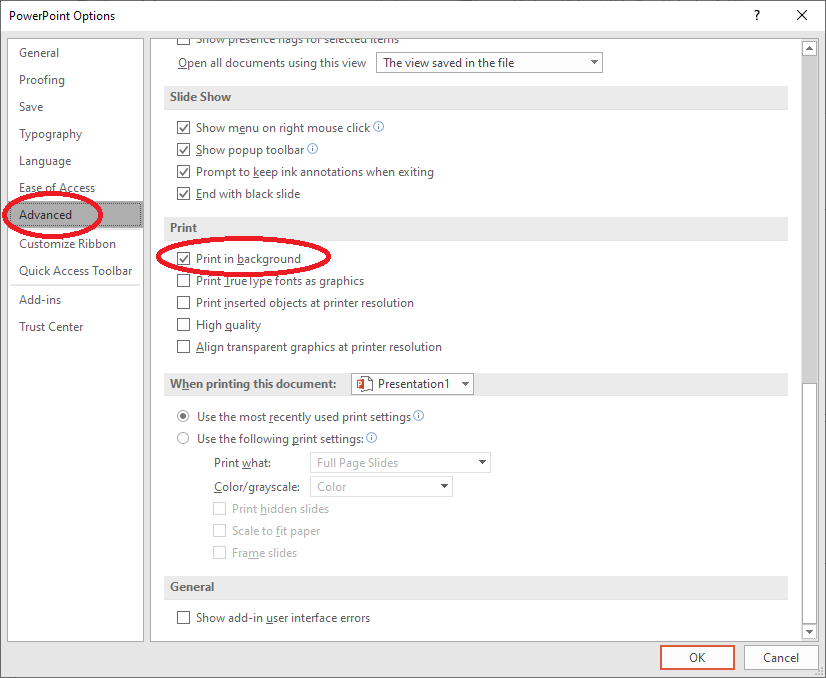
Where can I find the Chinese Simplified - Traditional conversion in MS Word?
The Chinese conversion - Simplified <-> Traditional feature (繁簡轉換) requires you to have the Chinese language pack installed. Please check the Office Language preference of your office suite.
Procedures: (Applicable for MS Word 2016/2019)
- Click "Start" -> "Programs" -> "Microsoft Office" -> ""Microsoft Office Language Preferences"
- Make sure you have the "Chinese (Tradition, Taiwan)" installed and set as default. If not, you can click the "Add additional editing language" and select "Chinese (Taiwan)". Then click "Add" to install it.
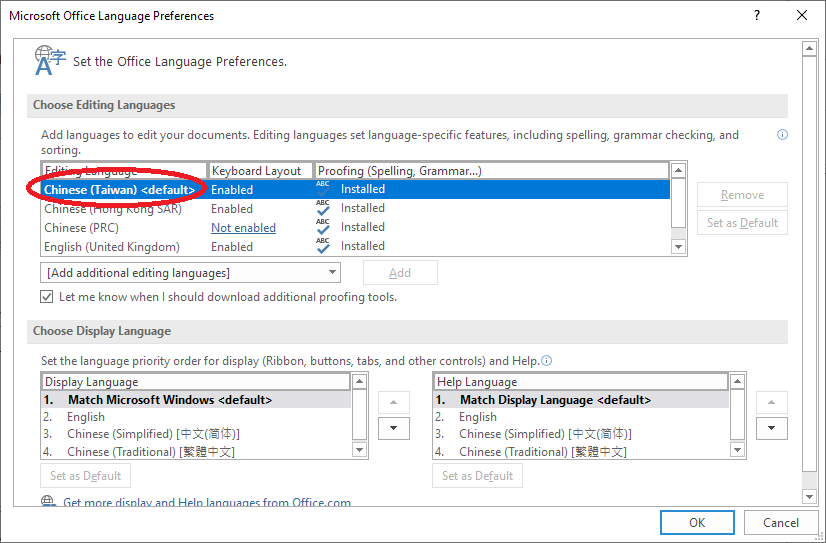
- Once the language pack installed, Launch MS Word and
- clik "Review" from the ribbon bar, then you can see the conversion button.
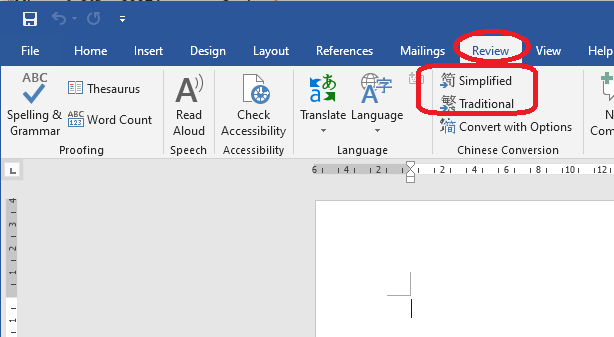
Printing
How do I connect to a Network Printer?
To connect to a network printer, please follow these steps: (For staff using office PC only)
There are few methods to connect to a Network Printer in Windows.
Method 1:
- Double click the icon "Network Application" from the desktop or the quick launch bar.
- Choose "Network Printers Mapping Tool"
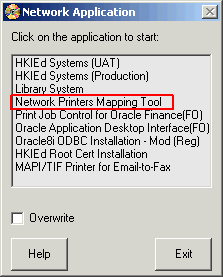
- Then highlight the printer that you want to add and click the "Add Printer as Default" or "Add Printer" button.

- The selected printer will be added to your system when installation is completed.
Note: If you wish, you may change the default printer to another one (e.g. the local printer) in 'Control Panel -> Printers and Faxes'.
Method 2:
- Click "Start" -> "Setting" -> "Printers and Faxes".
- Click "Add a printer" from the left panel.
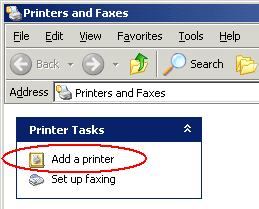
- Click "Next" -> select "A network printer, or a printer attached to another computer" -> "Next"
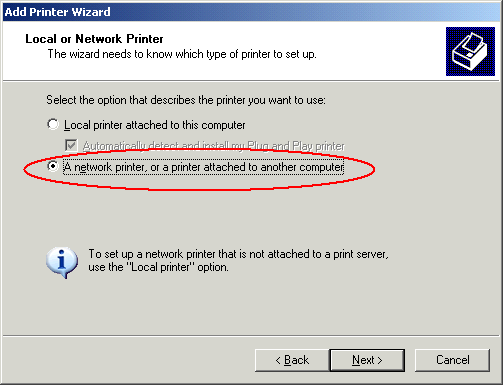
- Choose "Connect to this printer (or to browse for a printer, select this option and click next)". If you know the shared printer name, you can enter the name in the box. Otherwise, click "Next" to browse for the printer. This may takes some times for the system to search for the printers on the network.

- Select your target print queue, e.g., "HP LaserJet 5" and click "Next.
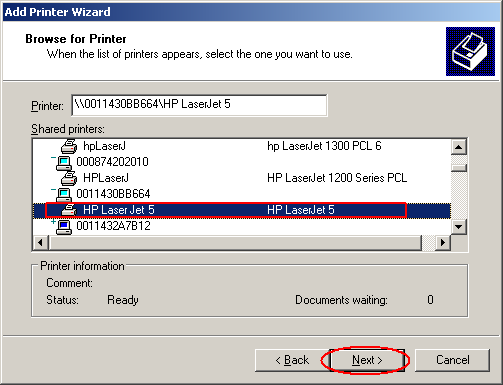
- Then click "Yes" when Windows prompts it will try to load the printer driver automatically.
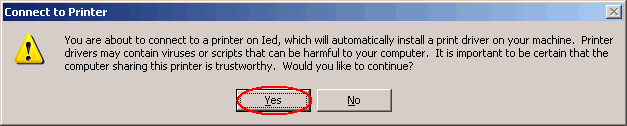
- If Windows cannot locate any driver automatically, it will prompt to search to printer driver. Then click "OK".

- Select the printer driver according to the printer model, e.g. HP LaserJet 5.
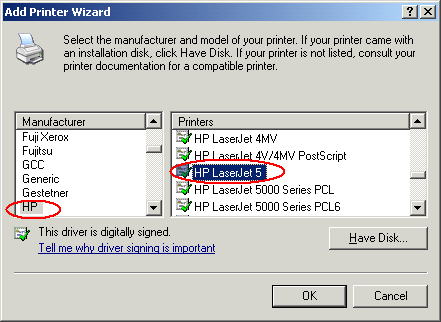
- Click "Finish". Then you will notice that a printer icon appears.
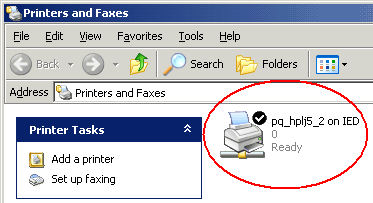
You can now send your print jobs to your departmental queue inside your application.
How to save the MS Word documents with default printer tray before distributing files?
From the printer properties, change to the Paper tab and select Auto Selection from Paper Source option.
Besides, in the MS Word's Menu bar, click Tools > Option. Then choose the Printer tab. On the default paper tray option, choose Use Default Printer Setting.
What is Network Printer?
Network printers are fast printers connected to the network for sharing among users. Unlike local printers connected directly to your PC, network printers can only be used after you login the network. You can then use the network printers available in your department/office. Each printer has a unique name to identify the printer in the office, e.g. PQ_HPLJ5SI_1 which you needed to indicate to the PC where to print to.
For details of how to connect to your network printer, please refer to How can I connect to a Network Printer?.
[Staff Only] I have transferred to another department and found that I can't print through the network printer(s). Why?
Staff Only Only staff in the department can access the network printers in the department. You can use the network printing resources in the new department only after your record in HRO has been updated. Once updated, you can access that department's resources and network printing facilities there.
[Student Only] How do I use my Notebook computer to print via print quota system?
Student Only The Wi-Fi Printing service is available to all EdUHK students. It allows eligible users to print conveniently and securely from mobile devices via EdUHK secure wireless network. Charges for printout are the same as printing from OCIO Printing Quota System. Please visit Wi-Fi Printing service for Notebook Computer Users for details.
[Student Only] How to refill my print quota?
Student Only Students print on network printers in central computer rooms and Print-N-Go Stations with their print quotas. If needed, they can purchase additional print quota using the Octopus Payment Machines (OPM) on campus or through the Online Payment Portal (OPP). We recommend students to print only when necessary to protect the environment. For details, please kindly refer to Computer Accounts for Students - Print Quota
If you want to check your print quota balance, please click here (EdUHK system, opens in new tab) (access via SSL VPN while off campus).
Note: Print quota system is in place to facilitate printing in teaching venues for students only. Staff is not allowed to print using the print quota system. For staff members, please make use of the printing facilities provided by your department.
Remote Access Services
How can I access my network drive at home?
To access the network drive at home, please refer to: Accessing Network Drive Outside Campus.
How can I read my email at home?
Please refer to Accessing Email Outside Campus.
How do I uninstall the GlobalProtect VPN agent on Mac?
Download the GlobalProtect Agent from GlobalProtect-6.0.7.372.pkg by right-clicking on the link and select Save Link As.
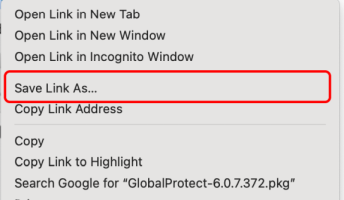

Run that agent, check the "Uninstall Global Protect" and click Continue to delete your currently installed agent.
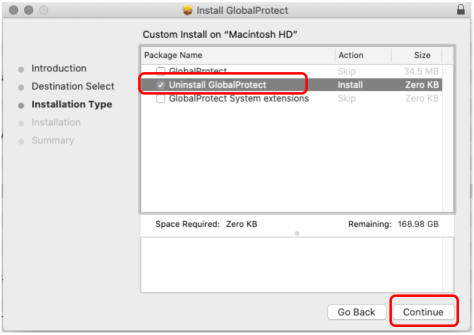
How do I uninstall the GlobalProtect VPN agent on Windows?
Go to the Start Menu, search for Settings and open it.
Select Apps.
Go to Installed apps tab.
Use the search bar or scroll down to find GlobalProtect and click on the three dots next to it.

Click Uninstall.
How to access OCIO services away from campus?
Away from our campuses, users can access most of the OCIO services, e.g. Internet, Intranet, ftp, Webmail through your ISP. For details, please kindly refer to Remote Access Services.
What should I do if I cannot access services in EdUHK with my ISP?
If you can access web pages in other sites, e.g. https://www.hku.hk, the problem may be related to our site. Please kindly report to IT Help Desk Hotline (2948 6601) with the time of the problem and the symptoms and we will follow up.
If you cannot connect to any sites, please kindly contact your Internet Service Provider (ISP) customer support.
Smartcard Classroom Control System
Can I use a classroom if I forget to bring my EdU Card?
You may ask other staff to check in for you.
You may also call the EO’s Security Centre at 2948 8002 for assistance.
Can I use the classroom if it is not being booked?
No, the room is locked by the system if it is not booked.
For emergency use, please call the Security Centre at 2948 8002 for assistance.
How can my students enter a classroom that I have booked before I go to the classroom?
Doors will be opened 20 minutes before a reserved session starts. Its lighting and air-conditioning will also be automatically enabled.
If I fail to check in a booked session and the door of the classroom is locked automatically, will the participants be trapped inside the venue?
No, you can open the door by using the "door release button", which is installed beside the door inside the room, to deactivate the electronic lock. You can then present your EdU Card over the access control reader outside the room to perform check-in.
What should I do if I need assistance with using a teaching venue?
Please call the Security Centre at 2948 8002 if you need urgent assistance for access to a teaching venue.
However, if you have problem using the teaching equipment in the room, please call OCIO’s Classroom Service Hotline at 2948 6529.
Staff Email
How can I check the sizes of mailbox folders in Outlook?
To check the sizes of mailbox folders in Outlook, please follow these steps:
- From the ribbon bar, click File.
- Select Info.
- You can check the quota and usage under Mailbox Cleanup
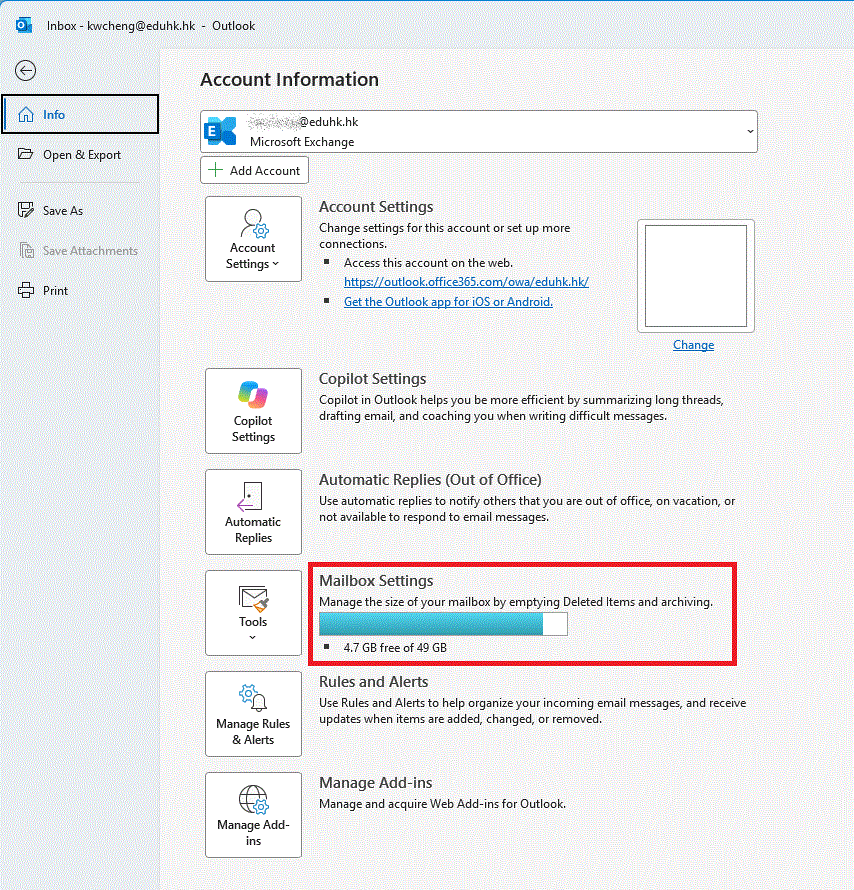
How can I do wildcard search for recipient name and email address quickly in Outlook?
When we send email to the recipient(s) using Outlook, you may not remember the full email address (e.g. chiling@eduhk.hk). You could browse the Global Address Book/Contacts which could be quite tedious as the list is only sorted by surname. Assuming you only know part of the name (e.g. Joanne or Chi Ling) of the recipient, the quickest way to tell Outlook where to send the email to is to do wildcard search with part of the name and ask Outlook to check against the Global Address Book/Contacts for users with their name containing the string of text. Then you could pick from this shorter list easily.
Procedures to do wildcard search:
- Create a new mail.
- Type in the text you want to search for in the To, CC or BCC field. (e.g. joanne in this example)
- Press Ctrl + K or click on the Check Names icon.
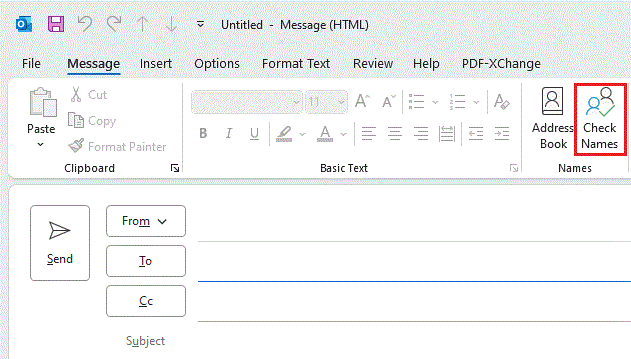
- Then a list of matched case will show in a window. You can choose from the list and click OK to add the contact in the new mail.
How can I export and import data in Personal Folder by Outlook?
Exporting Personal Folder Data Use the following steps to export an individual folder such as Contacts or Calendar to a personal folder file:
- On the File menu, click Import and Export.
- Click Export to a personal folder file, then click Next.
- Click the folder you want to export and click Next.
- In Save exported file as, type the name of the file to which the data will be exported.
- Click Finish.
Importing Personal Folder Data:
Use the following steps to import a personal folder file into Outlook:
- On the File menu, click Import and Export.
- Click Import from a personal folder file, then click Next.
- Type the path and name of the personal folder file you want to import, then click Next.
- Click the folder into which the data will be imported.
- Click Finish.
How can I forward my emails to another email address?
Please refer to Email Forwarding.
How can I open someone else's mail folder in Outlook?
In Outlook, you may give permission to others to access your e-mail folders. The following is an example of how user A allows user B to open the 'Inbox' folder of user A.
In user A's account, assign permissions to user B
- Login using Outlook as user A.
- In the Folder list, right-click A's Mailbox folder and select Properties
- Click the Permissions tab.
- Click on the Add button.
- Select the name of User B from the list shown in the left panel and click Add. Click OK when finished.
- Back to the previous window, select the name of user B under the Name field.
- Under Permissions, either choose a role or check appropriate permissions.
- Click OK.
- Right-click A's Inbox folder and select Properties.
- Repeat the steps from 2 to 8.
In user B's account, open the mailbox of user A
- Login using Outlook as user B.
- On the Tools menu, choose Services.
- Click Microsoft Exchange Server in the Services list, and click Properties.
- On the Advanced tab, click Add.
- Type the e-mail account name of user A in Add Mailbox.
- Click OK.
Note: By doing the above, user B can only open Inbox of user A. If user B needs to open other mail folders of user A, user A has to assign the appropriate permissions to user B for each folder one by one.
How can I view or manage my colleague's calendar folder in Outlook ?
If a colleague or manager lets you know that they have given you access to share their Calendar, you can open the shared Calendar and read their schedule. You can also schedule appointments and meetings for your colleague or manager. If you receive a mail message that says you have been given delegate access permission to share a Calendar, you can send and accept meeting requests for your colleague or manager in addition to the activities listed above.
Set sharing permissions for a folder
- You need to setup the permissions for your Mailbox and Calendar folder.
- If the Folder List is not visible, click the View menu, click Folder List
- Firstly, setup the Mailbox folder permission.
- Right click the folder Mailbox - Your NAME, and then click Properties on the shortcut menu.
- Click the Permissions tab.
- Click Add.
- In the Type name or select from list box, type or select the name of the person you want to grant sharing permissions to.
- Click Add, and then click OK.
- In the Name box, click the name of the person you just added.
- In the Roles box, click the permissions you want. (Reviewer permission is a minimum requirement for accessing sub-folder like calendar. Setup higher permission only when you need to grant more access rights (e.g. editing) to the user.)
- Secondly, setup the Calendar folder permission.
- Right-click the folder Calendar, and then click Properties on the shortcut menu.
- Click the Permissions tab.
- Click Add.
- In the Type name or select from list box, type or select the name of the person you want to grant sharing permissions to.
- Click Add, and then click OK.
- In the Name box, click the name of the person you just added.
- In the Roles box, click the permissions you want.
Tips:To set permissions for all your Outlook folders simultaneously, use the options on the Delegates tab (on the Tools menu, click Options).
View another person's Calendar:
- On the File menu, point to Open, and then click Other User's Folder.
- In the Name box, type the name of the person who granted you delegate access permission or click Name to select from a list.
- In the Folder box, click Calendar.
Tips:
- To always have quick access to the Calendars you use often, add shortcuts to other people's Calendars to your Outlook Bar. Right-click the background of the Outlook Bar, and then click Add to Outlook Bar on the shortcut menu. (You must have reviewer permission to gain access to other people's mailboxes, and you must have added their mailboxes to your user profile.)
- If you manage the Calendars of several people, you can create a new group on the Outlook Bar and store shortcuts to their Calendars there. Right-click the background of the Outlook Bar, and then click Add New Group on the shortcut menu. Drag the Calendar shortcuts you created into this new group.
- You can have Outlook automatically open another person's Calendar (or any Outlook folder) when you start Outlook. Just leave the folder window open when you quit Outlook.
- If you have author or editor permission, any items the delegate creates while the shared Calendar is active are stored in the other person's Calendar.
How do I back up my mail in Outlook?
You can create a Personal Folder and copy your emails to the new folder. For details, please refer to Using Personal Folders.
How do I setup ThunderBird to send emails in the campus?
The followings give the brief procedures for setting up ThunderBird to use the SMTP gateway (smtp.office365.com) to send emails in the campus.
Procedures:
- From the menu bar, click Tools -> Account Settings...
- Click the Outgoing Server (SMTP) from the left panel. Then highlight the default server and click the Edit button.
- Make sure you enter the following information correctly.
- Server Name: smtp.office365.com
- Port: 587
- Connection security: STARTTLS
- Authentication method: Normal password
- User name: your username
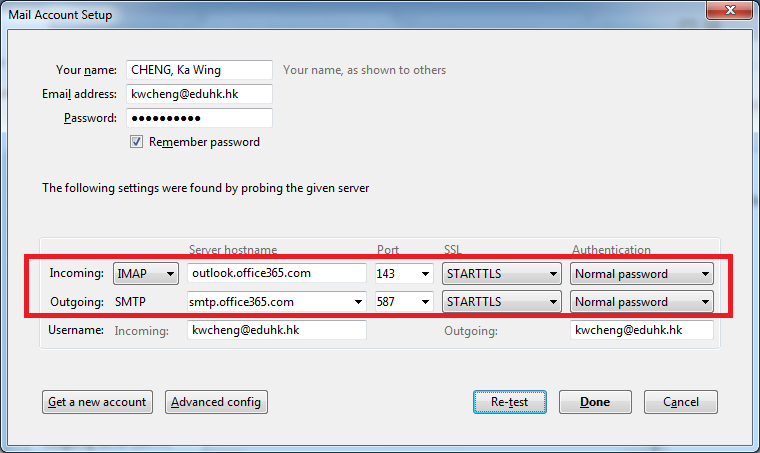
How to Import and Export my Rule Wizards in Outlook?
Procedures to Import/Export Rules in Outlook:
- Open Outlook.
- From the ribbon bar, click "File".
- From the Info session, click the "Rules and Alerts...".
- Click the "Option" button. Then click "Export Rules..." or "Import Rules..."button. When prompt, choose the location and input the filename to save.
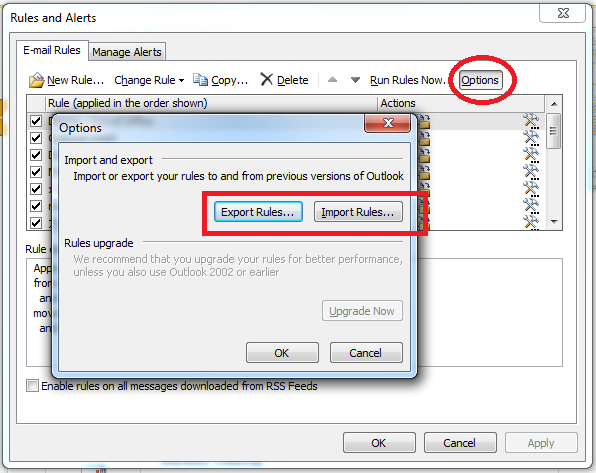
- Click Save.
Note: All available rules (including both client side and server side; either checked or unchecked) will be exported or imported by using the above procedures.
How to add or change your Autosignature in Outlook?
To change your auto email signature in Outlook 2024/2019 (legacy layout), please follow steps below:
- From the ribbon bar, choose File -> Options.
- From the left panel, choose Mail.
- Then click the Signatures... button.
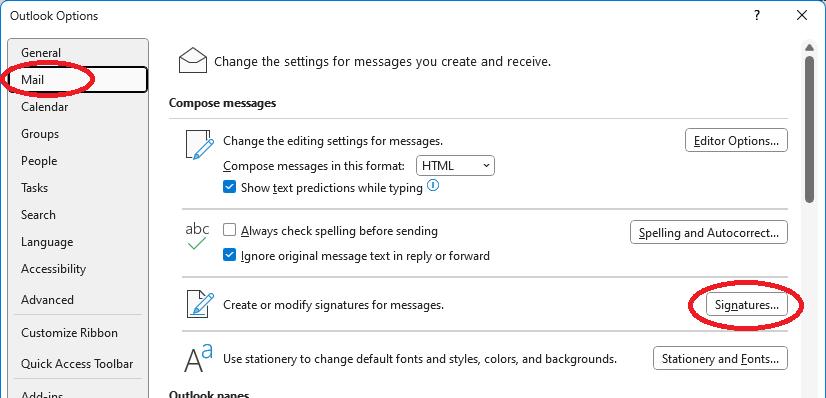
- Click the New button.
- Provide a name for your signature then click OK
- Type your signatures in the Edit Signature text box.
- When done, click OK.
To create signature:
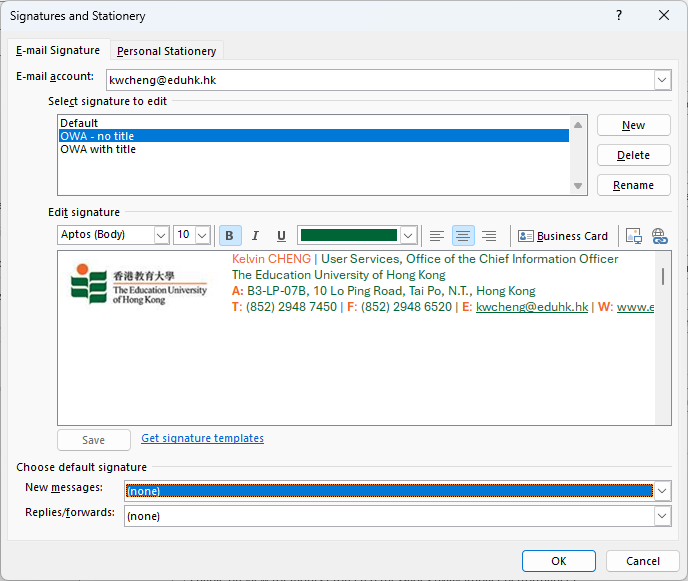
Set Auto Signature:
- Under the session Choose default signature, set the signature you preferred for New messages: and Replies/forwards:.
- Then click the OK button.
- Now when you create a new email, replies or forward a email the signature you selected will be added in the email.
To change your auto email signature in Microsoft 365 (M365 web app), please follow steps below: (For the Outlook (new) app, click "Settings (the gear icon) > Account > Signature" (please refer to the screen of step 3).
- Login Microsoft 365 portal (external site, opens in new tab).
- Go the Outlook Web app.
- Click the gest icon from the top right hand corner.
- Click "Account > Signature".
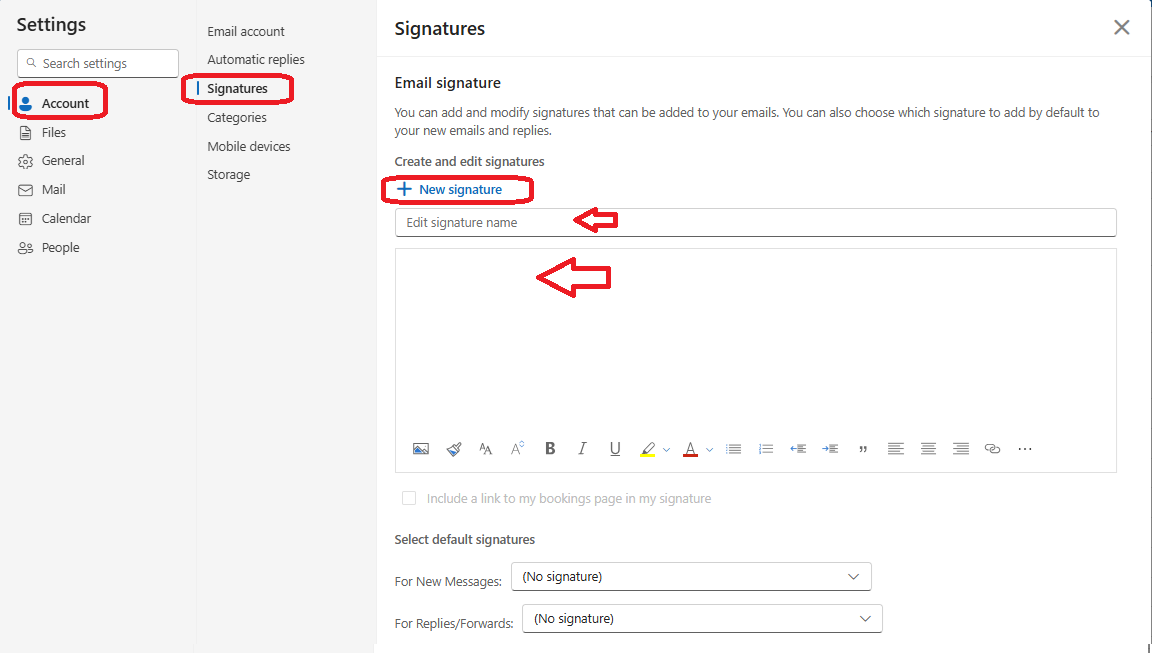
- Click "+New Signature".
- Enter a Signature name.
- Type your signatures in the text box.
- When done, click Save.
- From the "Select default signatures" session, set the signature you preferred for New messages: and Replies/forwards:.
- Then click the Save.
- Now when you create a new email, replies or forward a email the signature you selected will be added in the email.
To create signature:
Set Auto Signature:
How to archive emails in Outlook?
You can archive your emails by using Outlook Data File (.PST) (aka Personal Data File) in Outlook. First of all, you need to create an "Outlook Data File". Then you can copy the email from any folder of your mailbox to the "Outlook Data File".
For Outlook 2024:
Export email or Outlook items to an Outlook Data File (PST):
- From the Home tab, click File.
- Click Open & Export. Then click Import/Export.
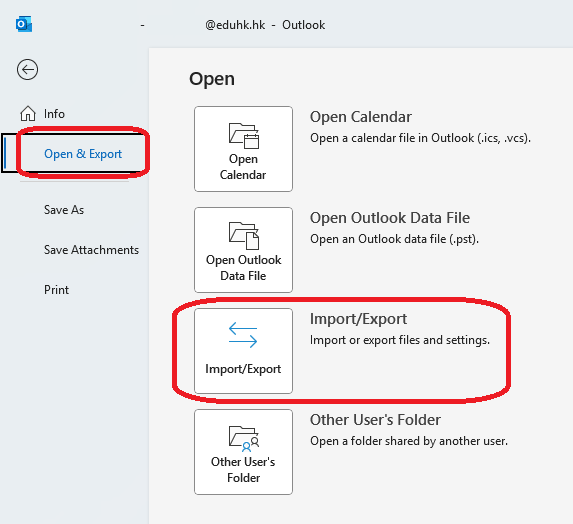
- Choose Export to a file and click Next.
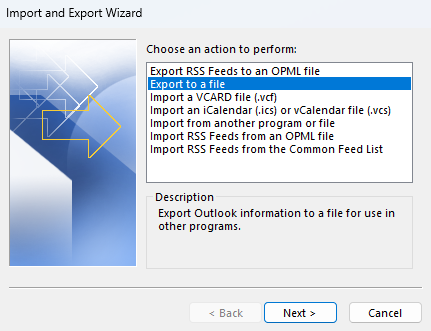
- Choose Outlook Data File (.pst) and click Next.
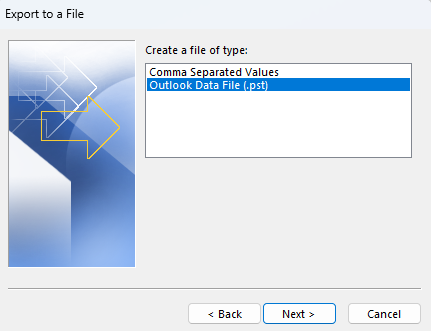
- Select the items you would like to export (e.g., you can select the mailbox if you want to archive all items) and click Next. (Note: Tick the option "Include subfolders" if there are any subfolders under each item.
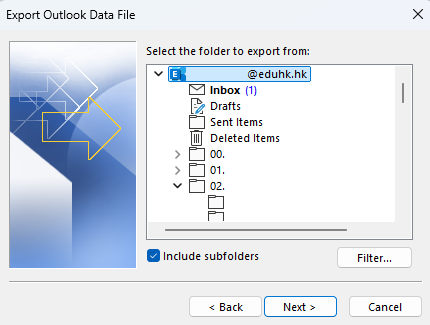
- Choose the path and file name for the Outlook Data File (.pst) and click Finish.
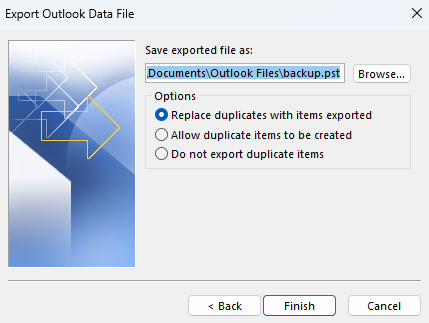
- If you would like to set up a password to open the Outlook Data File, please enter it in the box and click OK to confirm. Otherwise, just leave it blank and click OK. (If you have set up a password, you will be prompted to enter the password).
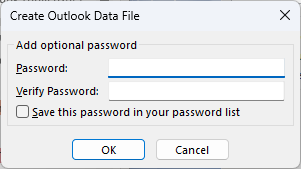
- The system will start exporting the items you select. The process time depends on the size of the items. You cannot use Outlook during the process. Please don't close Outlook until the process finishes.
Note: Please disconnect the Outlook Data File (.pst) from Outlook beforehand If you have to copy the .pst to another location.
For Outlook 2019/2016:
Create Outlook Data File (PST):
- From the Home tab, click New Items -> More Items -> Outlook Data File....
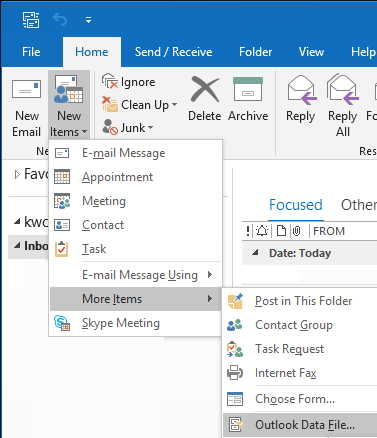
- Specify whether the archive to store (e.g. D:\email_archive). And provide a file name for it. If you want to set a open password, remember to tick the option Add Optional Password. Then click "OK
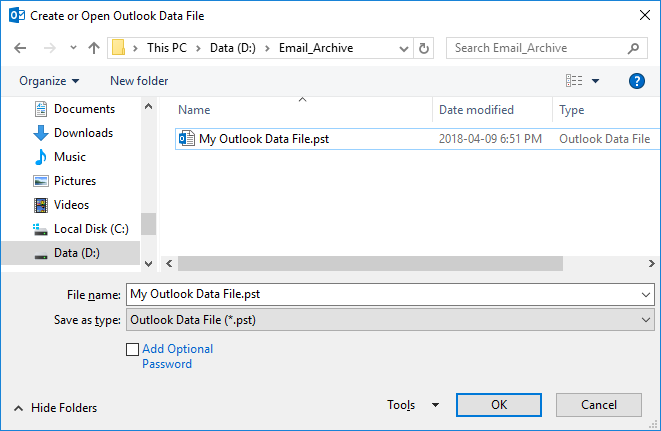
- The "Outlook data file" will be displayed on the left panel.
Change the Outlook data File display name or password
- Right click the Outlook Data File and choose Data File Properties.
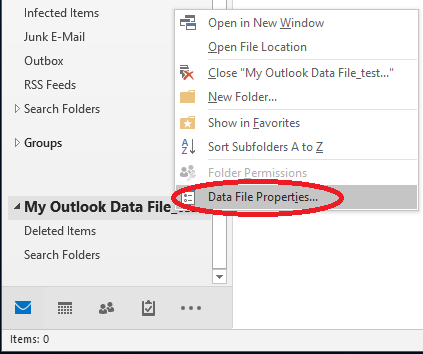
- Choose Advanced.
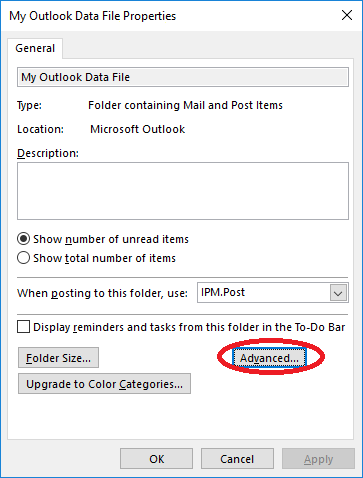
- Then enter the display name in Name box. If you want to modify the open password, click the Change Password... button to set your open password.
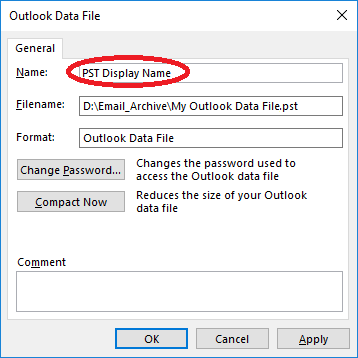
Note: The Outlook Data File can only be opened using Microsoft Outlook.
How to call back a message sent?
There are situations that you would like to call back a message which has been sent. For instance, when you find a typing mistake in a message just after you have sent it out, you may not want the recipient(s) read it or you may want to make a correction. In that case, the recall/replace function in Outlook could help. However, please note that you can recall/replace a message only if the recipient(s) are EdUHK staff and the message has not been read. To recall/replace a message, follow the steps:
Procedures:
- Go to Sent Items.
- Open the message you want to recall or replace.
- From the ribbon bar, under the "Message" session, click the Actions menu and choose Recall This Message....
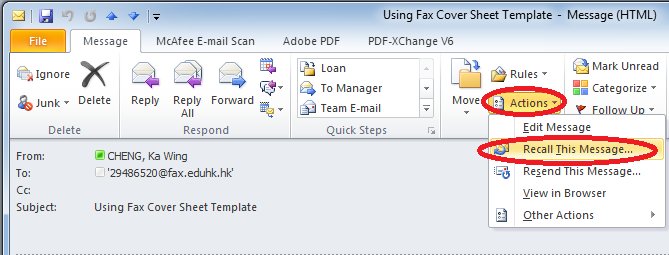
- To recall the message, click Delete unread copies of this message. To replace the message with another, click Delete unread copies and replace with a new message, click OK, and then type a new message.
- To be notified about the success of the recall or replacement for each recipient, select the Tell me if recall succeeds or fails for each recipient check box.
Note: To replace a message, you must send a new one. If you do not send the new item, the original message is still recalled.
How to find the email address of a staff or student?
You can go to Directory (EdUHK website, opens in new tab) which available on the university website (http://www.eduhk.hk) (EdUHK website, opens in new tab). Or you can also find it in The Portal (external site, opens in new tab) -> Others -> Email Directory.
How to handle Junk Mails?
It is not uncommon to receiving unsolicited emails both from inside or outside the Institute. These unsolicited mass mails are referred to as junk mails, or "spam" mails. The Institute has established policies to handle junk mails sent by staff and students. For junk mails sent from outside the Institute, there is no sure way to stop but there are a number of good practices to deal with them.
How do spammers get my address?
Since email addresses are so essential for communications today, they unavoidably have to appear in name cards, web sites and in many other ways which facilitate communications. Professional email spammers can systematically collect the email addresses from various sources. The more Internet activity you participate in, the more likely you'll end up in a spam list.
What should I do if I receive "spam"?
- Delete the message. Think of it in the same context as throwing away the junk mail you receive at home.
- DO NOT REPLY to the spam message. Almost all spammers use fake addresses and your "REPLY" action might cause another flooding of junk mails to all original addressees.
- DO NOT respond to "instructions to remove me from the mailing list". This often serves as a confirmation that your account is active and the mail is being read. For advertising purposes, this makes your address more valuable.
- If you are receiving a lot of offensive junk mails, you can set up Outlook filter rules to automatically remove these junk mails.
- If you know the ISP of the junk mail sender, you can send an e-mail to complain to the ISP (but not to the sender as stated in 2 above). Responsible ISPs could take necessary actions to alleviate the situation.
Use the EdUHK email account only for official purpose
It is strongly recommended that you use the EdUHK email account only for official purpose. For personal and commercial purpose, you are strongly encouraged to use your personal email addresses from ISPs or from some free email service providers (like Yahoo and Hotmail). Personal and commercial activities on Internet have a much higher chance to receive junk mails.
Note: Outlook provide a Junk E-mail Filter function, user can refer to "Junk Mail Filtering" session for details.
How to import Excel file into Outlook Contacts?
Procedures:
- Open Outlook.
- From the ribbon bar, click "File" -> "Options"
- From the left panel, choose "Advanced", look for the "Export" session. Then click the "Export" button.
- Choose "Import from another program or file" then click "Next"
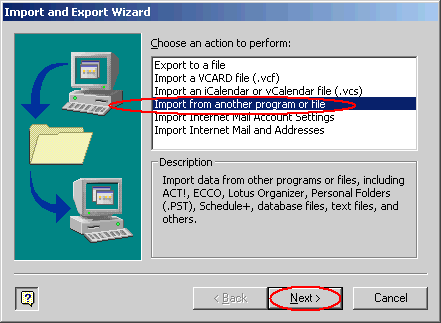
- Choose "Microsoft Excel" then click "Next"
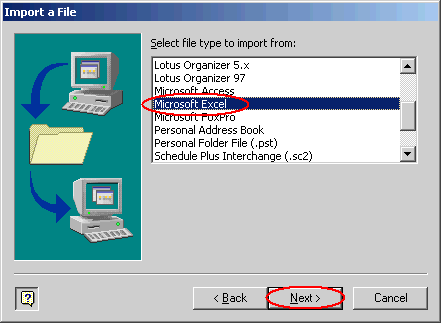
- Click "Browse" to select you Excel file then click "Next"
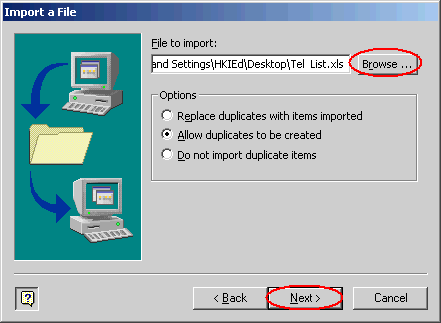
- Select "Contacts" then click "Next"
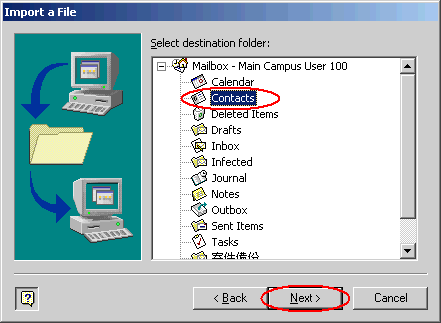
- Click "Map Custom Fields..."
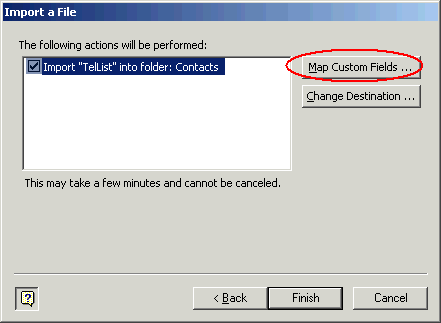
- Map your Excel field to Outlook Contacts field by drag from left panel to the right panel.
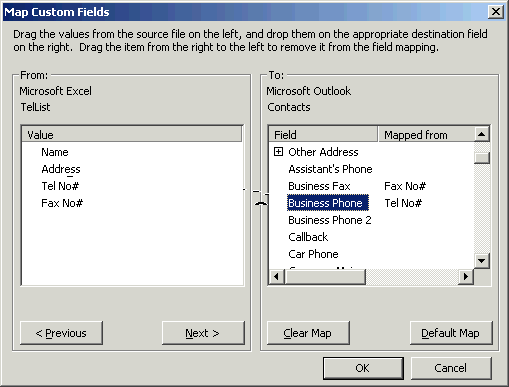
Note: You may encounter a error when importing the Excel file in which need you to "Name" the range of the Excel file.
- Open your Excel file
- Highlight the data (1)
- Input a name in the "NameBox" (2)
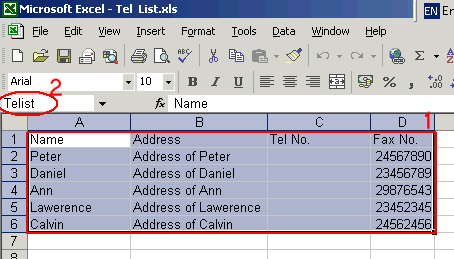
- Save your file
How to move my Personal Folders (PST file) to a new location in Outlook?
In case you want to move your Personal Folders to a new location, follow the steps: First, find the current location of the PST file by:
- In Outlook, on the Tools menu, click Services.
- Select the corresponding Personal folder, then click Properties.
- Note the current location of the PST file.
Then follow these steps to move the PST file to a new location.
- On the File menu, click Exit and Log Off to quit Outlook.
- Move the file by Windows Explorer or My Computer.
- Restart Outlook. When you're prompted for the location of the now-missing PST file, point to the file in its new location.
- On the File menu, click Exit and Log Off to quit Outlook again.
- The Personal Folder in the new location can then be used when you next time start Outlook.
How to open a personal folder in Outlook?
To open a personal folder in Outlook, please follow the steps:
- In Outlook, select File -> Open -> Open Outlook Data File...
- Click on the personal folder file from the appropriate directory
- Click OK and the personal folder will appear under the folder list in left hand panel
How to remove email addresses from the Auto-Complete List?
When you type the first 3 characters in the To: field, Outlook will show the nicknames and automatic completion cache as a pull down list which are the recent addresses resolved and sent. You may enter the wrong address for a recipient or the recipient changes their address. You can refer to the following steps to remove an address from this list or clear the entire list.
Note: Your auto-complete list is not backed up. If you delete an entry or remove all entries from the auto-complete list, there is no way to recover this.
Office 365 Webmail (OWA)
Removing an address from your auto-complete list
- In webmail, click the New button to start composing a new email.
- In the To: field, start typing an email address.
- Click the "X" at the right on each address. or use the up and down arrows on your keyboard, select the email address you would like to remove from the suggested contacts list. Press the Delete key on your keyboard.
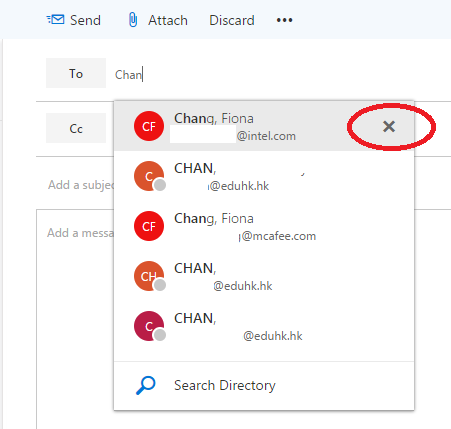
Outlook 2016/2013 for Windows
Removing an address from your auto-complete list
- Open Outlook.
- Click the Mail tab on the bottom of the screen so you are viewing your mailbox.
- Click New Email.
- In the new e-mail window, start typing the address you want to remove in the To: field. When it appears, click the X button next to the address.
Clearing out the entire auto-complete list
- Open Outlook.
- Click the File tab at the top of the screen.
- Click Options.
- In the "Outlook Options" window, click the Mail tab in the left hand pane.
- Scroll down to "Send Messages" and click the Empty Auto-Complete List button.
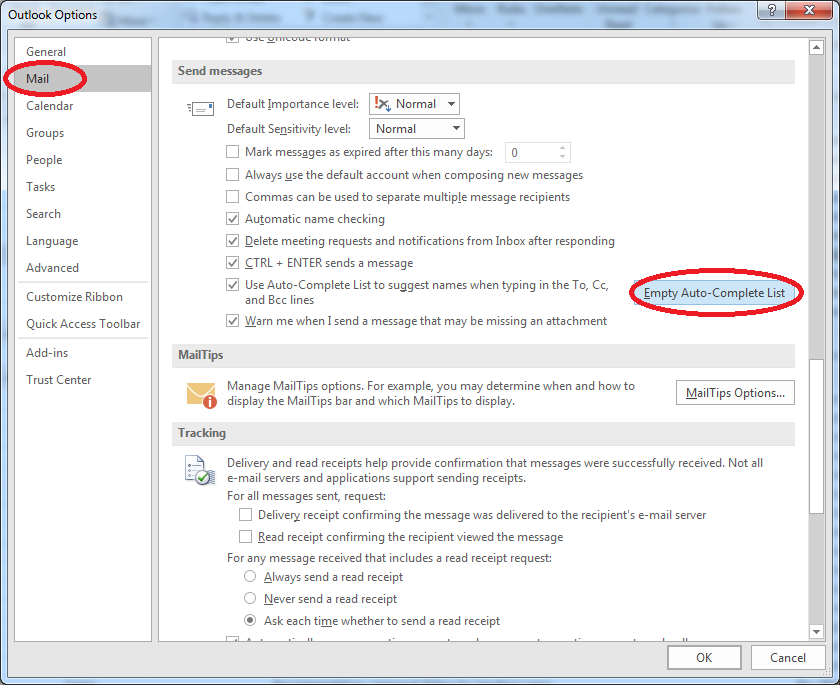
Outlook 2016 for Mac
Removing an address from your auto-complete list
- Open Outlook.
- Click the New Email button.
- In the new e-mail window, start typing the address you want to remove in the To: field. When it appears, click the X button next to the address.
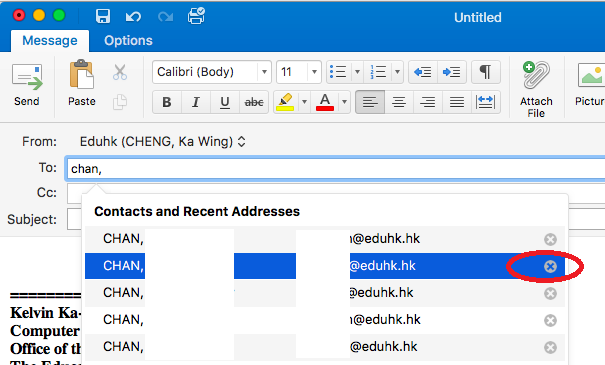
iOS mail client
Removing an address from your auto-complete list
- Open Mail app.
- Click the New Email button.
- In the new e-mail window, start typing the address you want to remove in the To: field. When it appears, tap the i button next to the address.Then tap "Remove From Recents" at the bottom.
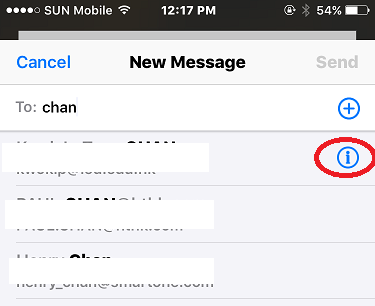 ->
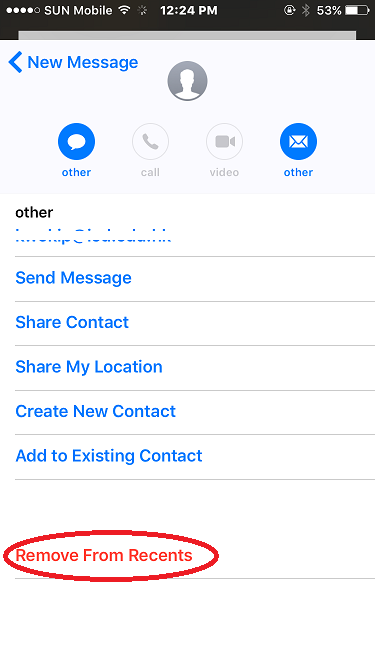
For more information, please visit:
How to resolve slow Outlook 2016 Autodiscover profile setup with Office 365?
In case you run into slow account setup with Outlook 2016, which can take up to 10 mins or more. To workaround this issue, you may use the following Registry settings to force Outlook to bypass the root domain discovery and redirect to the autodiscover CNAME or A record to resolve the address for autodiscover settings.
For Outlook 2016:
| Windows Registry Editor Version 5.00 [HKEY_CURRENT_USER\SOFTWARE\Microsoft\Office\16.0\Outlook\AutoDiscover] "ExcludeHttpsRootDomain"=dword:00000001 |
Note: For Office PC that has joined the campus Microsoft Active Directory, there is no need to amend the registry. This setting will be applied via the group policy when you login the system.
It is assumed this is caused by some bug in Outlook 2016 that causes the system to try a little too hard to obtain a response from the Autodiscover directory on root domain. If the domain resolves in DNS but does not respond to HTTP queries (i.e. you don't have an actual server to acknowledge them), this will cause timeout error and Outlook will try repeatedly.
If you wait long enough (11 attempts or so, each taking at least 30 seconds), Outlook will actually give up and move on. But if you don't like waiting, the reg key above will force Outlook to bypass this particular check and it will continue to the next method. So as a result the process will take a substantially smaller amount of time.
For more information, you can refer to: www.mistercloudtech.com/2015/12/08/how-to-resolve-slow-office-2016-autodiscover-with-office-365 (external site, opens in new tab)
How to send mail on behalf of another user?
Microsoft Outlook allows one user to send mail on behalf of another user. You can set up delegate permissions so that someone can send messages on your behalf.
Delegate user for send mail on behalf
Procedures: (For Office 2021/2019)
- Start Outlook.
- From the ribbon menu, click "File".
- Click "Account Settings" -> "Delegate Access"
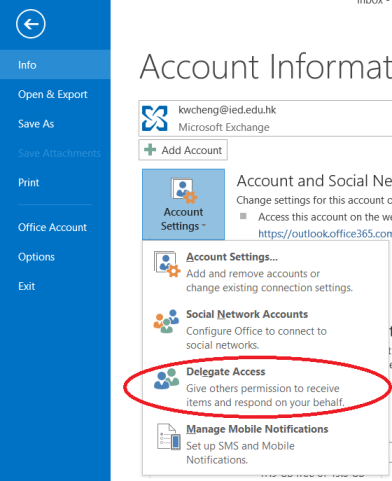
- Click the "Add" button.
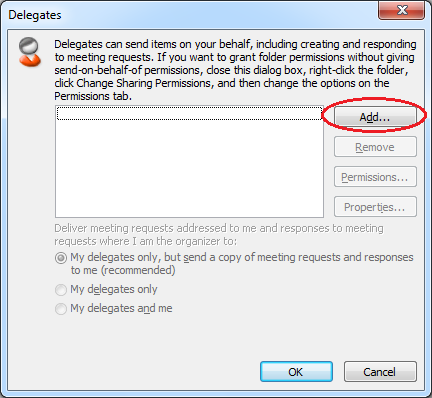
- Select a user from the global address list, click "Add", and click "OK".
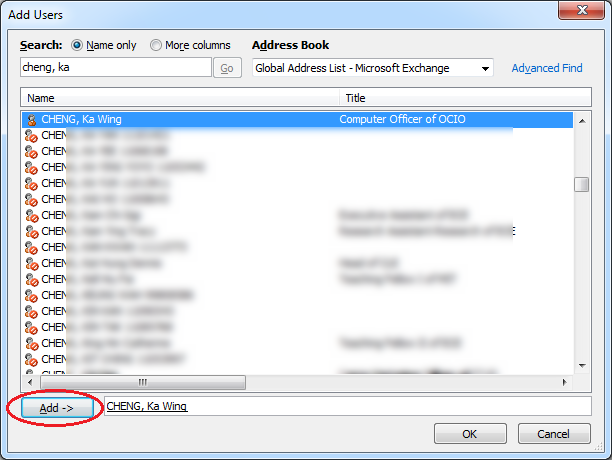
- Choose "Editor" from the list of Permissions for the Inbox. You are recommended to tick the option "Automatically send a message to delegate summarizing these permissions" as well. Then click "OK".
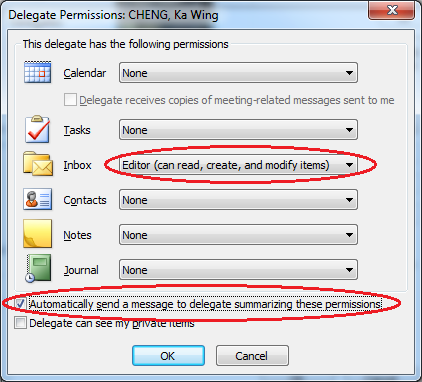
Procedures: (For Outlook Web App)
To configure delegate access in Outlook Web App, you can refer to www.microsoft.com/en-us/microsoft-365/blog/2013/09/04/configuring-delegate-access-in-outlook-web-app/ (external site, opens in new tab).
Send messages using on behalf
On user given Delegate permission to send messages on your behalf, do the following procedures: (For Outlook Web App)
- Log in to your mailbox using Outlook Web App (external site, opens in new tab).
- Click new New mail above the folder list. A new message form will appear in the reading pane.
- Click the more options menu
 , and then click Show From.
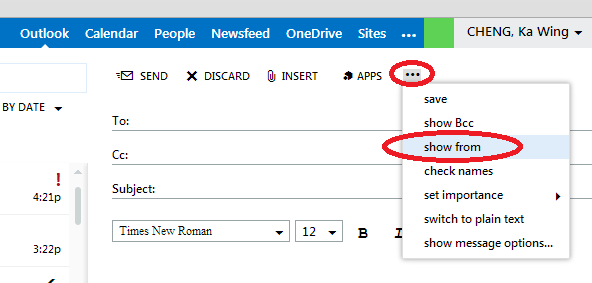
- Right click the email address and choose Remove.
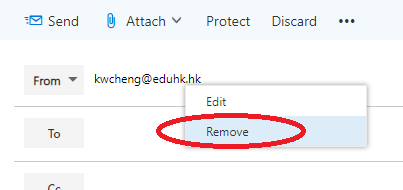
- Type the account name of the owner. Then fill in other fields and the message body as needed, and click Send.
On user given Delegate permission to send messages on your behalf, do the following procedures: (For Outlook 2016/2013)
- Open a new email message.
- From the ribbon menu, choose "Options", in the "Show Fields" session, click the "From" button. Then the "From" selection button will be shown. Click on it and select "Other Email Address...".
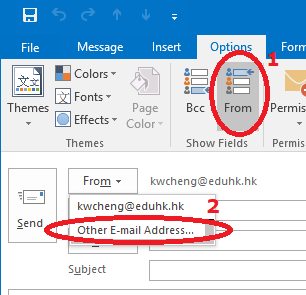
- Select the owner from the global address list or type the account name. Then fill in other fields and the message body as needed, and click Send.
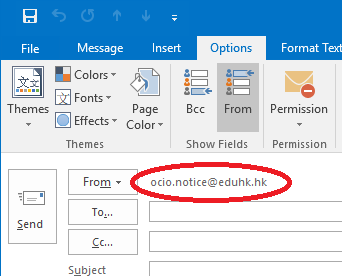
- When the message is received, the From Field looks similar to "Delegate on Behalf of Owner" where Delegate is equal to the name of the user with Delegate permissions and Owner is equal to the name of the mailbox owner.
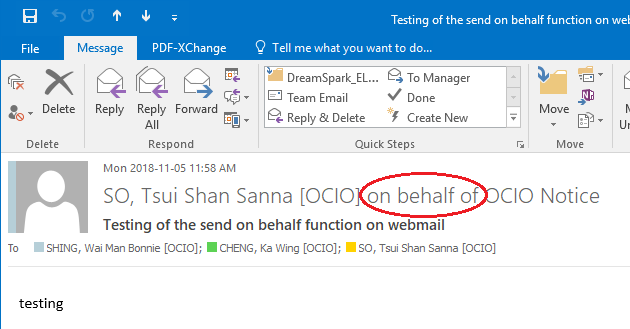
How to set up outlook to filter junk mail?
Please refer to Junk Mail Filtering (external site, opens in new tab).
How to setup user profile in Outlook ?
For details on setting up user profile in Outlook, please refer to Microsoft Outlook Profile.
How to use Out of Office Assistance in Outlook?
The Out of Office Assistance allows you to send a message (autoreply) to the sender when the first time he sends message to you while you're out.
For details, please check Out of Office Assistant.
I sent a Simplified Chinese e-mail but the recipient said he cannot read some words. Why?
Some users may use the following method to prepare a Simplified Chinese e-mail.
- Use MS Word to type the e-mail in Traditional Chinese first.
- Then use the "Traditional to Simplified" feature to change the characters.
- Then copy the article to Outlook and send out.
In some cases, the recipients may received a mail with the following output.

The problem due to the Outlook settings. In Outlook, two settings (Mail format, Encoding) will affect the output. Here is a table for the two settings combination:
| Plain Text | HTML | RTF | |
|---|---|---|---|
| GB | OK | OK | OK |
| Big 5 | X | OK | X |
You can locate the settings from the menu bar of a new mail windows.
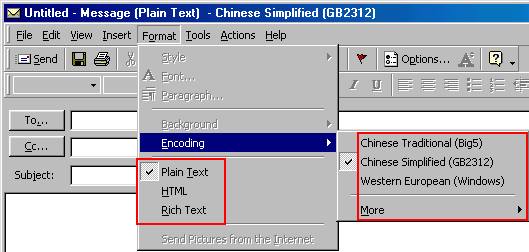
If you setup the settings correctly then the recipients will get the output like this:

I have deleted some mails already but my e-mail quota is still full. Why?
It may be due to the following reasons:
- The Deleted Items folder contains lots of messages or other items, which have been deleted some time ago and moved temporarily to this folder. In that case, delete all these items in the folder to free quota space.
- There are many items containing in the Journal folder. Check Question My mail quota is full and I cannot send any message. What can I do? for details on how to remove these items to allow more space for use.
- Some of your messages have attachment(s) of very large size like PowerPoint presentation file(s). Delete these messages if they are not needed or move them to a Personal Folder.
I have enabled the auto-reply function using Out of Office Assistant in Outlook but my colleague did not get a reply after he sent me a message. Why?
The auto-reply function in Outlook has some restrictions. The reasons that your colleague did not get a reply may be due to the followings:
- You have a preferred name in the Address Book. The sender will not get an auto-reply message if he sent mail using your preferred name.
- This is not the first time the sender sent you a message while you are out. The sender will only get that the first time he sent a message to you.
There is a get around (though a bit complicated) for the above in case you would like the sender gets a reply when he sends a message using either your full name or your preferred name and will get the reply every time a message is sent to you while you are out. Follow the steps:
- On the Tools menu, click Out of Office Assistant.
- Click I am currently Out of the Office.
- Then click the Add Rule button to open an Edit Rule dialog box.
- Under When a message arrives that meet the following conditions, type both your e-mail full name (e.g. Chan, Mei PO) and the preferred name (e.g. May Chan) in the Sent To text box. It makes the server send the reply to all the users sending message to you, no matter they use your full name or your preferred name in the To: field of the incoming message. Keep the From field empty if you want this rule apply to all senders.
- Under Perform these actions, select Reply with, and click Template button to open a Reply Template dialog box.
- Type the message and the subject of the reply message you want to reply to the senders in the box. Click the Save button and close the Reply Template dialog box.
- Click OK to leave the Edit Rule dialog box. Click Yes when the dialog box with warning written This rule will fire for all incoming messages. Is it what you want? appear. Then there will be a new rule appears in the These rules will be applied to incoming messages while you are out of the office box.
- Click OK to leave the Out of Office Assistant dialog box.
Note:
- Rules in the Out of Office Assistant dialog box are applied in the order they appear from top to bottom.
- If you have more than one condition in the Edit Rule dialog box, only messages that meet all of the conditions will get the reply message.
I receive a notification message every time when new e-mail arrives. Can I turn it off?
Yes. You may turn it off by the following steps:
In Outlook,
- From the ribbon bar, choose File -> Options.
- From the left panel, choose "Mail".
- Look for the "Message arrival" session
- Uncheck the box of "Display a Desktop Alert"
- Click OK to finish.
Manage email messages by using rules
A rule is an action that Microsoft Outlook performs automatically upon incoming or outgoing messages, based on conditions that you specified. You can create a rule from a template, from a message, or using your own conditions.
Using Outlook Web App
- Login Outlook Web App (external site, opens in new tab).
- Click the Gear icon , then click View All Outlook Settings
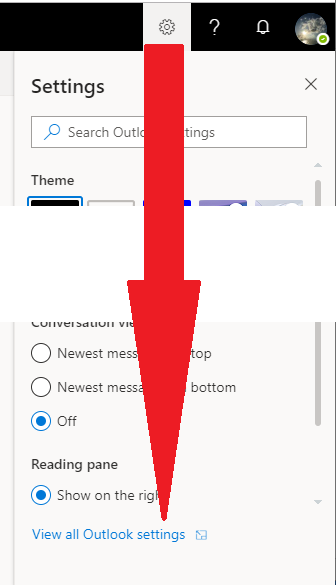
- From the Settings Window, choose Mail -> Rules
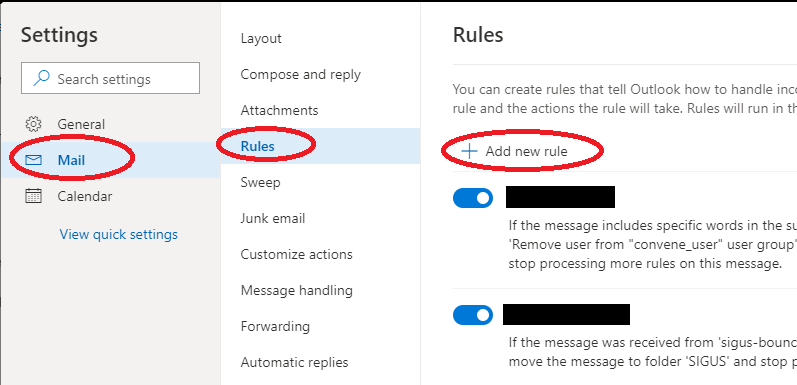
- Click + Add new rule icon
- On step 1, enter the name of this rule. (e.g. Move to Notices)
- On step 2, From the Add a condition field, choose "Subject includes"
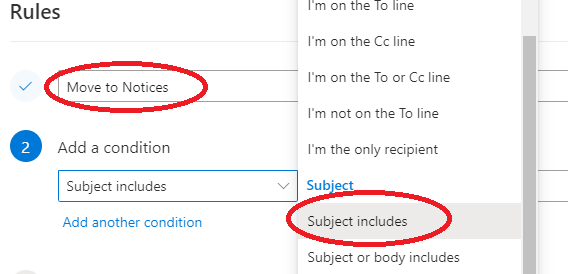
- For instance, if you want to filter all emails sent from departmental notice accounts, enter notice@eduhk.hk and click the "+" button to add.
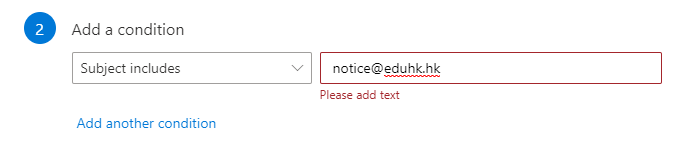
- On Step 3, from the Add a action field, choose "Move to"
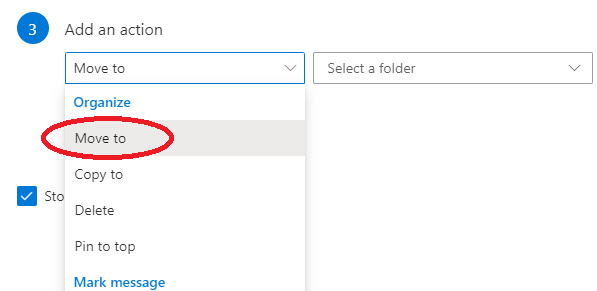
- Then select the folder you want to store the email messages and click "Save". (You may need to create a new folder if needed.)
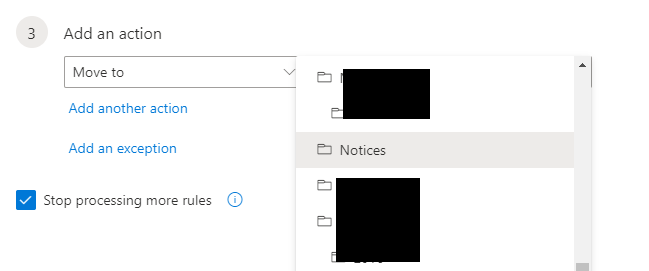
- Make sure the rule is turned on (button shown in blue colour). The rule is effective now. (If you want to turn off the rule, just un-tick it.)
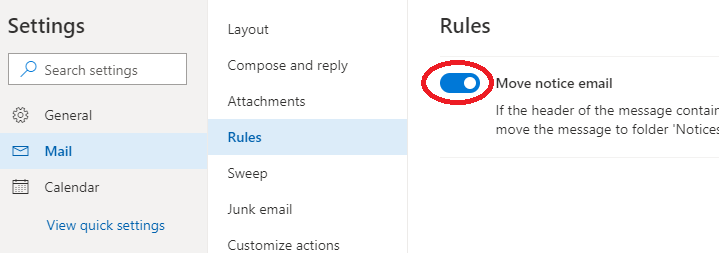
Using desktop Outlook (Outlook 2010/2013)
- Open Outlook.
- Click File -> Info -> Rules & Alerts ->.
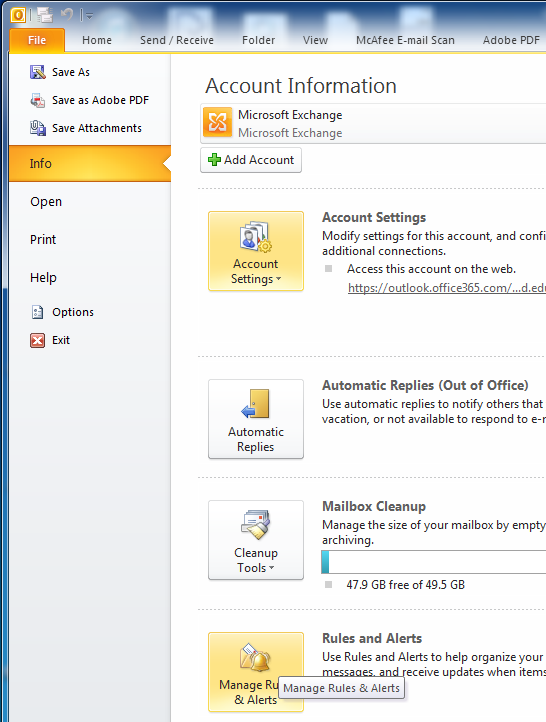
- Click the New rule...
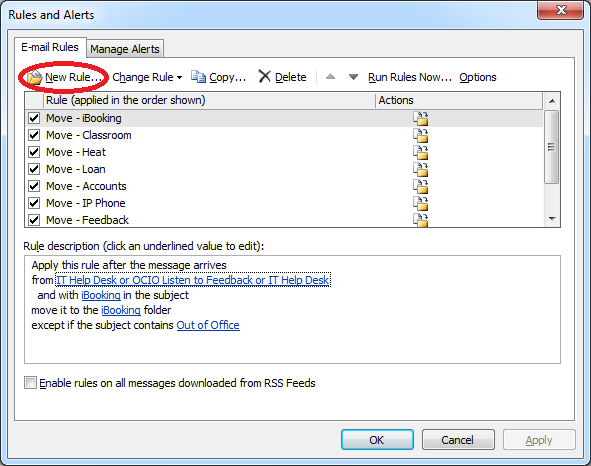
- Select Apply rule on messages I receive then press Next >.
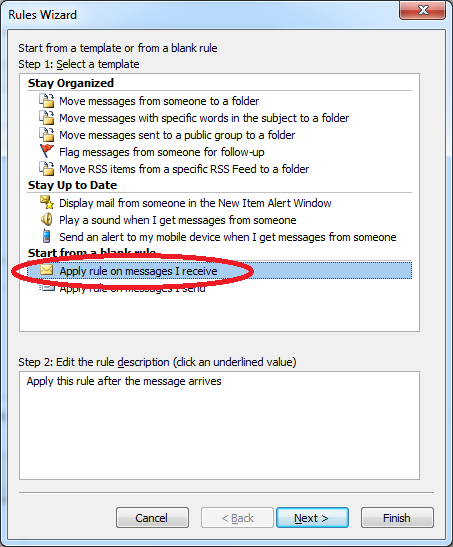
- Tick the option "with specific words in the message header" in step 1, then click on "specific words" in step 2.
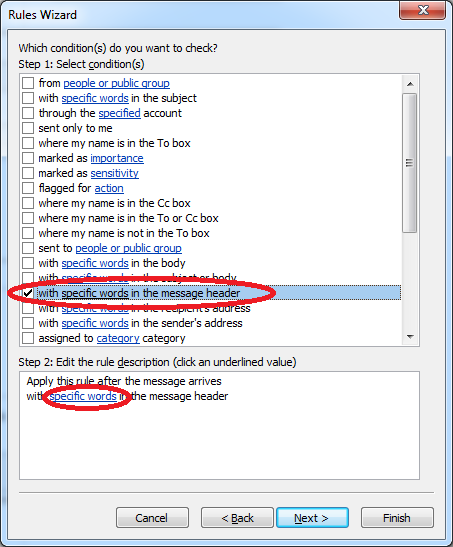
- For instance, if you want to filter all emails sent from departmental notice accounts, enter notice@eduhk.hk and click Add button to add in the list. Then Click "Ok" to complete the selection.
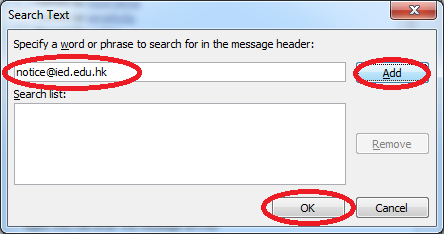
- Tick the option "move it to the specified folder" in step 1, then click on "specified" in step 2.
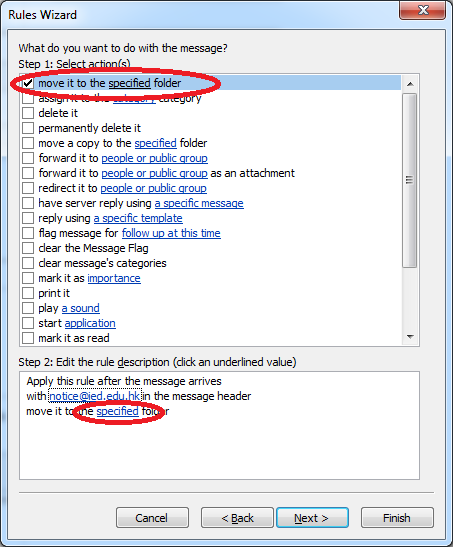
- Then select the folder you want to store the email messages and click "Ok". (You may create a new folder as needed.)
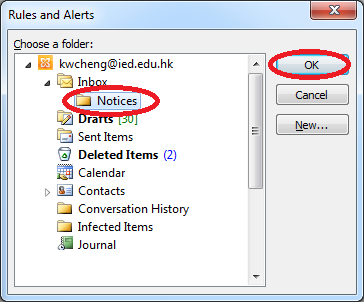
- For the exceptions, just click Next > to skip.
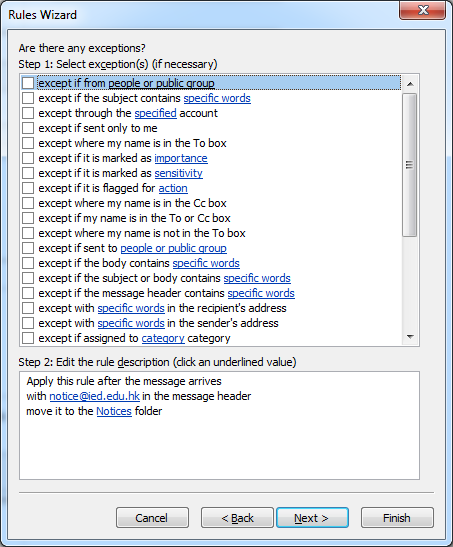
- Then enter a name for this rule. Make sure there is a tick for the Turn on this rule. Then click Finish.
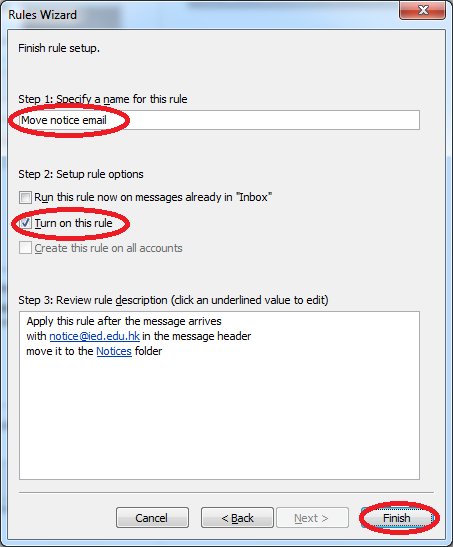
- The rule is effective now. (If you want to turn off the rule, just un-tick the rule.)
My mail quota is full and I cannot send any messages. What can I do?
You will not be able to send any messages when your mail quota is full but you can still receive emails. Try the following ways to solve your problem:
A. Delete messages in your mailbox
You are advised to delete some messages (e.g. in Inbox) in your mailbox. Please follow these steps:
- Click Inbox.
- Select the messages you want to delete.
- On the Edit menu, click Delete (or simply right click the selected messages and select Delete).
By doing the above, the 'deleted' items are only temporarily moved to the Deleted Items folder. Your mail quota will still be full if you do not delete these items permanently. To do that, follow these steps:
- Click Deleted Items.
- Select all (or some of) the items in the Deleted Items folder.
- On the Edit menu, click Delete and say Yes when prompted.
B. Delete items in Journal Folder
The function of Journal in MS Outlook is used to record the details of the MS Office applications that have been run, and by default, this function is enabled. That means, when Outlook is running and if you open a file by MS Word, the access time and the file name will be kept in the Journal folder. Since the record is saved as a shortcut, you can just double click the shortcut icon if you need to open the same document later on. However, these shortcuts will also occupy a large amount of quota space as time goes by, and it may due to that your quota is full. To free space, you may delete items in the Journal folder by:
- Choose Journal from the Go menu.
- Select the items you want to delete. Choose Delete from the Edit menu and say Yes when prompted.
- Delete these items from the Delete Items folder using the method mentioned in A.
You may also disable the default setting of the Journal function by:
- Select Options from the Tools menu.
- Click the Journal tab and uncheck the corresponding application check box in the Also record files from: window.
C. Move some messages to a Personal Folder
You may move some messages to a Personal Folder so as to free quota space. Check Question How do I back up my mail in Outlook? for details on how to create a Personal Folder, if you do not have one.
What is the maximum size of email I can send?
The maximum size of email you can send is 20MB.
When I open an email in Outlook, it prompts that the character set cannot be recognized. What can I do?
If Outlook prompts that it cannot recognize the character set of an email, and that there is an attachment called message.txt, you can try the following procedures to recover the email.
Procedures:
- Save the attachment message.txt to the hard disk and rename it to message.eml.
- Double-click message.eml to open it from the location where you save it (you will notice that the icon of the file has become an envelope). Note that the system will open message.eml automatically using "Windows Live Mail".
- Most of the time, you will be able to view the email properly now. Sometimes, however, you may find the message contains a lot of strange characters. In that case, try to change the encoding (View -> Encoding) to Chinese Simplified GB2312 or other encoding language.
Note: If you want to transfer the email from "Windows Live Mail" to the Outlook Inbox, click File -> Move to Folder from the menu. Then the email message will be transferred to your Outlook account. (In order to do so, you need to setup Outlook Express to receive your EdUHK email. For details, please refer to our online setup guide Using Windows Live Mail)
Why I cannot send or receive .EXE file in Outlook?
Any unsafe attachment like *.EXE is blocked by the mail server. Unsafe attachment even being compress/zip is blocked by the server.To send mail with this kind of attachment, the sender is suggested to rename the file extension (e.g. rename .exe to .bak). The recipients can save the file first and then change the file extension back to the original one. Blocked file extensions by our mail server includes:
- *.vbs
- *.doc.com
- *.doc.bat
- *.zip.com
- *.zip.pif
- *.zip.lnk
- *.exe
- *.com
- *.bat
- *.pif
- *.scr
- *.cmd
Why I cannot view the pictures within email using Outlook?
To protect your privacy, Outlook has disabled by default the automatically downloads and displays picture feature when you open an HTML email message.To enable the automatic download settings, please follow the steps below (Note: This will reduce the privacy protection provided by Outlook):
Procedures:
- From the ribbon bar, click File -> Options.
- From the left panel, choose Trust Center, and click the button Trust Center Settings...
- From the left panel, choose Automatic Download". Then uncheck the option Clear the Don't download pictures automatically in HTML e-mail messages or RSS items check box.
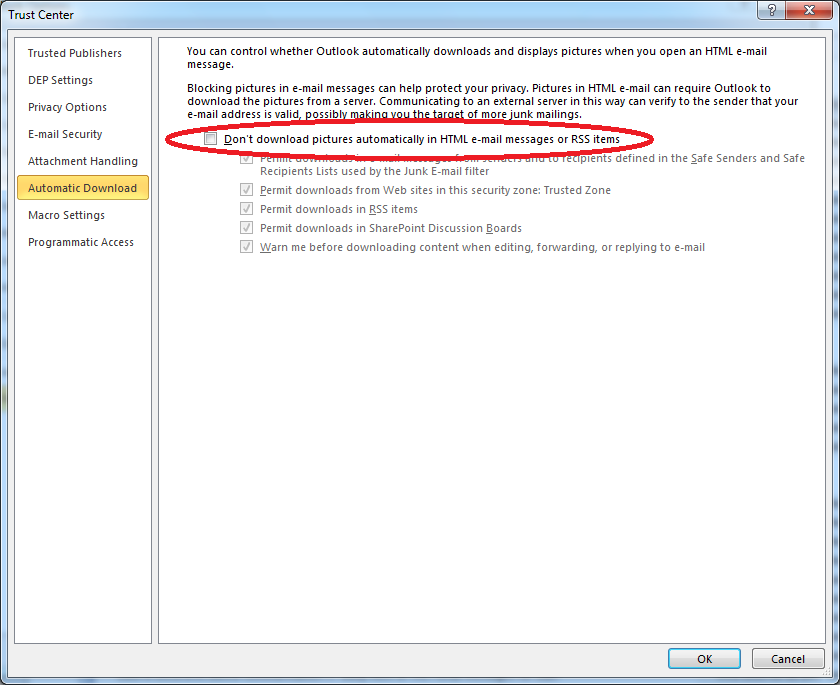
- Click OK
Why my name will automatically be included in the forwarded message when I try to modify the content?
In Outlook, there is a function called Include my name with remarks in a message which will make some text next to the remark of a message. The default text is your name. When you try to forward or reply a message and try to modify some of the original content, your name (or the text set by you as the comment) will appear in the forwarded or replied message. If you do not want that happen, you may disable it by following the steps:
Procedures:
- On the Tools menu, click Options.
- Click the Preferences tab, and then click E-Mail Options.
- In the When forwarding a message box, click the option you want.
Note: This Mark my comments with check box is available if user is NOT using word as e-mail editor. That means if user has selected the Use MS Word as the e-mail editor, the check box will be automatically dimmed. It is because Word will use revision marks to mark the user's annotations. In that case, your name (or the text set by you as the comment) will not be included in the forwarded or replied message.
[Staff Only] I will be leaving the University soon. Can I arrange to forward my EdUHK emails to my external email account after I have left?
Yes, you can setup email forwarding before your EdUHK email account expires, but please note that the email forwarding will be valid for 180 days after the expiry date of the account.
To do so, please follow the steps below:
For Outlook 2019/2016:
- In Outlook, choose File tab, and choose Info session
- Then click the Rules and Alerts button.
- Click New rule.. button.
- Choose Check messages when they arrive. Click Next to continue.
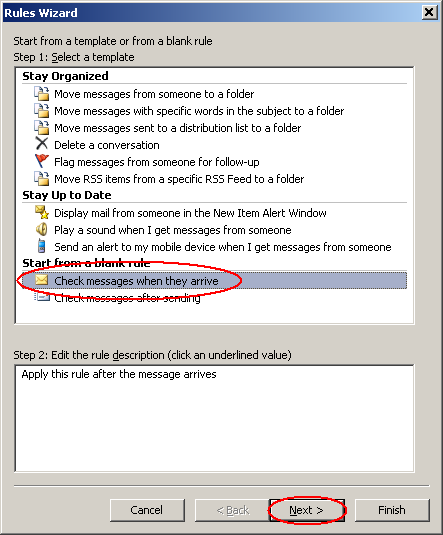
- Tick Where my name is in the To or Cc box
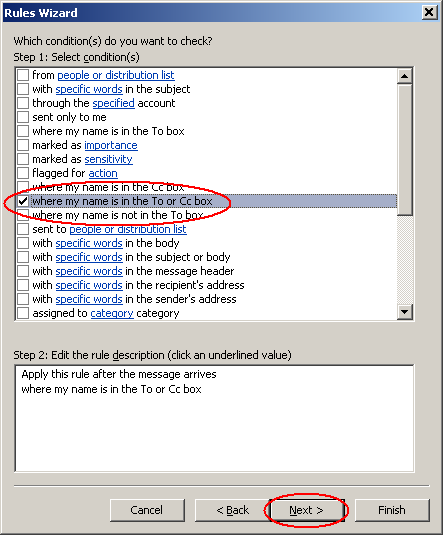
- Tick redirect it to people or distribution list
- Click on people or distribution list in the lower panel.
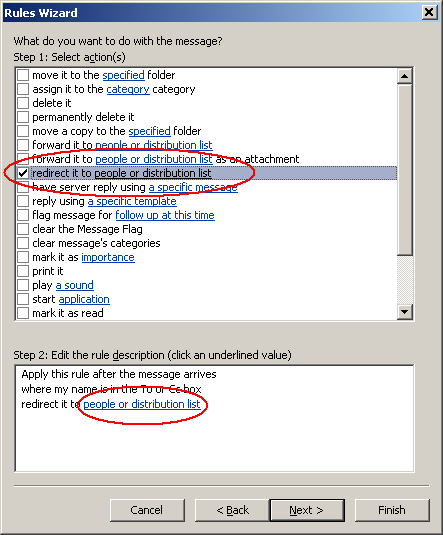
- Enter the email address for forwarding in the TO-> box.
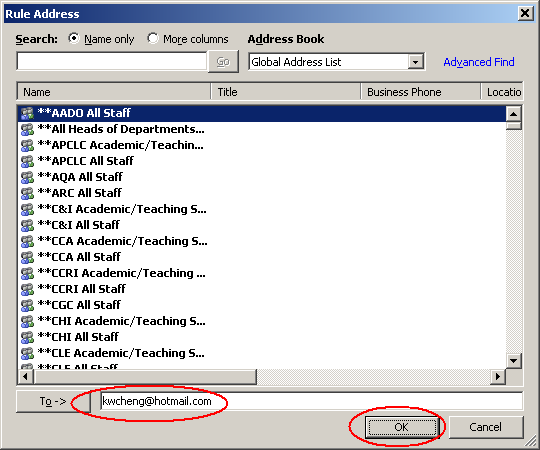
- Click OK in the Rule Address window to proceed.
- Click Next twice and then give a name for the rule (e.g., Email Forward to external account).
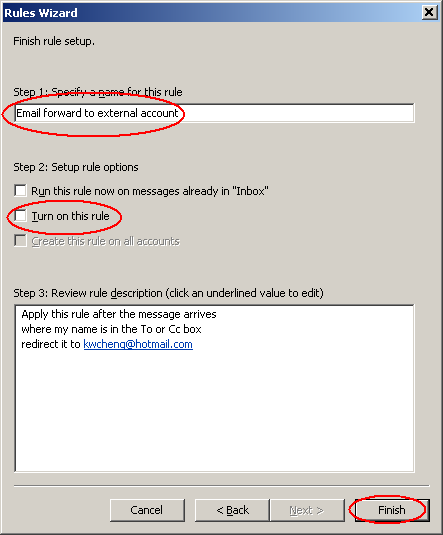
- Finally, click Finish to complete the setup of the new rule. DO NOT tick Turn on this rule check box at this point. We recommend user to turn on this rule on the last day of service.
Unix Services & Web Publishing
How can I get an UNIX account?
You can apply for an UNIX account through the Forms page from the OCIO web site.
How can I get started to create some simple web pages?
To create your web pages, please refer to Creating Personal Web Pages.
How can I read and send e-mails from UNIX?
Please note that there is no mailbox in UNIX. However, you can use PINE to read e-mails from the Exchange servers and send e-mails using smtp.eduhk.hk. To do that, please follow these steps:
- Open pine
- Login sun.eduhk.hk (for staff) or moon.eduhk.hk (for students).
- Run pine.
- Select SETUP -> Config.
- Change the inbox-path to {<outlook.office365.com>}INBOX,
e.g., {outlook.office365.com}INBOX. - Exit SETUP.
- Press Yes to save the setting.
- Next time when you run pine, you will be prompted to input your e-mail username and password.
Note: If you want to view all the folders in the PINE folder list option, you have to edit your .pinerc file manually. For details, please follow these steps:
- After login your Unix Account, you can edit your .pinerc file manually.
E.g., by using the pico editor, please type in: pico .pinerc - Use the down-arrow key to go down to folder-collections.
- Set the folder-collections to your Incoming IMAP Email Server.
E.g., folder-collections={outlook.office365.com}[] - Remember to save the setting before exit to UNIX.
Next time, when you run PINE, you can view all the folders in the folder list.
How to protect your web pages by Page Authentication?
Let's suppose you want to protect web pages in your UNIX directory called project to username UserA and password secret. To do that, you need to create 2 files (.htaccess and .htpasswd), and put them in your UNIX directory project.
- Create a text file called .htaccess in directory project that looks like this:
AuthUserFile /home/<login-name>/public_html/<DirectoryName>/.htpasswd
AuthGroupFile /dev/null
AuthName Page Authentication
AuthType Basic
require valid-userRemark: <login-name> = Your UNIX Username
<DirectoryName> = project - In project directory, create the password file .htpasswd using the following UNIX command:In order to do this, you need to use SSH client to connect the UNIX server.
htpasswd -c .htpasswd <UserName>
Remark: <UserName> = UserAThen, type in the password secret twice as instructed.
N.B. It is assumed that .htpasswd does not exist. If you have created one and want to add a second user to .htpasswd file, please try the following command:
htpasswd .htpasswd <UserName2>
Remark: <UserName2> = UserB
Then, type in another password secret2 twice as instructed.
- Now, try to access a web page in directory project -- your browser should demand a username and password, and not give you access to the file unless you enter UserA and secret or enter UserB and secret2 for the username and password respectively.
Note: If you are using a browser that doesn't handle authentication, you will not be able to access the document at all.
Remarks:
- Users should have the basic knowlege of UNIX operating system such as UNIX commands, file structure and security control for the above operations.
- Users can refer to the UNIX Command Quick Reference for basic UNIX command.
How to connect UNIX server using SSH Client:
You can use either following SSH client to connect to the server moon.eduhk.hk
PuTTY is available in all OCIO provided PC. You can invoke PuTTY via WinSCP by clicking Start -> Programs -> WinSCP. Connect to the server then click Commands -> Open in PuTTY from the menu bar.
How to publish my web pages to Intranet or Internet?
To publish your web pages, please refer to:
How to redirect a webpage to another URL?
To redirect a webpage to another URL, you can edit the "index.html" file with the following HTML code.
<html>
<head>
<meta http-equiv="refresh" content="0; url=http://www.example.com/" />
</head>
</html>
Note: Please replace the destination URL in red from the above example.
I am now working at home and want to install the software WinSCP for file transfer. Where can I found it?
If you are working at home and get connected to the Internet, you are recommended to obtain the freeware WinSCP from the official web site https://winscp.net/ (external site, opens in new tab) for your home PC.
I got the permission denied error when I tried to restore the local folders of Web documents to the Web using FTP. Why?
It may be due to the fact that the folder _vti_bin is included during the restore. Please note that _vti_bin is a special folder, which is generated by the system and is intentionally setup such that users should not touch. As such, you will get an error message when trying to update the content of this folder. To solve this, please exclude this folder during restore.
I have already got my UNIX account. But I don't have the password to login the UNIX. What is the password for my UNIX account?
Your UNIX account password is the same as your Network account password.
I have created some web pages. How can I publish them in the Internet?
To publish your web pages in the Internet, please do the following:
- You have to apply for an UNIX account on UNIX server to publish your own personal web pages.
- Once your UNIX account is ready, you can use SFTP software (e.g., WinSCP) to transfer your web pages to your UNIX Home Directory, which is used to store your web pages in UNIX and allows you to publish your web pages in Internet. For details of transferring your web pages to your UNIX Home Directory, please refer to Publishing Web Pages in EdUHK.
Note:
- Our Personal Web Server is home.eduhk.hk (EdUHK website, opens in new tab).
- The URL for your personal home page is http://home.eduhk.hk/~username.
- Path to store your web pages is /~username/public_html in sun.eduhk.hk (for staff) or moon.eduhk.hk (for students).
- You have a disk quota of 10M bytes for your UNIX account.
I have deleted some folders in the Personal Web Page Server with names starting with underscore _ and now I have problem with publishing. What should I do?
If you have accidentally deleted some folders in Personal Web Page Server with names starting with underscore "_", it will affects the web page to display content properly. Please contact OCIO to restore the account files from the backup.
I understand that we can publish web pages using Adobe Dreamweaver. But can I still use SFTP software for publishing?
Yes, you can use SFTP software for publishing. For more details, please refer to the FAQ - "I have created some web pages. How can I publish them in the Internet?" above but remember to connect to the appropriate server.
What are the procedures for setting up CGI program in my web page?
To set up CGI program in your web page, please follow these steps:
- Transfer your CGI program (e.g., <cgi-program-name>) into cgi-bin subdirectory under your UNIX account (i.e., /<login-name>/public_html/cgi-bin/ ). For example, you may use WinSCP to transfer your file into your UNIX account. For details of using WinSCP, please refer to Publishing Web Pages in EdUHK.
* Please note that your CGI program must be uploaded as ASCII mode via FTP. - Login your UNIX account (e.g., using SimpTerm) on
- sun.ied.edu.hk (for staff) or
- moon.ied.edu.hk (for students)
- Go into cgi-bin subdirectory by typing in: cd public_html/cgi-bin/
- It is assumed that the file <CGI-program-name> is already stored in cgi-bin sub-directory. After placing the cgi program in the cgi-bin sub-directory, you have to release the access file right to other people to access your program by typing in:
chmod u+x <CGI-program-name>
where <CGI-program-name> is the name of your cgi program. - To run your CGI program, you can use the following address in the URL field of your Web browser or an anchor in your HTML file:
http://home.ied.edu.hk/~<login-name>/cgi-bin/<CGI-program-name>
where <login-name> is the account name of your sun/moon account and the <CGI-program-name> is the name of your cgi program copied to the cgi-bin sub-directory. - The following is a sample cgi program called hello.cgi.
#!/bin/sh
# (or use #!/usr/local/bin/perl for Perl scripts)
echo Content-type: text/plain
echo
echo Hello, worldAfter you create a file called hello.cgi with the above content in the cgi-bin sub-directory, you can then run your file using the URL address as discussed above.
What is CGI?
CGI stands for Common Gateway Interface. It is a specification that allows an HTTP server such as the Apache Web Server to run programs for generating dynamic web pages instead of static web pages. CGI programs can turn your web page into an interactive one with its ability to process a user's input through forms. CGI programs are written either in the Perl or C programming languages.
What is Page Authentication?
The process of determining the identity and login validity of a user attempting to access specific web pages.
What is the disk quota of my UNIX account?
All users have a disk quota of 10M bytes.
What services are available for users in UNIX?
On the UNIX platform, you can:
- Publish Personal Web Pages
- Write CGI program
- Write applications using C, Shell scripts or Perl, etc.
- Read Internet news
What software is available in UNIX?
There is a list of software available in UNIX. For the UNIX software list, please refer to UNIX Software List.
Where can I find more information about Adobe Dreamweaver?
More information about Adobe Dreamweaver can be found at www.adobe.comdreamweaver (external site, opens in new tab).
Where can I find more references for creating web pages?
To find more references for creating web pages, please visit the following URLs:
Why are GIF/BMP images distorted when shown in web browser?
When embedding images, please avoid using width and height keywords. They will force the browser to scale the image and as a result the image will be distorted. Try to remove all the width and height html tag so that the image will be shown without scaling.
For Example:
Change from:
<img src=image.gif width=380 height=204>
To
<img src=image.gif>
Windows OS
How to activate MS Windows or MS Office at home?
If you borrow the Windows 10 Enterprise or Office 2016/2019 setup disc from OCIO, you need to activate the Windows system / Office for use within 180 days. If you do not activate the system within the activation period, it will be locked after a grace period of 30 days.
Windows 10 Activation procedures:
To activate Windows at home, you must make an SSL VPN connection to the campus network (Please visit SSL VPN Setup Procedure for details).
| Windows 10 (Based on version 1803) |
|---|
|
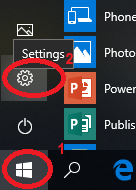


Note: You need to activate Windows or Office every 180 days. Otherwise the system will fall back to the trial mode and it will be locked after 30 days. To extend the activation period for another 180 days, you can simply make an SSL VPN connection to the campus network, and the activation period will be extended automatically. If Windows fails to activate automatically, you may need to do it manually. Please refer to Manually activate MS Windows with KMS license server for details.
Office 2016/2019 Activation procedures:
To activate the Office suite at home, you must make an SSL VPN connection to the campus network (Please visit SSL VPN Setup Procedure for details).
You can check the activation status by:
| Office 2019/2016 |
|---|
|

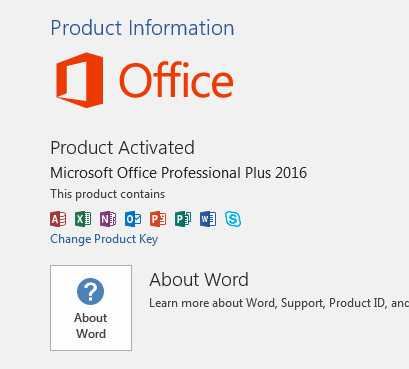
Note: Office versions earlier than 2013 are no longer supported. Please upgrade your MS Office suite to the latest version. For manual activation procedures, please visit Manually activate MS Office with KMS license server.
How to retrieve my Bitlocker recovery key on Microsoft 365 portal?
BitLocker is the Windows encryption technology that protects your data from unauthorized access by encrypting your drive and requiring one or more authentication factors before it will unlock it. BitLocker likely ensured that a recovery key was safely backed up prior to activating protection. There are several places where your recovery key may be, depending on the choice made when activating BitLocker. For details, please visit – Finding your Bitlocker recovery key in Windows. (external site, opens in new tab)
In case you forgot where you keep the Recovery Key, look for the recovery key in your Microsoft account is the most likely place to find it. Please follow the steps below for details.
- Press ESC to enter the Bitlocker Recovery mode on the locked device
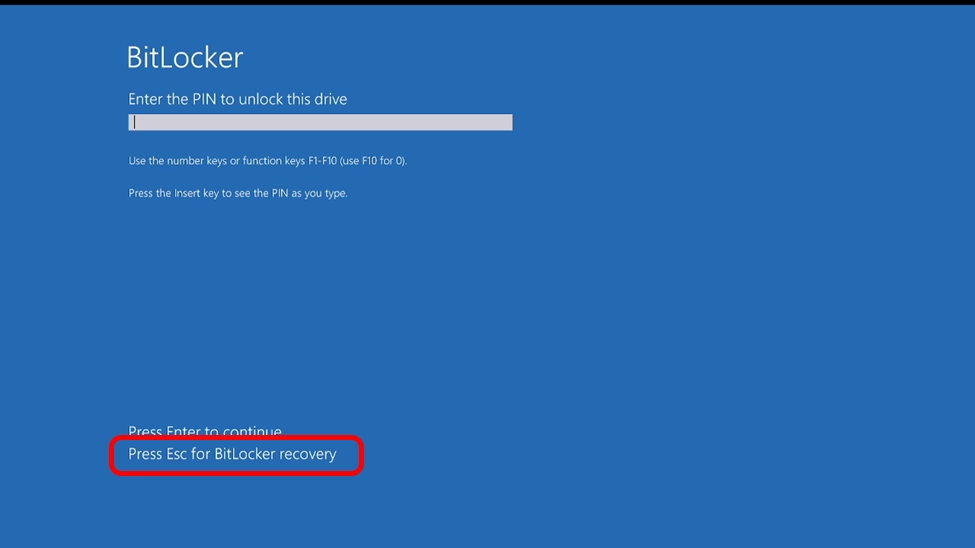
- Mark down the 32-characters Recovery Key ID
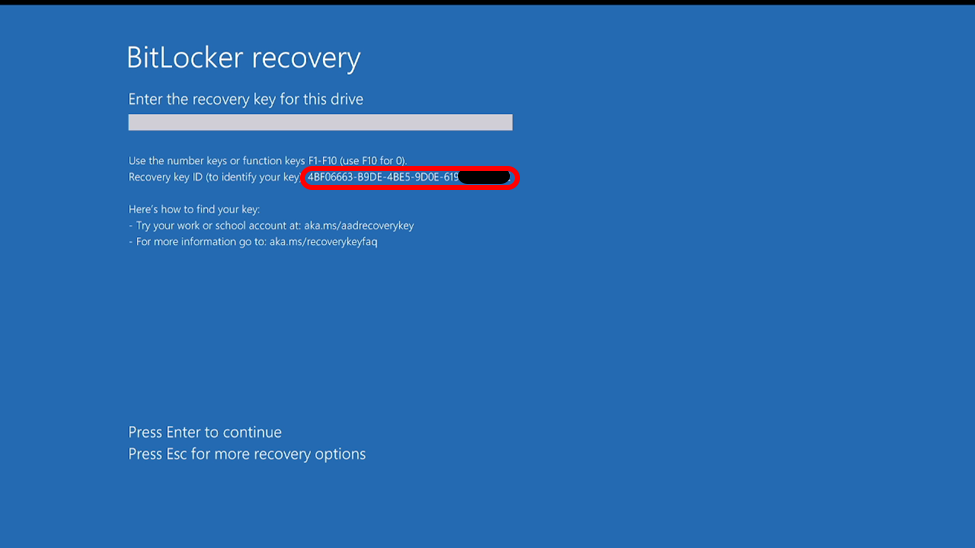
- Go to another PC and login to myaccount.microsoft.com/device-list (external site, opens in new tab), expand the active devices
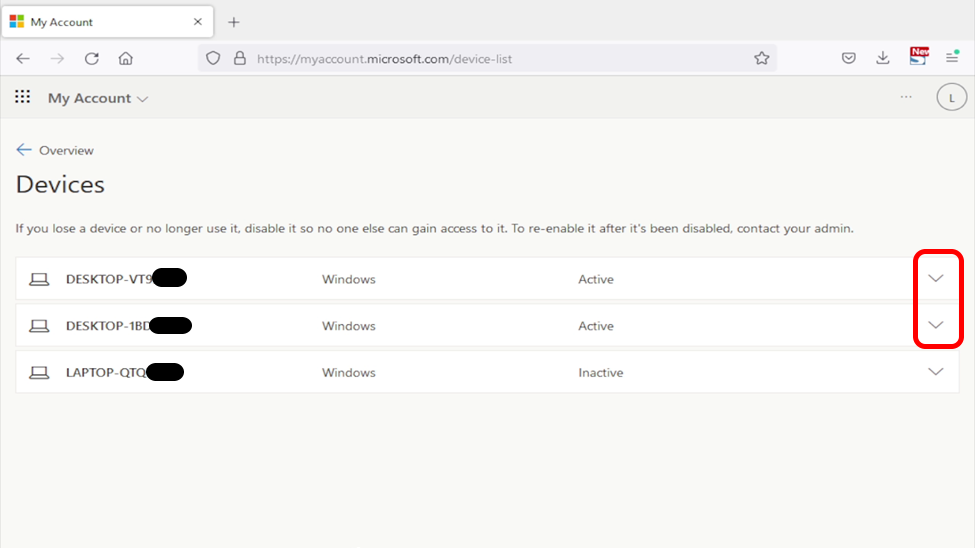
- Click View Bitlocker Keys
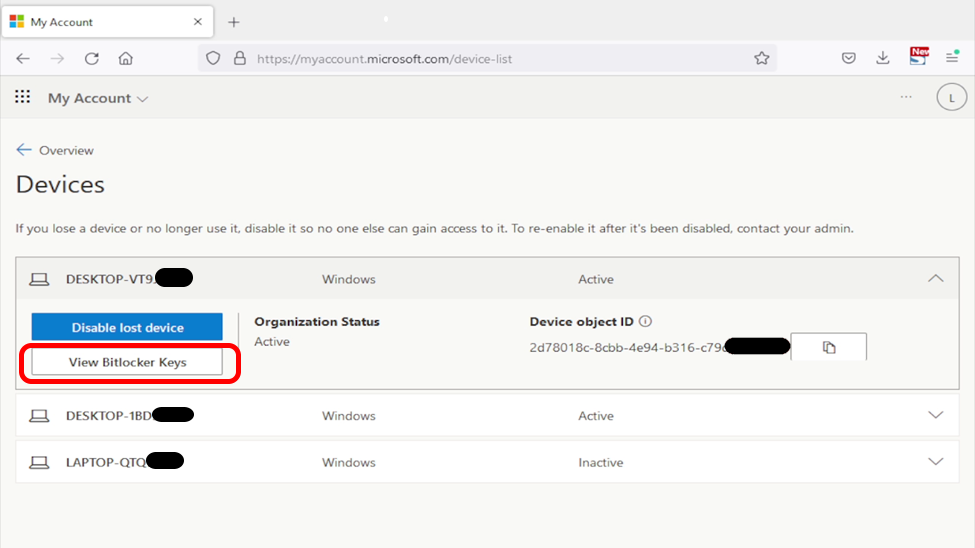
- Find the Key ID that matches the Recovery Key ID in Step 2 displays on the locked device
- Click Show recovery key
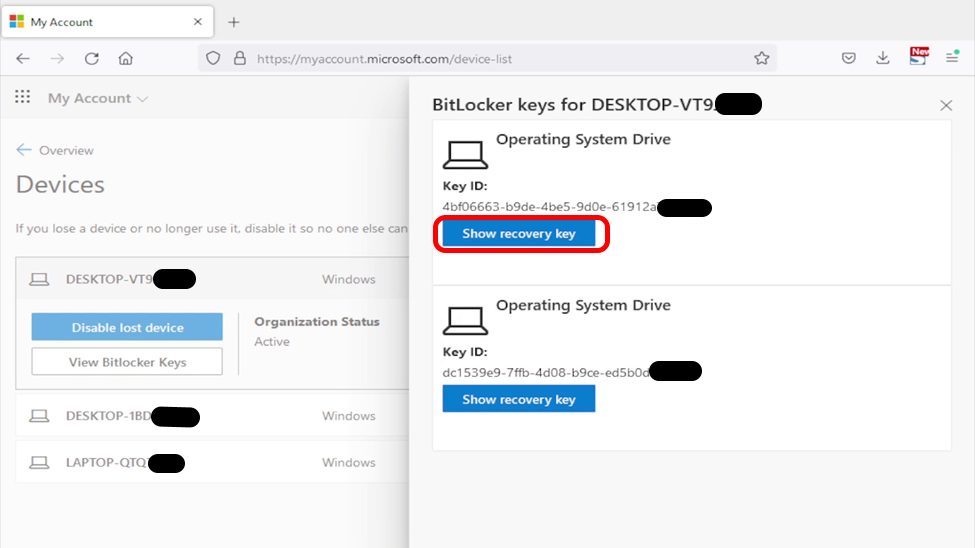
- Copy down the 48-digits Bitlocker Recovery Key
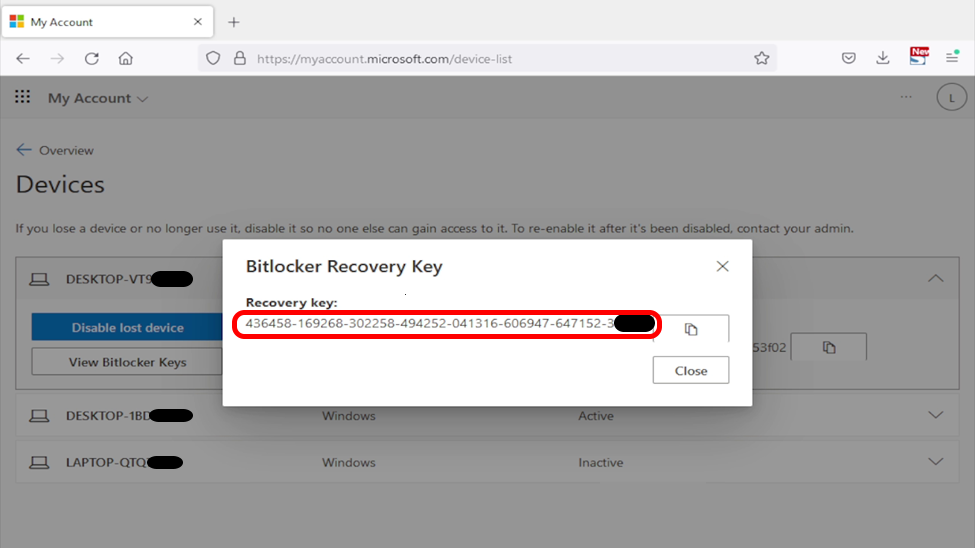
- Go back to the locked device, enter Bitlocker Recovery Key copied in Step 7 and press Enter
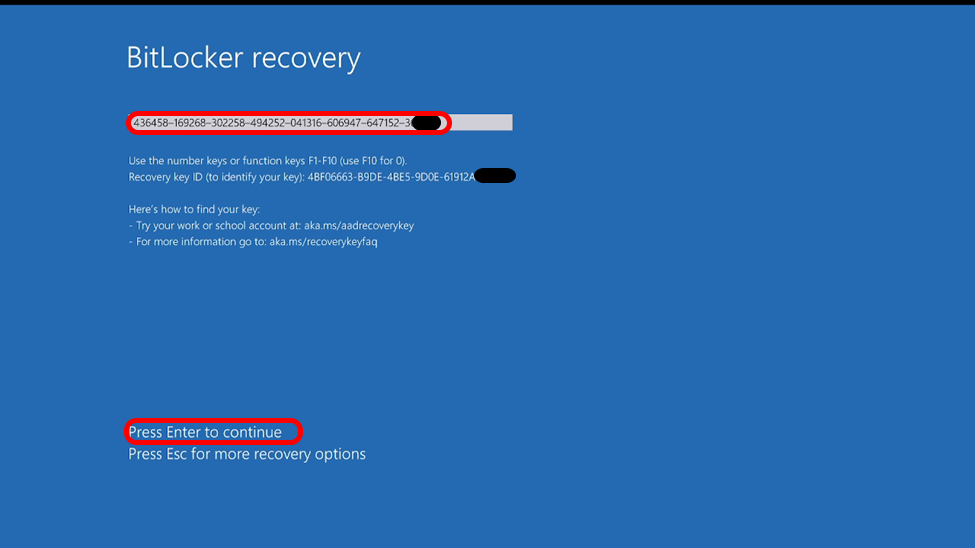
- Login your device with the original passowrd
I got error when activating Windows using media provided by University
If you encounter problem on activating your Windows or Office suite, it may due to various reasons. In most cases, there will be a error code generated. By using the code, you can check on the website from Microsoft to help you to identify the problem. Please visit 'How to troubleshoot Volume Activation error codes in Windows (external site, opens in new tab)' for details on specific error codes.
Manually activate MS Windows with KMS license server.
Normally, after you install MS Windows 11/10, its license will be activated automatically via our KMS license server. If you find that MS Windows cannot be activated automatically, please follow the steps below to activate it manually.
Procedures: (Screen capture based on Windows 11 - Build version 24H2)
- Connect to the campus network. If you are outside the campus network, please connect to the SSL VPN first.
- Launch "Command Prompt" by clicking the "Search" or "Windows" button on the taskbar and type "cmd". Then, right-click "Command Prompt" and choose "Run as administrator".
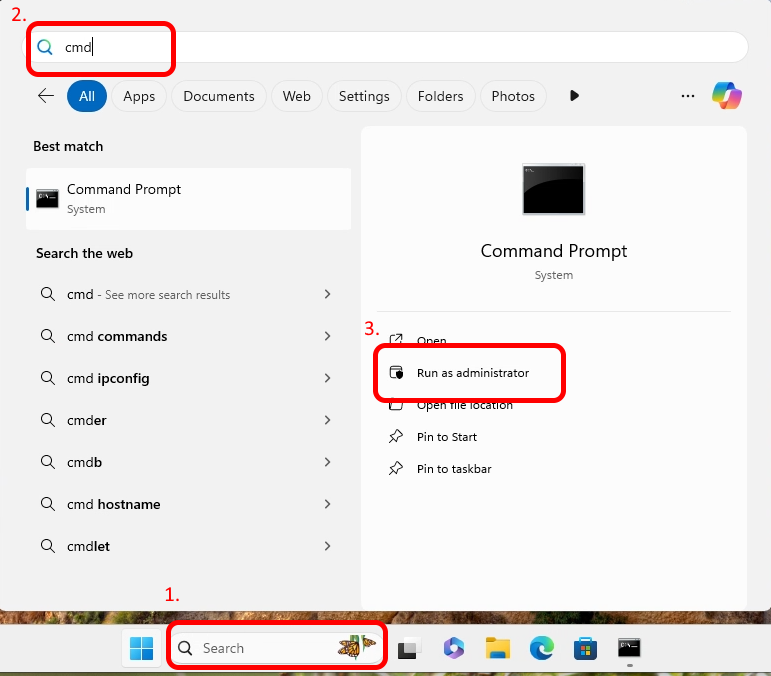
- Firstly, we need to tell Windows which KMS license server we are going to communicate with. Type "slmgr /skms kms.eduhk.hk" and the following message will pop up.
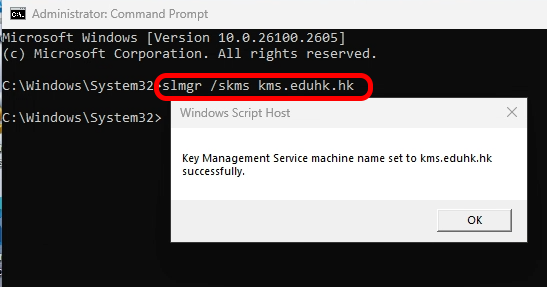
- Then, activate Windows by typing "slmgr /ato" and the following message will pop up.

You need to activate Windows every 180 days. Otherwise the system will fall back to the trial mode, and it will be locked after 30 days. To extend the activation period for another 180 days, you can simply make an SSL VPN connection to the campus network, and the activation period will be extended automatically. If you want to check when the license period expires, you can type "slmgr /xpr" and the expiry date will be shown in the pop-up message.
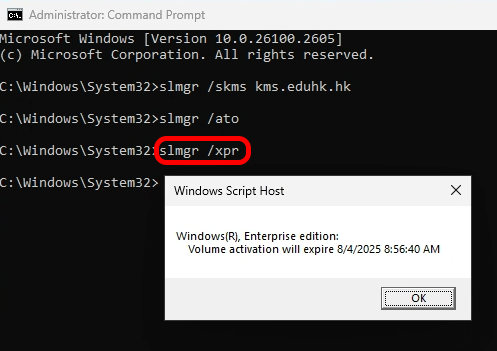
Wireless Network
How to select from various SSIDs and wireless connection methods at EdUHK?
While various SSIDs are available at EdUHK, staff and students are recommended to access the wireless network using EdUHK, Hostel or Quarters (marked with * below) for faster (5GHz) and encrypted connections. Users have to log in with their username and password once, and the device can usually reconnect with the same SSID automatically. Please avoid using Wi-Fi.HK via EdUHK, as data transmitted is not encrypted, bandwidth is limited, and users need to click to connect every time. The pros and cons of different SSIDs are tabulated as follows:
SSIDs for Academic/Administrative Buildings:
| User Type | Recommended wireless SSID | Encryption Technology | EdUHK Network Account Required? | Pros | Cons |
|---|---|---|---|---|---|
| Staff and Students | EdUHK * | WPA/WPA2 | Yes |
|
|
| EdUHK2.4G | WPA/WPA2 | Yes |
|
| |
| Visitors | Wi-Fi.HK via EdUHK | No | No |
|
|
SSIDs for Hostel/SSQ/OSQ:
User Type | Recommended wireless SSID | Encryption Technology | EdUHK Network Account Required? | Pros | Cons |
Students | Hostel * | WPA/WPA2 | Yes |
|
|
Hostel2.4G | WPA/WPA2 | Yes |
|
| |
Staff | Quarters * | WPA/WPA2 | Yes |
|
|
Quarters2.4G | WPA/WPA2 | Yes |
|
| |
Visitors | Wi-Fi.HK via EdUHK | No | No |
|
|
Please contact IT Help Desk if you have any problems getting connected.
Zoom
Can I create a Zoom meeting for EdUHK members only?
It is a default setting in Zoom that meetings you create can be joined by guests. If all participants of a meeting are EdUHK members, you can set up the meeting to allow only EdUHK members to join. This can be done in the advanced meeting option “Only authenticated users can join meetings".
How to enable Only authenticated users can join?
Using web portal:
- Log in on the Zoom Web Portal - eduhk.zoom.us (EdUHK system, opens in new tab).
- Click "Meeting" from the left panel.
- Click "Schedule a new Meeting".
- Under "Meeting Options", click "Only authenticated users can join" and select "EdUHK Domain"
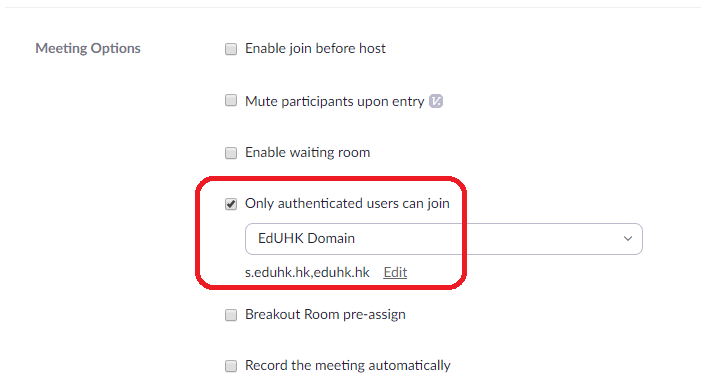
Using Zoom desktop client:
- Launch Zoom client app on your computer.
- Click "Schedule".
- Under "Meeting Options", click "Only authenticated users can join" and select "EdUHK Domain"
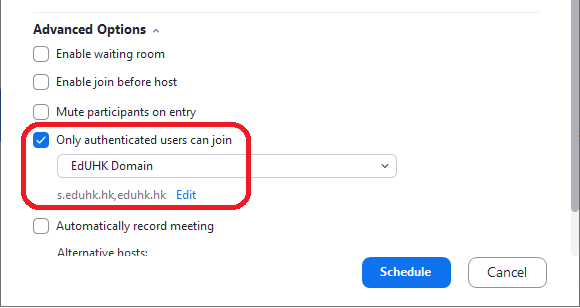
If a participant tries to join the meeting and does not sign in via SSO to the EdUHK domain, he/she will receive one of the following messages:
- If they are not logged into EdUHK domain (Guest):
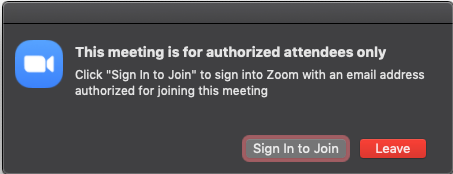
- If they are logged in with the non-EdUHK email domain (other Zoom account):
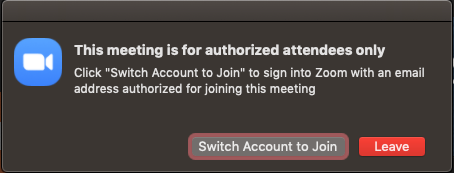
Can I join a Zoom class/meeting in Chinese Mainland?
User can join any Zoom class/meeting in Hong Kong, Oversea as well as Chinese Mainland via the invitation URL or with the Meeting ID.
For users in Chinese Mainland, when they join a Zoom class/meeting with the URL (e.g. https://eduhk.zoom.us/j/{meeting_id}), they will be re-directed to "https://eduhk.zoom.com.cn/j/{meeting_id}" automatically.
Note: If you have difficulties visiting eduhk.zoom.us (EdUHK system, opens in new tab) or eduhk.zoom.com.cn (external site, opens in new tab) in Chinese Mainland, please try the following:
- Visit https://zoom.com.cn (external site, opens in new tab)
- Select "JOIN A MEETING"
- Provide the MEETING ID and Password (if any)
(Note: Users in Chinese Mainland need to provide a phone number to verify their identity to join the meeting.)
Can I join multiple Zoom meeting on the same device Simultaneously?
There is an option called "Join different meetings simultaneously on desktop" which is disabled by default. The feature to join multiple meetings simultaneously from the Zoom desktop client allows users to participate in or monitor multiple meetings at the same time. This is ideal for support staff who may need to monitor multiple meetings at the same time.
Once the setting is enabled, you can join multiple meetings by clicking on the join URL or navigating to https://zoom.us/join and entering the meeting ID. The Join button in the Zoom client will only work for the first meeting that you join.
Please visit Join Multiple Meetings Simultaneously on Desktop (external site, opens in new tab)" on how to enable the feature and how to join multiple meetings.
Notes:
- The microphone and camera can work on ONE of the meetings. You have to disable both microphone and video on the current meeting then turn it on from another meeting.
- User cannot host multiple meetings at the same time.
Fail to join a Zoom meeting. Saying that this meeting ID is not valid.
If you encounter a problem to join a Zoom meeting with error saying that "This meeting ID is no valid. Please check and try again." as below. It is mostly due to an outdated or incompatible version of Zoom app you are using. Please update the Zoom app to the latest version and try to join the meeting again.
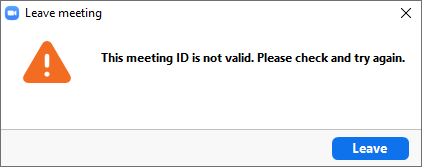
To download the latest Zoom app, please visit "Download Zoom desktop client or Zoom mobile app".
How can I Create/ Start a Zoom Online Lesson Through Moodle LMS?
The "Centre for Learning, Teaching and Technology (LTTC)" has prepare a guide for Academic/Teaching Staff to create/start a Zoom Online Lesson through Moodle Learning Management System (LMS). You can visit "www.lttc.eduhk.hk/e-learning-and-digital-competency/zoom-std/ (EdUHK website, opens in new tab)" for details.
How can I Join a Zoom Online Lesson Through Moodle LMS?
The "Centre for Learning, Teaching and Technology (LTTC)" has prepare a guide for Student to Join a Zoom Online Lesson Through Moodle Learning Management System (LMS). You can visit "www.lttc.eduhk.hk/e-learning-and-digital-competency/zoom-std/ (EdUHK website, opens in new tab)" for details.
How can I prevent unwanted person to join my Zoom meeting?
Normally, participants can join a Zoom meeting by just click on the invitation URL. If the meeting host would like to have control on it, there are number of ways to control who can join the Zoom meeting.
| Methods | How to enable and management? | Pros | Cons |
|---|---|---|---|
| Meeting Passcode - Set a password for your guests to enter. |
support.zoom.us/hc/en-us/articles/360033559832-Meeting-and-Webinar-Passwords- (external site, opens in new tab) | - Good increase in security. | - Requires you to distribute the passcode. - Passcode may be forwarded by someone. |
| Waiting room - Control when your guests are admitted to the meeting. |
support.zoom.us/hc/en-us/articles/115000332726-Waiting-Room (external site, opens in new tab) | - Good increase in security. - Best for smaller meetings. - Host can put anybody in waiting room again during meeting. - Customization on the Waiting Room Title/Logo/Description. |
- Host need to admit those guests. |
| Lock meeting - Don't allow other participants to join the meeting in progress. |
support.zoom.us/hc/en-us/articles/115005759423-Managing-participants-in-a-meeting#h_5d989601-de2b-459d-927e-816b000bb953 (external site, opens in new tab) | - Good increase in security | - Guest can't join the meeting when locked, they have to wait and try to join again when the meeting is unlocked. |
| Only Authenticated users can join - Allow only EdUHK members to join the meeting by logging in with Single-Sign-On (SSO). |
www.eduhk.hk/ocio/content/faq-can-i-create-zoom-meeting-eduhk-members-only | - Good increase in security - Best if all participants are EdUHK members |
- Guest can't join the meeting when option is enabled. |
How to check which account I have logged in on the Zoom client?
If you have multiple Zoom accounts, you may need to verify which account you have logged in before you start or join a meeting. Otherwise, you will join the meeting with the wrong Zoom account.
Procedures: (For Zoom desktop client):
- Launch the Zoom client.
- Click the profile icon on the upper right.
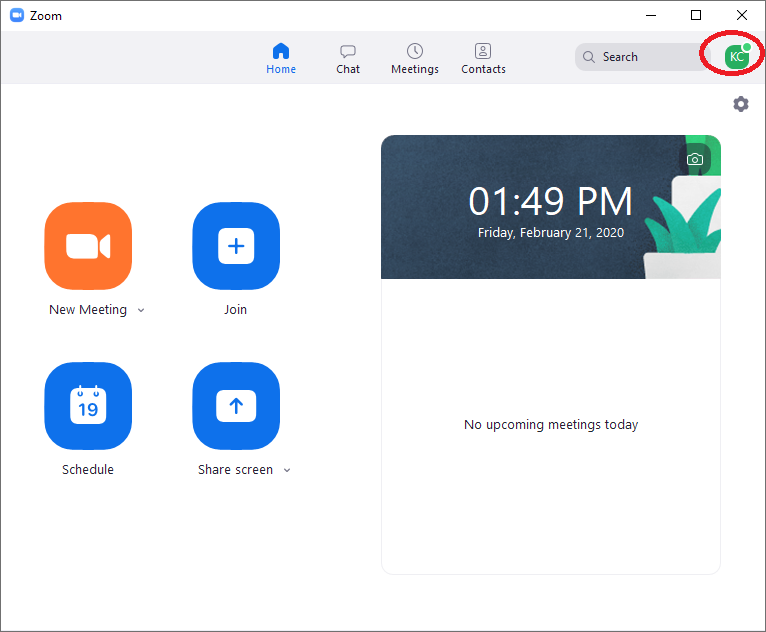
- You can check on the email address of the account you signed in. For EdUHK member, the email address domain will be @eduhk.hk (staff) and @s.eduhk.hk (students). And you can see the user type shown on the right is "Licensed".
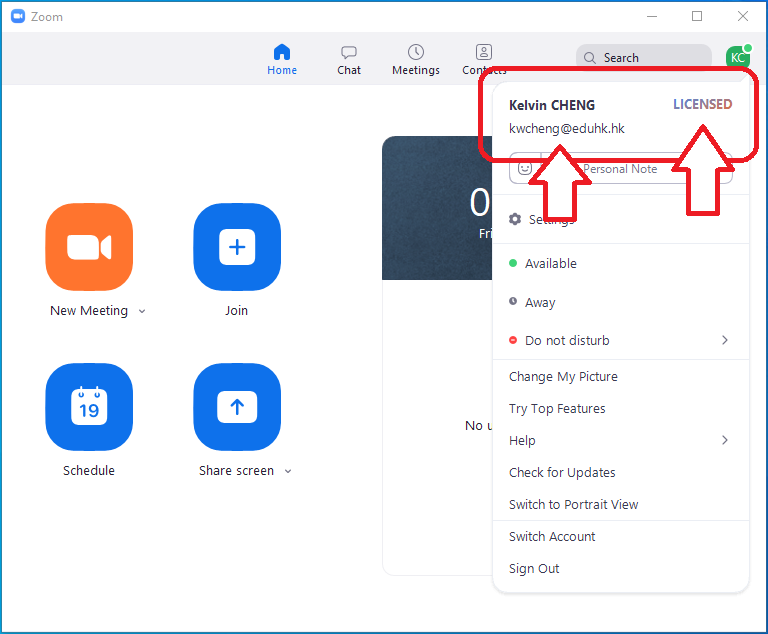
- If the current sign in account is not the one you like to start/join the meeting, click "Sign Out".
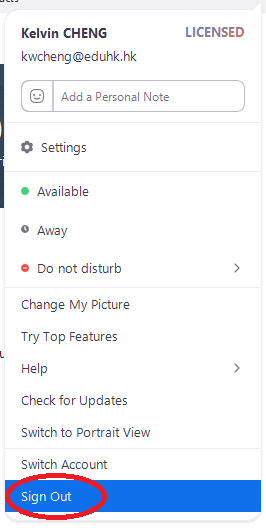
- Then you can sign in another account.
Procedures: (For Zoom mobile app):
- (screen captured on iOS)
- Launch the Zoom App.
- Tap "Settings" at the bottom.
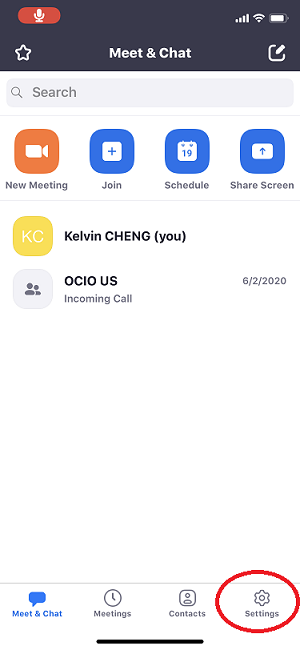
- You can check on the email address of the account you signed in. For EdUHK member, the email address domain will be @eduhk.hk (staff) and @s.eduhk.hk (students). And you can see the user type shown on the right is "Licensed".
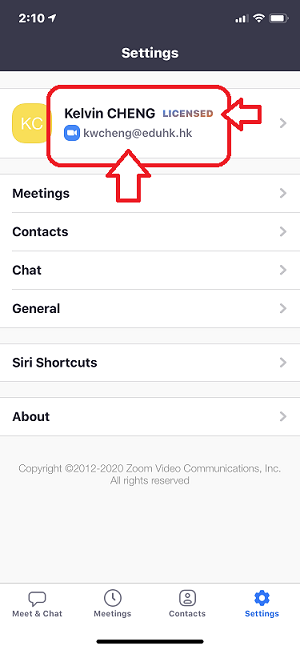
- If the current sign in account is not the one you like to start/join the meeting, tap the ">" on the right.
- Tap "Sign Out" at the bottom.
- Then you can sign in another account.
How to download the recording from ZOOM cloud?
For better use of University resources, all Zoom recordings created on the cloud from 1 Jan 2021 will be retained for 180 days only and they will be removed automatically afterwards. Cloud recordings created on or before 31 Dec 2020 will be kept until 1 Jul 2021. Users are recommended to back up the recordings and download them to their local drive if needed.
- Visit the Zoom portal at eduhk.zoom.us (EdUHK system, opens in new tab).
- Click the "Sign-In" and log in with your EdUHK account and password.
- On the left panel, click "Recordings" under the PERSONAL menu. This will bring up your Cloud Recordings screen, showing the list of your Meeting Sessions Recordings on your ZOOM Cloud.
- Locate and click on the Meeting session you are interested. The details of the meeting recordings will be displayed.
- Locate and click on the "Download" button to initiate the download of all the recordings.
How to enable Virtual Background for the Zoom meeting?
The virtual background feature allows you to display an image or video as your background during a Zoom Meeting. This feature works best with a green screen and uniform lighting, to allow Zoom to detect the difference between you and your background.
You can also upload your own images or videos as a virtual background. There are no size restrictions when adding your own virtual backgrounds, but we recommend cropping the image to match the aspect ratio of your camera before uploading it.
The Communication Office has prepared 4 Zoom virtual background templates for use. EdUHK members are welcome to use it. These 4 templates are preloaded into the Zoom app. If you cannot find it or accidentally delete it, you can download it at EdUHK Zoom Virtual Background Templates.
System Requirements
There are some prerequisites for using Virtual Background. Below is an abstract of the requirements. For details, please visit "Using Virtual Background in Zoom meeting (external site, opens in new tab)".
PC Requirements
- Image only without a physical green screen
- Zoom Desktop Client for PC, version 5.2.0 or higher
- Windows 10 (64-bit)
- Intel i3 - 4-cores or higher, gen 8 or higher (Note: Starting with Zoom windows client 5.4.0 (external site, opens in new tab), Virtual Backgrounds are now supported for i3 5th-gen and above, i5/i7/i9 3rd-gen and above, all including Y-series. These CPUs will support Virtual Backgrounds at 15fps and 360p.)
- AMD Ryzen 5/7/9 or higher
- Note: Due to compatibility issues, devices with an Intel HD 620 graphics processor must use a physical green screen.
- Image only with a physical green screen
- Zoom Desktop Client for PC, version 3.5.53922.0613 or higher
- Intel Dual Core 2Ghz or higher (i5/i7 or AMD equivalent) processor
- AMD Ryzen 5/7/9 or higher
Mac Requirements
- Image only without a physical green screen
- Zoom Desktop Client for Mac, 4.6.0 (13614.1202) or higher
- 4th generation i7 quad-core or higher processor
- 6th generation i5 dual-core or higher processor
- Note: 6th generation i5 dual-core processor, requires MacOS 10.14 or higher
- Image only with a physical green screen
- Zoom Desktop Client for Mac, version 3.5.53922.0613 or higher
- Dual Core 2Ghz or Higher (i5/i7 or AMD equivalent) processor
iOS requirements
- Zoom Mobile App for iOS, version 4.1.27541.0627 or higher
- iPhone 8, 8+, or X or higher
- iPad Pro and the 5th and 6th generation iPad 9.7 or higher
Android requirements
- NOT supported.
Enabling Virtual Background During a Meeting
- For Zoom client (Windows or Mac):
- In a Zoom meeting click the ^ arrow next to Start/Stop Video.
- Click "Choose a virtual background..."
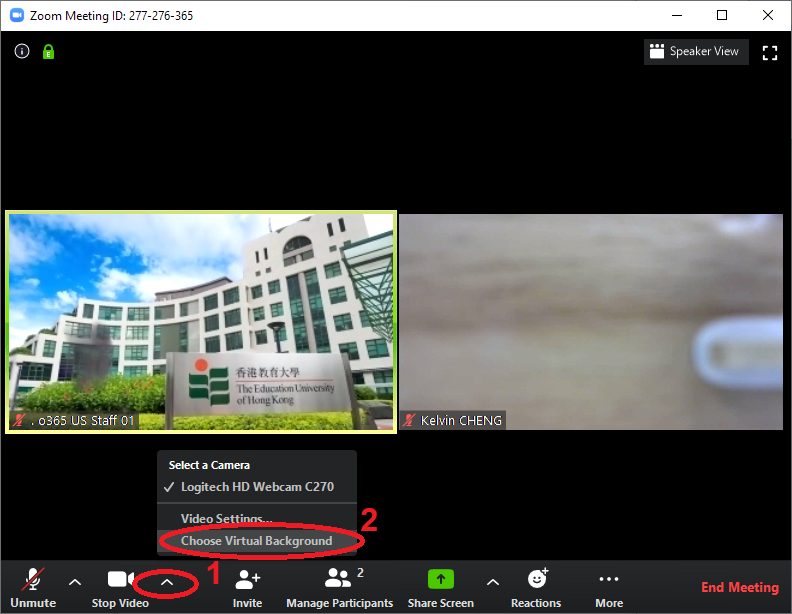
- If prompted, click "Download" to download the package for virtual background without a green screen.
- Select the picture you want. You can click the + button to add your own picture. The background will be automatically applied. Then click the "x" to return to the meeting.
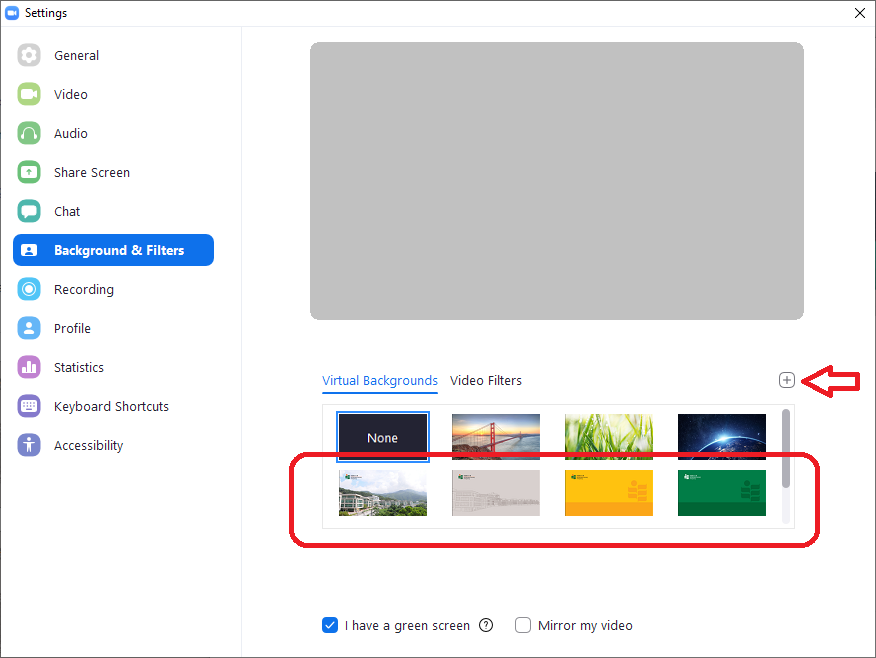
- For Zoom mobile app (iOS only, Android is no available yet):
- Sign in to the Zoom mobile app.
- While in a Zoom meeting, tap More in the controls. Then tap Virtual Background.
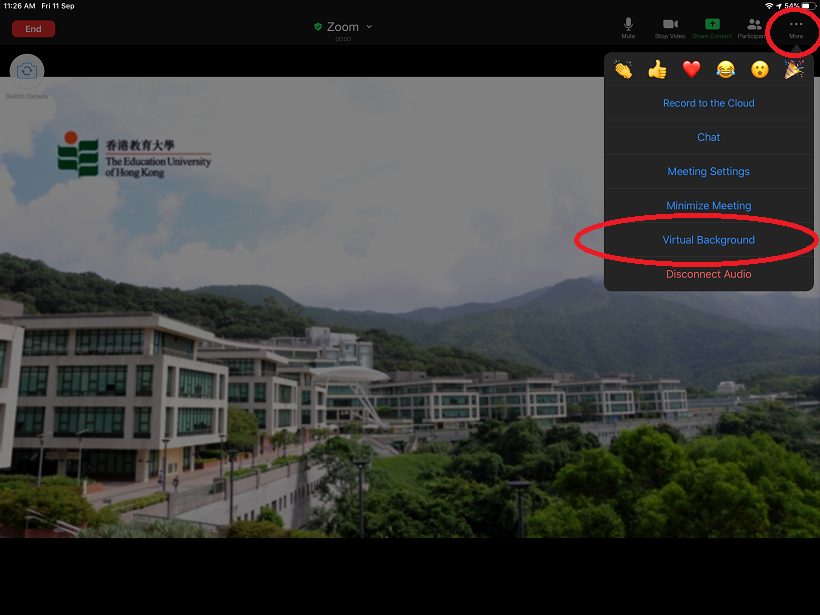
- Tap the background you would like to apply or tap + to upload a new image. The background will be automatically applied.
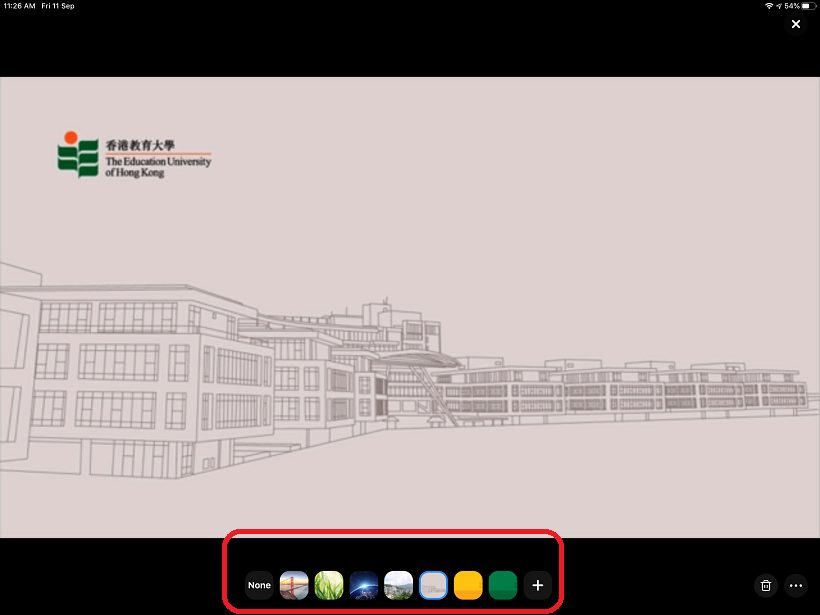
- Tap Close after selecting the background to return to the meeting.
- To disable Virtual Background, open the virtual background options again and choose the option None.
Recommendation on using Virtual Background
- To achieve the best virtual background effect, Zoom recommends using a solid color background, preferably green. Recommended green screens from Webaround or Amazon.
- Higher quality cameras result in a better virtual background. See camera recommendations for details.
- Use uniform lighting and color.
- Do not wear clothing that is the same color as the virtual background.
- A background image with an aspect ratio of 16:9 and minimum resolution of 1280 by 720 pixels. Sources for royalty-free images: Pexels, Unsplash, Pixabay.
- A video (MP4 or MOV file) with a minimum resolution of 480 by 360 pixels (360p) and a maximum resolution of 1920 by 1080 pixels (1080p).
How to retrieve the attendance list for a Zoom meeting?
As Zoom can support up to 300 users in a single session, the hosts may want to know who have joined the session and how long they stayed in the session and what time they leave the session. To this end, Zoom offers usage reports 30 minutes after a session is concluded.
To retrieve attendance list
- Visit eduhk.zoom.us (EdUHK system, opens in new tab) and sign in with your EdUHK network account.
- On the Zoom portal, click Reports on the left panel and click Usage.
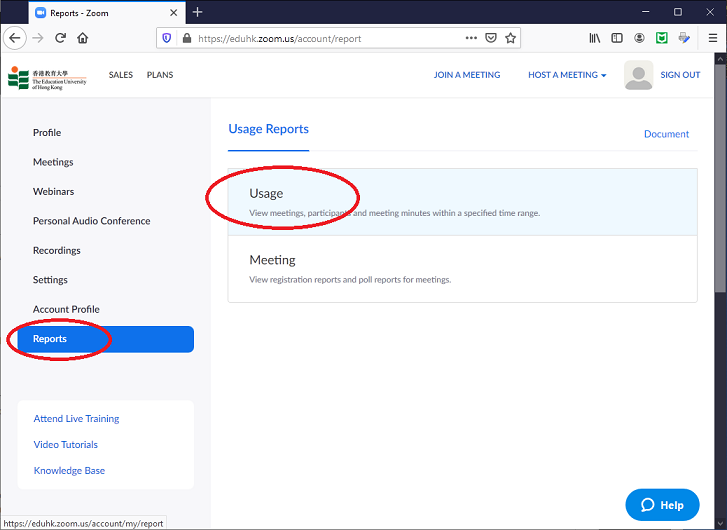
- Choose the time range and click Search and it will bring up a list of past meetings.
- From the meeting you look for, click on the number of participants.

- A pop-up screen with the list and details of participants will be shown. If you need to have a unique name list, tick the option "Show unique users"
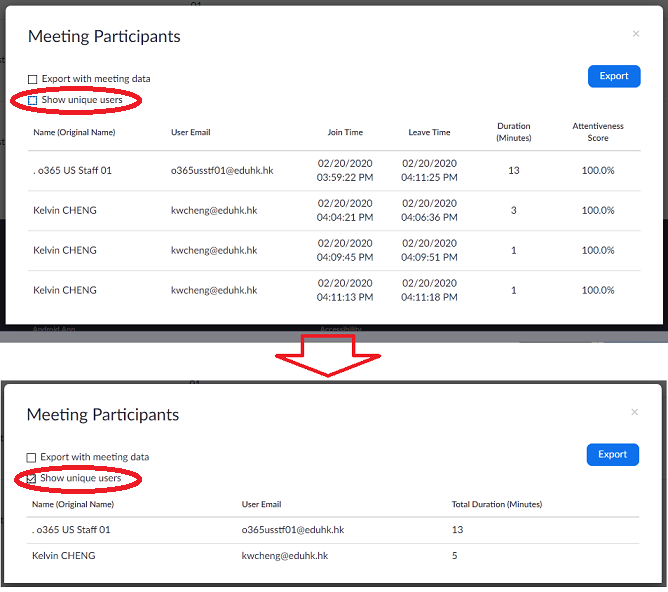
- You can generate an CSV file of the list by clicking the Export button.
Allow only authenticated users to join
Since participants can enter the name they wish to use, it might be difficult for the host to authenticate the participants’ identity. Hosts could choose to schedule a meeting with the “Only authenticated users can join” option on and all participants will need to log in Zoom with their EdUHK network account and password. Participants’ full name and email address will then be displayed in the list of meeting participants.
Note: Zoom Reports can be retrieved for the last 12 months, with a search range of up to one month at a time. If a meeting is not started in 30 days and is batch deleted by Zoom, the reports for the meeting are also deleted. For details, please visit "Getting started with reports (external site, opens in new tab)".
How to transfer file in the Zoom chat room?
In-Meeting file transfer allows you to send files to other meeting participants during the meeting through the in-meeting chat. This feature is enabled by default. If you fail to access this feature, please refer to "Enabling In-Meeting File Transfer (external site, opens in new tab)". There is no limit on the file type, if you want to limit the type of file to transfer, please visit "Limiting Shareable File Types (external site, opens in new tab)".
Using In-Meeting File Transfer
Please note that the file transfer feature only available for Windows and Mac client at this moment. Please refer to Zoom on the system prerequisites (external site, opens in new tab).
- During a Zoom meeting click on Chat.
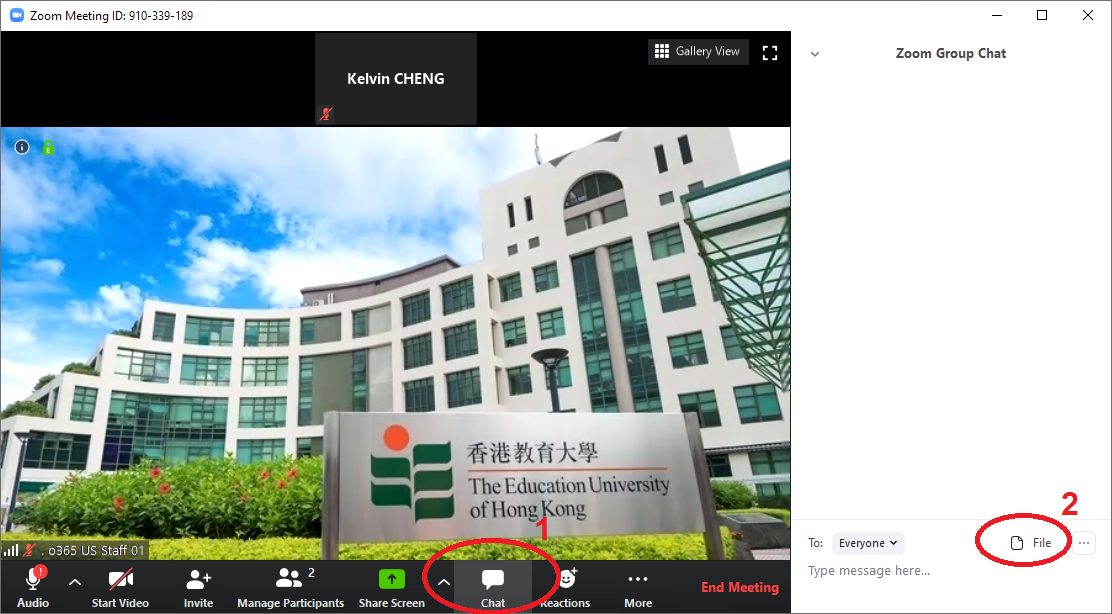
- Then click the "File" button from the lower part of the chat Window to send a file.
- Select the file when prompt.
- The following indication will be seen once the file is successfully sent.
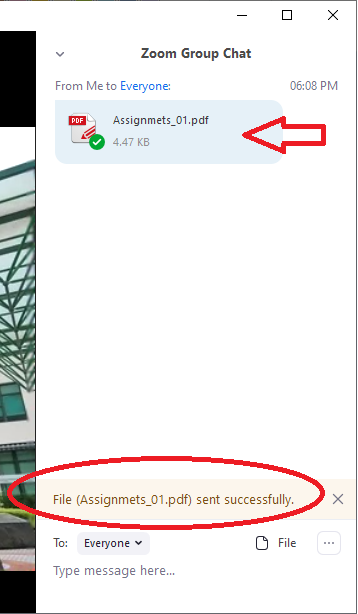
- The participants will see a notice when a file is sent and will be given the option to download the file. Once Download is selected, they will be able to view the file.
I have removed participants during a Zoom meeting, they won't be able to rejoin the meeting.
By default, if you remove participants or panelists from the webinar, they won't be able to rejoin using the same email address. Follow these steps to allow them to rejoin.
To enable allowing removed participants to rejoin meetings for your own use:
- Sign in to the Zoom web portal eduhk.zoom.us (EdUHK system, opens in new tab).
- Click Settings
- Navigate to the Meeting tab > In-Meeting (Basic) options and switch on the Allow removed participants to rejoin toggle.
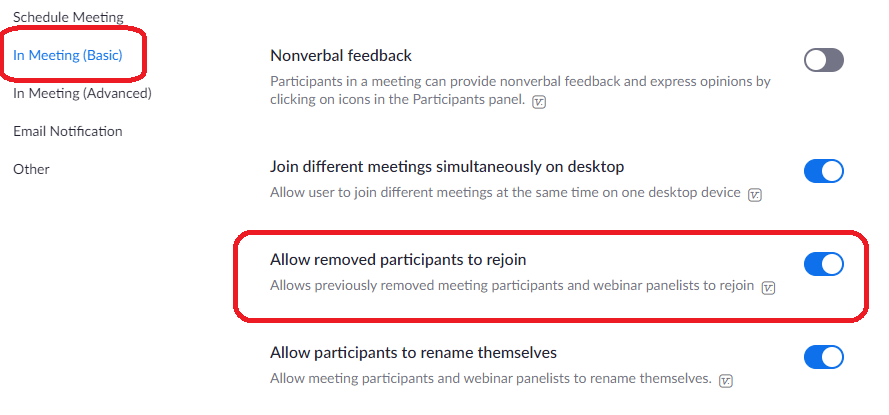
Note: Current meeting in progress will not affected by toggling on/off. You have to end the current meeting and start the meeting again.
For details, please visit Allowing Removed Participants or Panelists to Rejoin (external site, opens in new tab)
Selecting data center regions for hosted Zoom meetings and webinars
Starting from 18 April 2020, Zoom users can customize which data center regions they use for the real-time traffic for meetings and webinars they host. You can opt in or out of each specific data center region. Your default region, that is the United States, is the region where your account was provisioned and is locked from opting.
To customize data center routing, you should:
- Sign in to the Zoom web portal eduhk.zoom.us (EdUHK system, opens in new tab).
- From the left navigation panel, click Profile.
- Under Others, look for the option "Transit Data" and verify it is enabled.
- Check the regions that you would like your in-meeting and in-webinar data to route through. Then click Save.
The image illustrates how to select data center regions
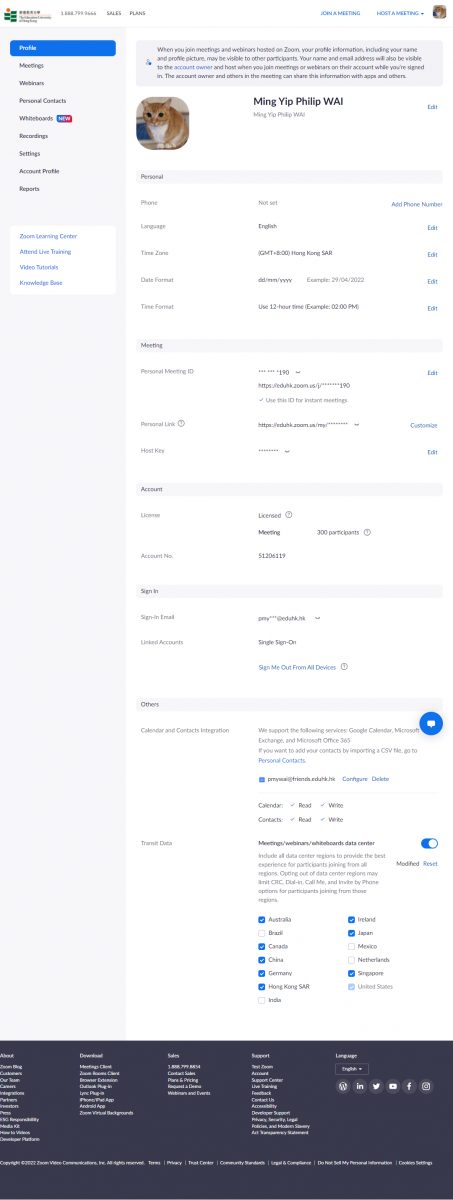
For details, please visit support.zoom.us/hc/en-us/articles/360042411451-Selecting-data-center-regions-for-hosted-meetings-and-webinars (external site, opens in new tab).
The SSO login keeps saying that my User ID/Password is incorrect.
For systems or services (e.g. Zoom, Qualtrics) using Single-Sing-On (SSO) for authentication, you have to use the EdUHK network account name (e.g. "tmchan" for staff or "s1234567" for student) rather than the full email address.
If you use the email address to login SSO, you will got the error message "User ID/Password is incorrect".
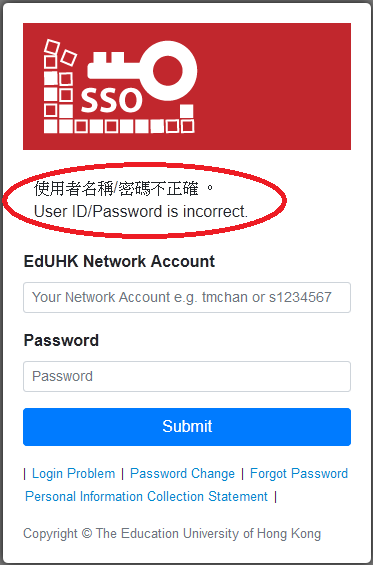
Account disabled due to intruder detection
If you enter a wrong password more than 8 times within 2 minutes via SSO, your account will be disabled due to intruder detection. Your account will be freeze-ed for 2 minutes.
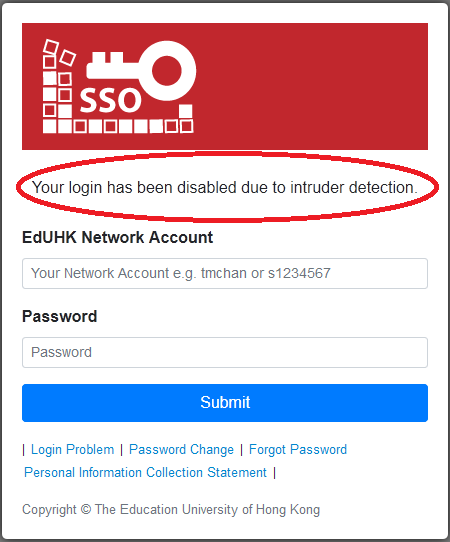
Why I cannot join a Breakout rooms session during a Zoom meeting, I keep stay in the main room?
There is a feature called "Breakout Rooms" in Zoom meeting to allow the host to to split the Zoom meeting in up to 50 separate sessions. The meeting host can choose to split the participants of the meeting into these separate sessions automatically or manually, and can switch between sessions at any time.
Users joined into the Zoom meeting from the Zoom Desktop Client, Zoom Mobile App, or H.323/SIP devices can participate in breakout rooms. Please note that, users joined via the web client and Zoom Rooms are unable to join Breakout Rooms, but the main room can be used as an alternative session for these users.
Install Zoom for joining Breakout room
Participants who need to join the breakout room session must have the Zoom installed. Please download the desktop client or mobile app according to your device.
For desktop computer: (Windows and Mac)
- Please visit zoom.usdownload (external site, opens in new tab)
For mobile device:
Will my Zoom meeting timeout?
All current EdUHK member accounts (Staff and Students) will been granted with the "Licensed" account type when they login via Single-Sign-On (SSO) to Zoom (eduhk.zoom.us (EdUHK system, opens in new tab)) on the first time. There is no time limit for hosting online class or meeting.
For details, please visit Understanding time limits for Zoom Meetings (external site, opens in new tab).
